How to Test Samsung Ice Maker: Step-by-Step Troubleshooting
If your Samsung fridge isn’t making ice, you don’t need to guess—you can narrow the cause by testing the ice maker’s core functions in order. This is the fastest way to learn whether the problem is water, freezing/frost, airflow, or the control system. Knowing how to test samsung ice maker behavior (and what “normal” looks like) helps you avoid unnecessary parts swapping.
For more help, see our Samsung Ice Maker Not Working: Diagnose and Fix No-Ice Problems guide.
Before You Start: What a Normal Ice Maker Should Do
Check water supply, temperature, and freezer settings
Start with the conditions that must be correct before any ice maker test is meaningful.
- Verify water supply is on (open the household shutoff valve feeding the fridge).
- Confirm the freezer is cold enough: set it to 0°F (-18°C) or colder.
- Check the fridge’s ice setting: ensure Ice Maker/Crushed Ice/Cube is enabled.
- Make sure the refrigerator isn’t in a demo/holiday mode that disables cooling cycles.
- Allow the unit to stabilize if you recently adjusted settings—temperature affects the fill and harvest timing.
If the freezer isn’t cold and stable, the ice maker can run cycles but fail to freeze water into cubes.
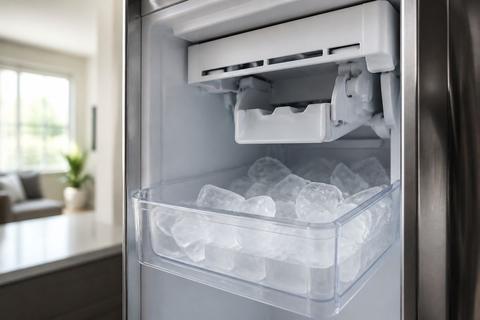
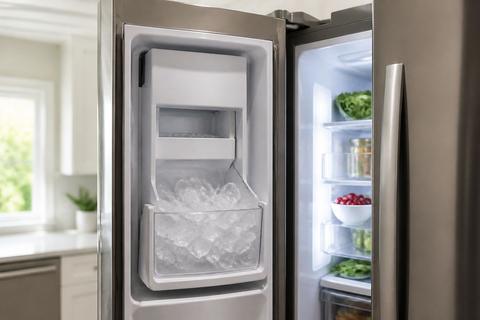
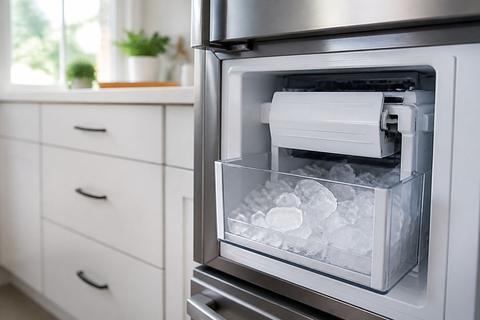
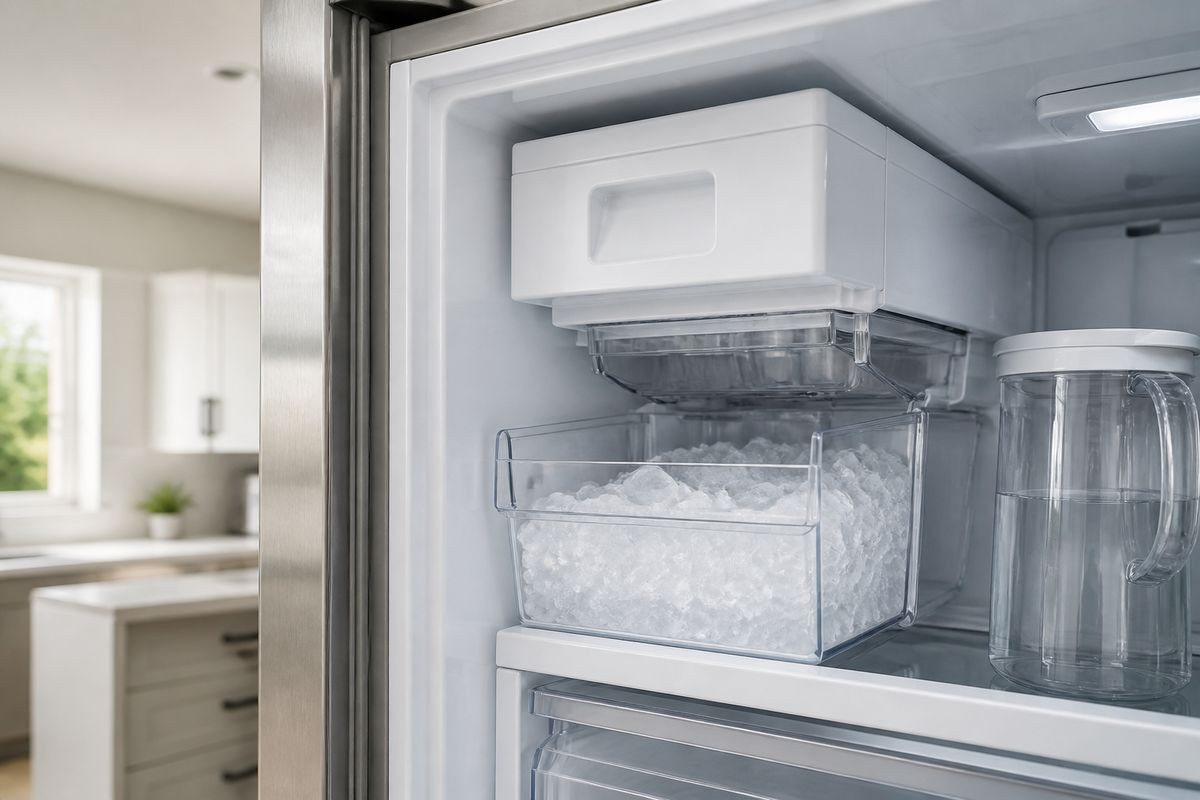
Confirm the ice maker is turned on and the bin is seated
A common “no ice” cause is that the ice bucket isn’t recognized or the unit is paused.
- Make sure the ice maker is enabled on the control panel (not Ice Off).
- Remove the ice bin briefly, then reinsert it fully until it clicks/seats.
- Confirm the ice bucket doesn’t wobble or sit crooked—misalignment can prevent harvesting.
- If your model has an “ice bin full” sensor, ensure ice isn’t blocking it.
- Listen for a change in the ice maker status after reseating.
This step matters because the ice maker may refuse to harvest if the bin-door sensor doesn’t register.
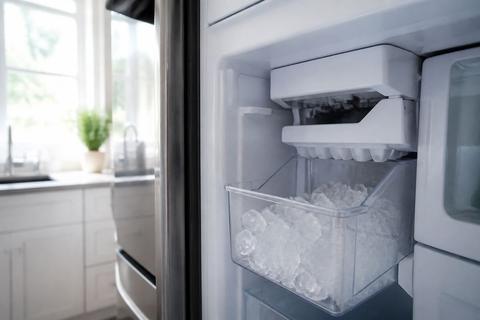
Look for obvious frost, clogs, or leaks
Before powering tests, inspect visible areas for physical blockers.
- Open the freezer and look around the ice room/ice maker area for heavy frost.
- Check the fill area and chute for ice bridges or clumps of frozen water.
- Look for water pooling under or behind the ice bucket area.
- Inspect the water filter housing (if accessible) for leaks.
- Feel for unusual warmth near the ice maker compartment—heat suggests insulation or airflow issues.
If you see thick frost or an obvious ice jam, you’ll need to address the obstruction before expecting a clean test result.
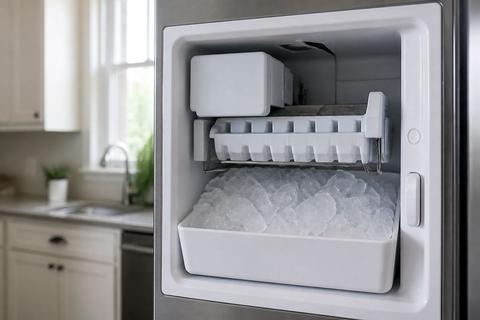
Run the Built-In Ice Maker Test
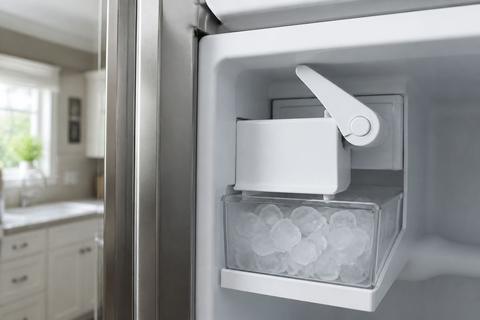
Find the test button or test switch
Samsung models include a built-in diagnostic that forces the ice maker through a harvest/fill cycle.
- Locate the test control on your ice maker assembly—many have a small blue Test button on the underside or right side of the ice bucket assembly.
- If the button is hard to reach, remove the ice bucket carefully to access the test switch.
- Some models also provide a panel-based diagnostics mode, but the button on the ice maker is the most direct.
- Have a towel ready—during tests, water can dispense and frost/ice may loosen.
Use the test control only after basic conditions (freezer temp and bin seating) are correct.
Watch for the full test cycle and note the results
When you start the built-in test, it should run through both fill and harvest steps so you can observe where it fails.
- Press and hold the test button about 10 seconds (many models chime when diagnostics starts).
- Observe the cycle: you should see water fill toward the mold, then the eject/harvest action to release ice.
- Listen for the motor/ejector movement and water sounds during fill.
- Note timing: repeated attempts with no fill often indicate a water-path issue; fill without harvest often points to the eject/motor side.
- If your unit displays status lights, record which LEDs blink during the failure.
Write down exactly what happens in the cycle—this guides which next section to follow.
How to interpret beep patterns, blinking lights, and failures
Samsung ice maker diagnostics communicate faults through patterns, not just “pass/fail.”
- If you hear a startup tone but the cycle stops immediately, the control likely detects a blocked component or jam.
- A blinking ice-maker light during/after diagnostics usually indicates a sensor or harvest fault.
- If the unit beeps repeatedly with no water sound, the water fill portion likely didn’t complete.
- If it fills and then doesn’t eject, the ejector/motor path or sensor is likely obstructed.
- If the lights indicate an error, note the exact code (for example “5E/SE” types), then jump to the error-code section.
Treat diagnostics results as a map: they tell you whether to focus on water flow, frost/defrost, fan/airflow, or control components.
Inspect the Water Path and Fill System
Test whether the ice maker is getting water
If no cubes form, the ice maker can’t freeze without water entering the mold.
- Start the ice maker test and listen for water filling sounds at the mold.
- Look for a visible stream or timed fill attempt during the cycle.
- If you hear no water, inspect supply and the internal fill components next.
- If you do hear water but ice never forms, focus on freezing/temperature and airflow.
- After any jam removal, run the test again to confirm improvement.
This isolates “no fill” from “fill but no freezing.”
Clear frozen fill tubes and supply line blockages
A frozen fill tube is one of the fastest ways for a Samsung ice maker to fail.
- Unplug the fridge if you need to access internal tubing safely.
- Inspect the fill tube near the ice maker assembly for ice blockage.
- Use warm water carefully to melt an ice bridge (avoid soaking electrical parts).
- If needed, use a hair dryer on low to thaw the tube and surrounding frost without overheating plastic.
- Once melted, wipe away water and run the built-in test again.
Never force hardened ice mechanically—you can crack lines or dislodge sensors.
Check the quick-connect fitting and inlet valve
If water is on at the house but the ice maker still won’t fill, check the connection and inlet valve.
- Confirm the water line is firmly connected to the fridge’s inlet (quick-connect should be seated and not kinked).
- Inspect the line for kinks, pinches, or collapsed sections behind the fridge.
- If accessible, check the water filter condition—replace if clogged.
- Verify the inlet valve receives supply voltage when diagnostics starts.
- If diagnostics calls for fill and nothing comes through, the inlet valve is a strong suspect.
An inlet valve issue often shows up as “no fill” consistently across tests.
Evaluate the Fan and Airflow Around the Ice Room
Listen for the freezer fan and ice room fan
Airflow is critical because the ice maker depends on cold, circulated air to freeze the mold.
- Start an ice maker test and listen in the freezer compartment for fan operation.
- Confirm the freezer fan spins when cooling cycles run.
- For models with a dedicated ice-room fan, listen for an additional fan sound near the ice area.
- If fans don’t run or run intermittently, cooling performance will be uneven and ice production will fail.
- If you hear running fans but ice still won’t freeze, airflow can still be blocked by frost buildup.
Fan operation gives you a quick “is air moving?” answer before digging deeper.
Identify ice buildup that can block airflow
Even small frost patches can grow into airflow blockers in the ice room.
- Inspect the vents and air passages near the ice maker for ice accumulation.
- Check for a thick frost layer behind panels or around the fan shroud.
- Look for ice bridging that can reach the fan blades or redirect air.
- If you see heavy buildup, melt/remove it before further diagnostics—otherwise tests keep failing for the same reason.
- After clearing, run a test cycle and confirm you no longer see rapid frost expansion in the same location.
Blocked airflow commonly results in repeated no-harvest or “fill but no solid cubes.”
Reduce frost problems caused by bad door seals or warm air leaks
When warm air leaks into the freezer, frost comes back fast and interrupts ice making.
- Test freezer door seals: close the door on a thin piece of paper—if it slides out easily, the seal isn’t tight.
- Inspect for ice at the gasket edges; damaged gaskets reduce performance.
- Ensure the freezer door is level and closes firmly without sticking.
- Keep the freezer from being overpacked—air circulation needs space.
- If the ice room is near an air leak path, fix the leak first or frost will keep returning.
Stopping the warm-air source prevents the airflow blockage that repeatedly stops ice production.
Reset the Ice Maker or Refrigerator if Needed
Use the reset button safely
A reset can clear temporary control glitches, but you must do it in a way that doesn’t create new jams.
- Turn Ice Off on the panel (if available) before you remove the ice bucket.
- Remove the ice bucket and check for visible ice bridges or a stuck ejector area.
- Clear any jam with warm water and let parts dry before reassembly.
- Use the ice maker’s reset button only as directed by your model (some use a physical reset on the ice maker assembly).
- After re-enabling ice, allow time for the cycle to restart.
If there’s a mechanical jam, a reset won’t fix it—clearing obstruction is still required.
Perform a simple power reset for the fridge
A power reset clears electronics “stuck states” that can interrupt fill/harvest cycles.
- Set ice mode to Ice Off on the panel.
- Unplug the refrigerator or switch off power at the breaker for 60 seconds.
- Turn power back on, then set ice mode back to Ice On.
- Reinsert the ice bin so the unit recognizes it.
- Wait for the freezer to recover before running diagnostics (ice production timing depends on temperature stability).
After a reset, your first cycle may take longer than normal.
When a model-specific reset is worth trying
Some Samsung models use a specific button combination to enter forced modes or diagnostics.
- If your refrigerator has labeled Forced Defrost controls, follow the on-panel instruction pattern for your model.
- For some models, you can trigger a defrost by pressing and holding Freezer (or Power Freeze) and Fridge (or Lighting) buttons together for about 8–12 seconds until the display changes.
- Then follow the model’s prompt/step to reach the defrost selection (some show “Fd” on the display).
- Don’t run forced defrost repeatedly—use it when frost buildup is actively causing blockages.
- After forced defrost completes, restart ice making and run diagnostics once.
If the problem is frost-driven, model-specific defrost steps often restore function faster than basic resets.
Remove and Reinstall the Ice Maker for Deeper Checks
Remove the ice bin or tray without damaging parts
To inspect deeper components, remove the ice container carefully.
- Stop ice output by setting Ice Off on the control panel (if available).
- Pull the ice bin out slowly so you don’t stress wiring or the dispenser linkage.
- Inspect the underside area for ice bridging that resists removal—melt the bridge with warm water first.
- If your model uses an internal tray, remove it according to the assembly design so clips and tabs aren’t snapped.
- Place the bin on a towel to catch drips.
Damaging the ejector linkage or mounting points creates new failure modes.
Inspect the mold, ejector, and wiring connections
After access, focus on the parts that directly control harvest and fill.
- Inspect the ice mold area for stuck cubes or a hardened ice layer.
- Check the ejector mechanism for obvious obstruction or misalignment.
- Examine the wiring connectors for looseness, corrosion, or a wire pinched behind the assembly.
- Look for frost patterns suggesting a sensor or heater problem (heavy frost concentrated around sensing locations).
- If you find a jam, remove ice manually after thawing—don’t chip at plastic.
If the motor runs but the eject doesn’t move, the ejector path or control input is the likely issue.
Reinstall everything so the unit can test properly
Reassembly must be correct so the bin sensors and ice maker recognition work.
- Reconnect any harnesses you disconnected, fully seating the connectors.
- Reinstall the ice maker bin/tray so it locks in place without rocking.
- Ensure any guide rails and clips align with their intended positions.
- Wipe away excess water so it doesn’t refreeze around sensors.
- Turn ice back on and run the built-in test once to confirm the unit initiates the cycle.
Proper seating often fixes “test runs but never harvests” behavior.
Understand Error Codes and When They Point to a Bigger Problem
What common Samsung ice maker and DC-related errors can mean
Error codes speed up diagnosis by identifying which subsystem didn’t complete its part of the cycle.
- 5E/SE (ice maker sensor type) faults point to sensor issues, a stuck harvest, or frost/clogging affecting detection.
- If the code appears after the fill step, the problem likely lies with the eject/sensor path rather than the inlet valve.
- DC-related fault messages often point to motor/eject drive problems or a jam preventing motor movement.
- Any code tied to “ice room” or fan operation points to airflow obstruction or fan failure.
- Record the code exactly as shown (and whether it blinks with the ice light) to match symptoms.
Codes are most useful when paired with what you observed during the test cycle.
When an error suggests a fan, sensor, or board issue
Not all faults are DIY—some require deeper component access.
- If diagnostics repeatedly fail and the freezer fan seems weak or stopped, suspect the fan or fan control path.
- If a sensor-related error appears with heavy frost, clear frost first; persistent sensor codes then suggest a sensor/board issue.
- If a DC/motor code appears after a jam-free inspection, suspect motor/eject components.
- If multiple subsystems fail after reset, suspect a control board problem instead of separate causes.
- Confirm whether the ice maker runs briefly and stalls—stalling with a sensor code often indicates an obstruction affecting detection.
At this point, your earlier observations (water sound, fan sound, frost location) matter more than random resets.
Signs the problem is beyond a basic DIY fix
Some patterns mean it’s time to stop troubleshooting and move to service.
- Repeated “no fill” even after thawing tubes and confirming the inlet and line connection.
- Repeated “fill but no harvest” after clearing visible jams and confirming correct bin seating.
- Fan not running despite cooling cycles and cleared airflow passages.
- Persistent sensor/motor codes that don’t change after forced defrost/power reset.
- Any burning smell, melted connectors, or damaged wiring in the ice maker compartment.
Those signs point to component-level failures that are unsafe or impractical to keep testing.
When to Call for Service
Symptoms that point to a bad valve, fan motor, or control board
Call for service when symptoms keep matching the same failed subsystem after basic checks.
- Bad inlet valve signs: water never enters the mold during tests, even when the supply line is confirmed and thawed.
- Bad fan motor signs: airflow-related ice failures with fans not running or running abnormally after clearing frost.
- Control board signs: random or cascading errors, multiple subsystems acting inconsistently, and codes that persist after resets.
- Evidence of electrical damage: scorched parts, melted insulation, or loose/burned connectors.
- You’ve already cleared jams and restored airflow but the unit still fails in the same test step.
Service is the safest path when the cause is electrical or when component replacement is likely.
When repeated ice buildup means a defrost problem
If frost keeps returning quickly, it’s often a defrost system failure rather than “normal buildup.”
- Ice and frost build up around the ice room faster than the freezer door seal behavior suggests.
- You see repeated blockages that recur within days after thawing/clearing.
- Defrost-related behavior doesn’t correct after a proper forced defrost attempt (when your model supports it).
- Fans run but ice still forms unevenly, indicating freezing control is off.
- The freezer never reaches stable temperature under normal settings.
A defrost issue needs targeted diagnosis of heaters, sensors, and control logic.
When to stop testing and schedule repair
Stop testing when you’re not learning new information or when continued attempts risk damage.
- The same diagnostic step fails every time (no fill, no harvest, or fan not running) after you cleared the obvious causes.
- You’ve opened the ice maker assembly and find damaged wiring or a component that won’t reset after thawing.
- Error codes keep returning with the same meaning and you’ve already ruled out water and frost.
- You detect leaks you can’t trace to a simple connection issue.
- You smell burning or see heat damage around the ice maker area.
A technician can test voltage/resistance safely and confirm which part to replace.
Frequently Asked Questions
How do I know if my Samsung ice maker is working correctly?
A working Samsung ice maker should power on, run its harvest cycle, fill with water, and produce ice at a steady pace. You should not see repeated error indicators, heavy frost around the ice room, or unusual grinding/noise during harvesting. During test cycles, you should hear water filling into the mold and then see ice release during the eject/harvest step. If it fills but never harvests, or harvests but never fills, the behavior points to a specific subsystem to troubleshoot next.
What is the test button or test switch on a Samsung ice maker?
It is a built-in diagnostic control that starts a harvest cycle so you can verify whether the motor, ejector, and fill process are functioning. The exact location and behavior depend on the model. On many Samsung French-door refrigerators, the ice maker has a small blue Test button on the underside or right side of the ice bucket assembly—press and hold it about 10 seconds until you hear a chime, then the unit runs a test fill/harvest cycle. If your model uses a different interface, use the physical test control first for the clearest observations.
Why is my Samsung refrigerator ice maker not filling with water?
Common causes include a frozen fill tube, low water pressure, a clogged water filter, a closed supply valve, or a faulty inlet valve. Start by confirming household water shutoff is open and the water line isn’t kinked. Then check during diagnostics for water sound or visible fill at the mold—no fill points to supply/filter/tube/inlet valve. Thaw any frozen fill tube with warm water (or low hair-dryer heat), then rerun the test to see whether the water path resumes.
Can ice buildup stop the Samsung freezer fan from working?
Yes. Heavy frost or ice buildup can block the fan blades or airflow path, leading to noise, poor cooling, and ice maker problems. If you don’t hear the freezer or ice-room fan during cooling or during a diagnostic cycle, inspect vents and the ice room for accumulated ice that can obstruct airflow. Clearing frost and addressing causes like warm air leaks (especially poor door seals) is necessary to prevent the fan obstruction from returning.
Should I reset my Samsung fridge before testing the ice maker?
A simple power reset can clear temporary control glitches, but it should not replace checking the water line, freezer temperature, airflow, and the ice maker test cycle. If you already know the freezer is cold and the bin is seated correctly, run the built-in ice maker test first so you can capture symptoms (water sound, fan sound, and any error codes). If diagnostics are acting erratically or errors persist after basic checks, then use a controlled power reset or model-specific forced mode only when frost or electronics behavior clearly points to that need.