Replace a Samsung Ice Maker: Removal and Installation Steps
If your Samsung ice maker stopped producing ice or keeps freezing up, you need a clear path from removal to installation. Replace a Samsung Ice Maker: Removal and Installation Steps can feel intimidating, but the process is straightforward when you disconnect power, remove the correct assembly parts, and reconnect everything in the right order. Use this guide to remove your ice maker safely, install the correct replacement (including model-specific compatibility), and avoid common reconnection mistakes that cause no-ice issues.
How to Replace and Install a Samsung Refrigerator Ice Maker
This replacement process works when the ice maker has failed mechanically, the harvest cycle can’t complete, or repeated cleaning/reset attempts don’t restore ice production. Start by preparing the refrigerator for removal (power off and ice bucket out), then remove the ice maker assembly components in the correct sequence. After that, install the replacement with the right model match, ensure connectors are seated properly, and restore power so the unit can run its first fill/harvest cycle.
How to Replace and Install a Samsung Refrigerator Ice Maker
- Power down and clear ice storage. Turn the refrigerator off at the control panel or switch the ice maker function to Ice Off, then remove the ice bucket so water isn’t trapped in the chute.
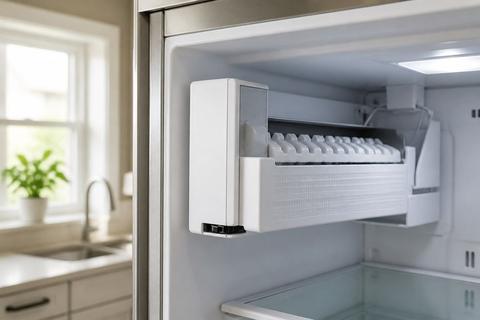
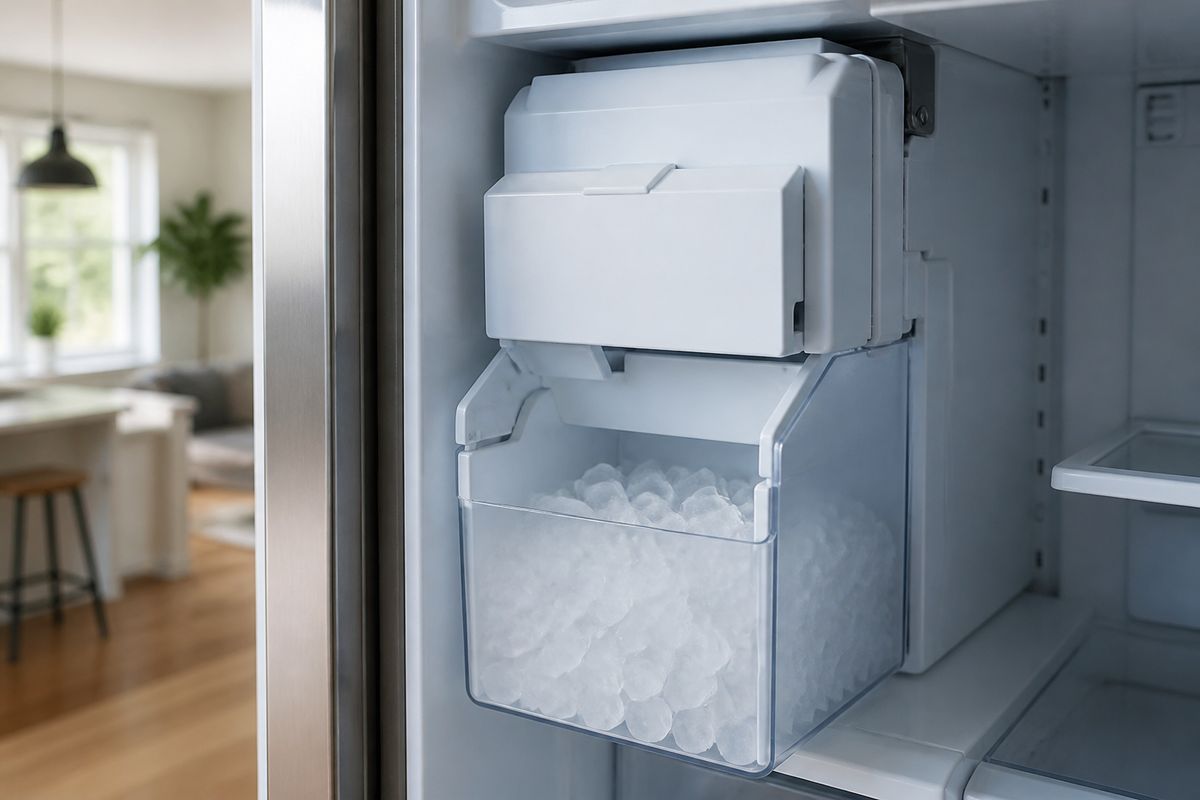
- Access the ice maker. Pull the needed interior access panel(s) so you can see the ice maker bracket, wiring harness, and water line connection point.
- Disconnect power and wiring. Unplug the ice maker harness (or disconnect the connector) and make sure no wires are stretched as you free the unit.
- Disconnect the water feed line. Release the fitting at the ice maker inlet (use the same method the original connector uses—clip, twist-lock, or fitting release).
- Remove the old ice maker. Remove mounting screws/brackets, then lift the unit out without bending the auger/chute.
- Install the new ice maker. Position the replacement correctly on the mounting points, attach the bracket/screws, then reconnect the water line and wiring harness.
- Restore power and run the first cycle. Turn the refrigerator back on and switch ice production On. Plan for the first batches to take time to refill and may be incomplete.
Full Guide: How to Replace and Install a Samsung Refrigerator Ice Maker
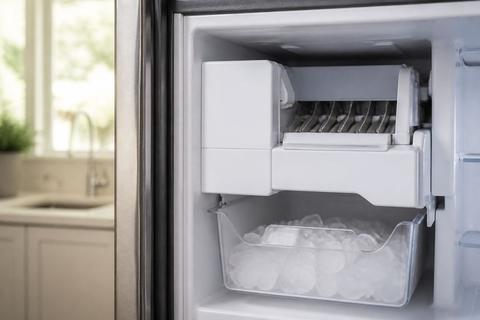
How to Remove a Samsung Ice Maker for Service
Removing a Samsung ice maker is often the safest first step when you need to diagnose a fault, clear ice buildup, or service the mechanism that dispenses ice. Taking the unit out gives you direct access to the auger, sensor area, chute, and wiring connections—so you can identify the real cause instead of guessing. Detailed removal steps should cover power safety, how to avoid damaging connectors, and how to safely clear ice jams before you reinstall or replace.
How to Remove a Samsung Ice Maker for Service
- Stop ice production and protect the electronics. Use the ice maker control to set Ice Off, then unplug the refrigerator or disconnect the ice maker power harness so you don’t work on a live circuit.
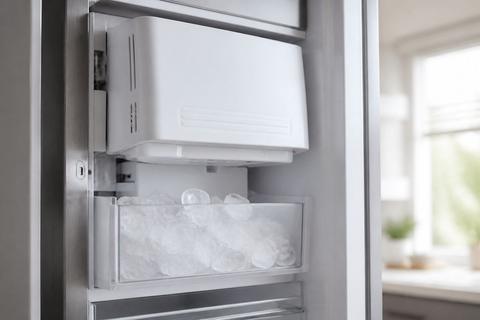
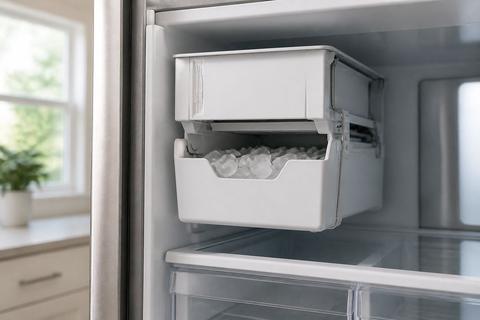
- Remove the ice bucket. Pull out the bucket and set it aside. Check for ice bridges at the bucket rim and along the chute.
- Clear any obvious jam first. If you see ice blocking the chute, break loose the blockage with a plastic utensil. Use warm water sparingly to melt stubborn ice; avoid pouring water into electrical parts.
- Access the ice maker assembly. Remove the interior cover panel to expose mounting screws, the wiring plug, and the water line inlet.
- Disconnect wiring and remove mounting hardware. Unplug the ice maker connector, then remove screws holding the ice maker to the bracket/liner.
- Release the water connection. Detach the ice maker water line using the specific connector type on your model (clip/twist-lock/fitting release). Keep a towel ready for drips.
- Lift the ice maker out carefully. Pull it straight out to avoid bending the auger or snagging the chute.
Full Guide: How to Remove a Samsung Ice Maker for Service
How to Install a Samsung DA97-15217D Ice Maker Replacement
Installing a Samsung DA97-15217D ice maker replacement depends on correct model compatibility and proper physical positioning on the mounting bracket. The most common installation issues come from mis-seated wiring connectors, a kinked water line, or a water inlet that isn’t fully connected. Follow the dedicated procedure for the exact wiring, inlet, and mounting sequence for DA97-15217D so the harvest and refill cycle can complete.
How to Install a Samsung DA97-15217D Ice Maker Replacement
- Confirm correct part match. Verify the ice maker part number and refrigerator compatibility for DA97-15217D before installation.
- Position the unit on the bracket. Place the replacement into the mounting location so the chute aligns with the discharge opening—do not force it into place.
- Reconnect the wiring harness. Plug the connector into the ice maker until it clicks/fully seats. Ensure the wire routing isn’t pinched under the bracket or cover.
- Connect the water inlet line. Attach the water line to the ice maker inlet until fully seated and secured by its connector mechanism (clip, twist-lock, or fitting).
- Secure mounting screws/brackets. Tighten the screws evenly so the ice maker sits flat against the refrigerator frame.
- Reinstall any access panels. Put covers back so the wiring and water line aren’t exposed to contact or vibration.
- Power back on and start production. Turn ice production back On. Expect roughly 24 hours for full refill and ice production; discard the first one or two batches.
Full Guide: How to Install a Samsung DA97-15217D Ice Maker Replacement
Samsung Ice Maker Assembly: Replace the Full Unit Correctly
When individual components don’t solve the issue—or the entire ice maker system has failed—replacing the full ice maker assembly prevents repeated breakdown. A complete assembly swap covers identifying the assembly components, removing the old unit without damaging mounting points or the chute path, and installing the replacement so the sensor and harvest mechanism function as designed.
Samsung Ice Maker Assembly: Replace the Full Unit Correctly
- Identify the full assembly. Locate the complete ice maker assembly that includes the unit body with the auger/chute path and mounting bracket system.
- Follow safe removal steps first. Disconnect power, remove the ice bucket, and detach wiring and the water connection before unmounting the assembly.
- Remove the entire unit as one assembly. Keep the bracket orientation and avoid separating parts unless your replacement kit instructs otherwise.
- Install the replacement assembly in the same orientation. Mount the assembly to the same liner/bracket points and route the wiring and water line the same way the original was routed.
- Reconnect connectors and line securely. Seat the wiring plug fully and attach the water inlet without kinks or twists.
- Reassemble covers and restore power. Turn the refrigerator back on and switch ice production On so the unit can run its first cycle.
- Address persistent no-ice after installation. If ice production still doesn’t start after a reasonable time, check for sensor frost, frozen chute blockage, and a fully opened water valve.
Full Guide: Samsung Ice Maker Assembly: Replace the Full Unit Correctly
Frequently Asked Questions
How do I know whether I should replace the whole Samsung ice maker or just service it?
Replace the whole ice maker when the mechanism has a clear failure (harvest won’t complete, repeated freeze-up that doesn’t clear with defrost, or electrical faults like sensor-related errors). Service or partial inspection is appropriate when the issue is access or cleanup-related—such as ice buildup blocking the chute, a jammed auger area, or minor frosting that clears after a proper thaw.
Do Samsung ice maker replacements require a model-specific part?
Yes. Samsung ice makers are commonly model-specific, so installing the wrong part number can lead to poor fit, connector mismatch, or incorrect water inlet alignment. Match the replacement part number to your refrigerator/ice maker assembly, then proceed with installation only after confirming compatibility.
What is the safest first step before removing a Samsung ice maker?
Turn off ice production on the refrigerator control panel, then disconnect power if needed—either by unplugging the refrigerator or unplugging the ice maker harness—before you touch wiring or the water connection. This reduces the risk of electrical shock and prevents accidental damage to the ice maker components while you remove the assembly.