How to Set Up a Whirlpool French Door Ice Maker
If your kitchen is ready for cold, fresh cubes but your whirlpool french door ice maker setup didn’t immediately produce ice, you’re not alone—installation and startup steps matter. Most “no ice” issues come from a simple shutoff position, an unprimed water line, or a freezer that hasn’t reached the right temperature yet. Follow the steps below to get your Whirlpool French door ice maker installed, running, and making consistent cubes.
For more help, see our How to Replace and Install a Whirlpool Ice Maker guide.
Before You Start: Confirm the Model and Parts
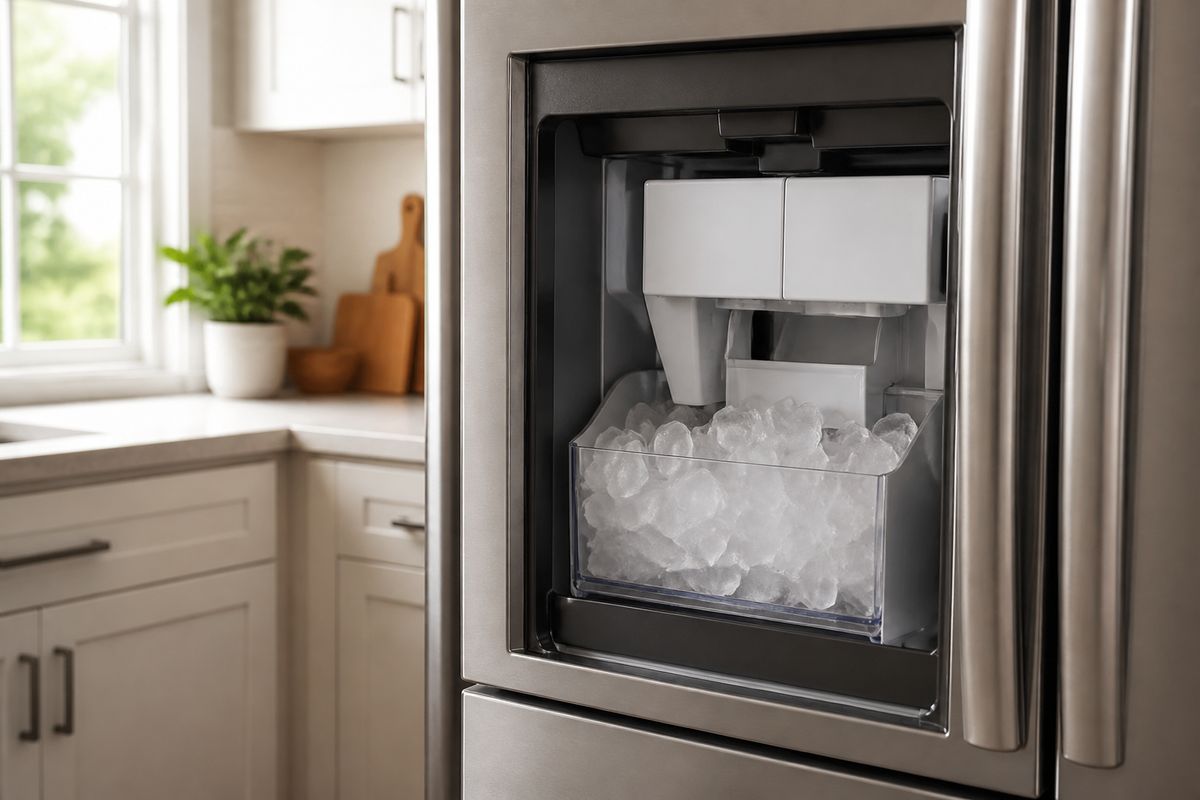
Check whether your refrigerator has an in-door or French-door ice maker
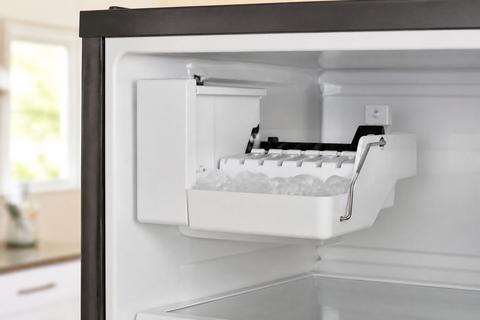
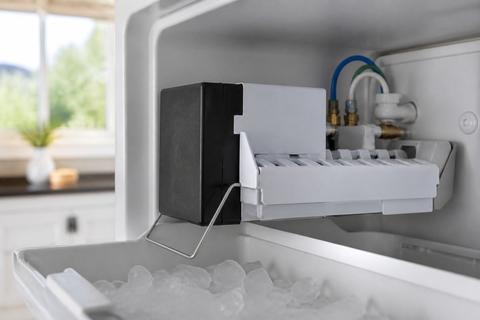
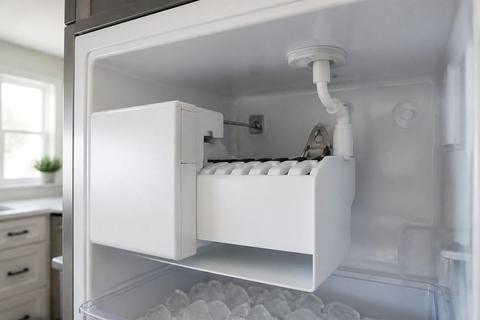
Start by matching your ice maker type to your exact Whirlpool model. French-door refrigerators often have modular ice makers located in the freezer, but some Whirlpool units use different configurations. Open the freezer compartment and identify the ice maker module and its bin/harvest mechanism. If there is a wire feeler/shutoff arm or a sliding feeler paddle attached to the ice maker, note its current position. In many Whirlpool setups, lifting the shutoff arm turns the ice maker OFF and lowering it turns it ON.
Gather the required water line, shutoff valve, and installation parts
Before you connect anything, gather everything needed for a clean, code-compliant install: a dedicated cold-water line (usually 1/4 in.), a shutoff valve, appropriate fittings (compression or push-to-connect as your kit specifies), and the ice maker’s installation kit (mounting hardware and any harness/water fittings). If you’re installing a new line, confirm you’re using a cold-water source only. Have a towel and a bucket ready for the water priming step and keep a flashlight handy to see the underside connection points inside the freezer.
Inspect the ice maker kit for damage or missing components
Unpack the ice maker module and installation kit and check every piece before mounting. Look for bent metal parts, cracked plastic housings, damaged wiring harness connectors, or a missing shutoff arm/feeler paddle. Verify you have the correct water inlet fitting(s) for your model and the mounting screws/retainers. If anything is missing or broken, stop and replace the kit rather than forcing a connection—misaligned modules and faulty connectors are a common cause of startup failures.
Install the Ice Maker Assembly Correctly
Locate the ice maker compartment and mounting points
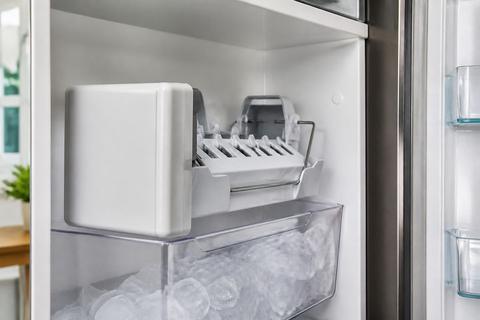
Remove the freezer items needed to access the mounting area. Identify the ice maker compartment opening and the mounting points used by your Whirlpool unit. Modular Whirlpool ice makers are designed to align with specific connectors and fasteners—don’t drill new holes. Clean the mounting surface so the module seats flush. If the unit has an existing wiring plug in the compartment, ensure it’s accessible and free of ice buildup or debris that could prevent a full connection.
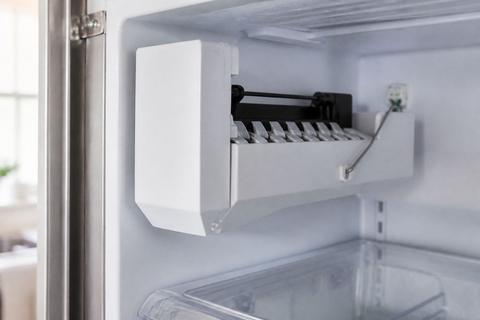
Secure the ice maker module and connect the wiring harness
Mount the ice maker module using the screws and brackets included in the kit so it sits level and fully seated. Then connect the wiring harness firmly: align the keyed connector and press until it locks. Route any slack wiring so it doesn’t interfere with bin movement or the shutoff arm/feeler paddle. Once connected, lightly move the module’s front area by hand to confirm it’s stable and not pinched by adjacent plastic panels.
Make sure the bin, shutoff arm, and sensors move freely
Before you finish installation, check the moving parts carefully. Slide or re-seat the ice bin so it fits correctly on its tracks. Locate the shutoff arm or sliding feeler paddle and move it through its range: it should move freely without rubbing or sticking. Also ensure any ice-detection sensors (often small optical/position components on the module) are unobstructed. A shutoff arm left in the OFF position is a direct cause of “no ice,” even when water and power are connected.
Connect Water and Turn the System On
Flush the water line before connecting it to the refrigerator
Flush the new or existing water line before final connection. Turn on the cold-water supply at the shutoff valve and run water into a sink or bucket for about 1–2 minutes (or until the flow runs clear). This removes air, debris, and metal particles that can clog the inlet or cause the first harvest to be poor. Turn the valve off again before attaching the line to the refrigerator ice maker inlet.
Attach the water supply and check for leaks
Connect the water line to the refrigerator’s water inlet using your kit’s fitting style. Tighten compression fittings snugly—don’t overtighten plastic parts. After connecting, turn the water supply valve on and inspect every connection point: refrigerator inlet, shutoff valve, and the line fitting. Use a dry paper towel to spot drips; even small leaks can worsen over time. Wipe up any moisture and re-check after 2–3 minutes of flow.
Power up the refrigerator and let the ice maker initialize
Restore power to the refrigerator. On many Whirlpool models, ice production starts after the freezer reaches the correct cold temperature and the ice maker completes its startup initialization. Leave the freezer door closed during the first startup period so the unit can stabilize. If your model has a service mode or uses an onboard test cycle, don’t run it yet—finish the first steps below so you have a clean baseline for the first harvest.
Run the First Ice-Making Cycle
Allow enough time for the freezer to reach the right temperature
For consistent ice production, the freezer must reach the right temperature before the ice maker can harvest. Whirlpool French door freezers typically need to stabilize around 0–5 degrees F. If the freezer was recently emptied or the doors were open for long installation sessions, give it time to recover. This step matters because warm freezer conditions can prevent complete freezing in the ice mold, leading to incomplete cubes or no harvest.
Start the first cycle and discard the initial batch of ice
Begin the first ice-making cycle using your model’s normal operation—most ice makers start automatically once powered and water is available. Then discard the first 2–3 full batches of ice because installation debris, air in the line, and initial water-chamber seasoning can affect cube quality and taste. After that, the ice should be clear, evenly formed, and free of “off” flavors caused by initial water flow.
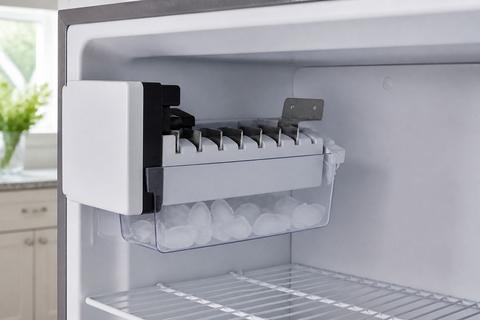
Confirm the ice maker is producing and ejecting cubes normally
Listen and observe during the first harvest. The ice maker should fill, freeze, and then rotate/actuate to eject cubes into the bin. If your unit has a shutoff arm, it should remain in the correct ON range and not stop early due to a stuck feeler. Watch for water filling inside the mold, then verify cubes drop into the bin cleanly. If harvest doesn’t happen, move to troubleshooting based on the specific symptom.
Troubleshoot Common Setup Problems
Find the reset button or reset sequence for your Whirlpool model
Reset controls vary by model, so use your Whirlpool owner’s manual as the final authority. Many Whirlpool ice makers have a reset button on the underside of the ice maker module or require a test/reset sequence accessible through the front cover. If your ice maker uses a shutoff arm, make sure it’s not in the OFF position before attempting any reset. For models with a display, look for an ice maker reset/test option in the refrigerator’s settings menu.
Fix an ice maker that will not reset or start after installation
If the ice maker won’t reset or won’t start, check the simplest causes first: water shutoff valve position, correct shutoff arm position, and harness seating. Turn off power to the refrigerator briefly, then re-seat the wiring harness connector and restore power. If you recently installed a new module, ensure the ice bin is installed correctly because some assemblies use bin position to detect readiness. If it still won’t run, proceed to the water flow diagnosis steps below.
Diagnose low water flow, frozen lines, or a clogged filter
Low water flow is one of the most common causes of partial ice or no ice. Inspect the water supply valve is fully open. If the supply line or fill tube is frozen (especially the thin fill tube feeding the mold), thaw it using a hair dryer on low with careful distance—aim for gentle warming, not overheating plastic. Also check your water filter: a clogged or overdue filter slows flow and can produce small, hollow cubes. Replace filters that are past their service interval; Whirlpool EveryDrop filters are rated around 6 months / 200 gallons.
Clean the ice maker and bin if ice tastes bad or production is slow
If ice tastes bad, the cause is usually odor-carrying debris, old cubes in the bin, or buildup inside the ice maker chute. Remove the bin, discard old ice, and clean the bin and interior surfaces with warm water and mild soap. Wipe the ice maker’s area around the chute so cubes aren’t sticking and backing up the harvest. If production is slow after cleaning, check the water filter and freezer temperature again before assuming the ice maker has failed.
When to Repair, Replace, or Remove the Ice Maker
Identify signs that the ice maker motor or control board has failed
Not all failures are setup issues. Signs of a motor or control board fault include repeated harvest attempts with no fill/freeze action, an ice maker that never cycles even after reset and correct shutoff arm position, or consistent failure to eject cubes. If water pressure is adequate, lines are not frozen, and the filter is new, but the module still won’t run, electronic control or a failed motor/gear mechanism becomes more likely. At that point, the safest next step is verifying the module’s specific failure pattern with your model’s diagnostics.
Decide whether to repair the unit or replace the ice maker assembly
When troubleshooting narrows the issue to a component inside the module, replacement may be faster and more reliable than piecemeal repairs—especially for sealed or integrated assemblies. Choose replacement when the wiring harness, motor assembly, or control module is the suspected failure and when the cost of parts plus labor approaches the price difference. Repair is worth considering if the problem is localized and the part is clearly accessible and safe to swap. For any uncertainty involving electrical connections or sealed components, use professional service.
Safely remove the ice maker if you are not using it
If you’re not using the ice maker, removal can prevent leaks and reduce unnecessary cycling. Turn off the refrigerator power, then shut off the water supply valve and disconnect the water line from the refrigerator inlet. Remove the ice maker module by undoing its mounting hardware and disconnecting the wiring harness. Cap or secure any exposed fittings per your refrigerator’s guidance so you don’t leave an open plumbing point. Keep the bin storage area dry and clear so water doesn’t collect where the module was removed.
Maintenance Tips for Reliable Ice Production
Keep the freezer temperature and water filter in the right range
Set and maintain freezer temperature so the ice maker can freeze cubes completely—aim for about 0–5 degrees F. If the freezer runs warm due to frequent door openings or a faulty temperature setting, ice quality and harvest timing will drop. Also keep the water filter fresh; clogged filters reduce water flow, causing small or incomplete cubes. When replacing filters, discard the first 2–3 batches after the change to clear any residual air and carbon fines from the system.
Clean the ice maker and bin regularly to prevent buildup
Regular cleaning prevents cubes from sticking in the chute and reduces off-tasting ice. Every few months (or sooner if you notice buildup), empty the bin, wash it with warm soapy water, and wipe the surrounding ice maker outlet area. Avoid harsh abrasives that can damage plastic components. If you see ice dust or residue forming, clean it out so the shutoff arm and sensors move freely and the module can harvest without obstruction.
Watch for recurring issues in French-door, side-by-side, and four-door models
French-door, side-by-side, and four-door Whirlpool models share many ice maker mechanics, so recurring symptoms often point to the same root causes. Common repeat problems include slow production after months of filter use, taste changes after power outages or long shutoffs, and incomplete harvest caused by warm freezer conditions. If you’ve fixed it once but it returns, address the recurring factor: filter schedule, freezer temp stability, and ensuring the shutoff arm never returns to OFF during reloading or bin removal.
Frequently Asked Questions
Where is the reset button on a Whirlpool French door ice maker?
The reset button location varies by model. It is often on the underside of the ice maker module, behind the front cover, or accessed through a test/reset sequence. Always check the model-specific owner’s manual before pressing anything.
Why is my Whirlpool ice maker not making ice after setup?
Common causes include a closed water supply valve, air in the water line, a clogged filter, the freezer not being cold enough, or the ice maker not having completed its startup cycle. Also check the shutoff arm/feeler paddle position so it’s in the ON position.
How long does a Whirlpool ice maker take to start making ice?
It can take several hours after installation or reset before the first harvest. If the freezer is still warming up or the water line is not fully primed, production can take longer.
Should I clean the ice maker before using it?
Yes. Cleaning the ice maker, bin, and surrounding area before first use helps remove dust, odors, and installation debris that can affect ice quality. Discard the first 2–3 full batches after setup as well.
Can I replace the ice maker myself?
Many Whirlpool ice maker assemblies can be replaced by a confident DIYer with the right model number and tools. If the issue involves plumbing, sealed components, or electrical uncertainty, professional service is safer.