How to Replace a Whirlpool Ice Maker: Basic Swap Steps

If your freezer is cold but your ice maker has stopped making cubes, you don’t have to guess for long. The right whirlpool ice maker replacement steps start with matching the exact part to your refrigerator and swapping it safely. Once installed, proper water flow and a clean first harvest cycle make the difference between “it’s in” and “it’s working.”
For more help, see our How to Replace and Install a Whirlpool Ice Maker guide.
Before You Start: Confirm the Right Replacement
Check the model number and ice maker style
Start by confirming the exact Whirlpool refrigerator model number and the ice maker style. Look inside the fresh-food compartment wall (near the crisper or door) for the label with the model/serial—match the ice maker part number listed there to what you’re buying. Whirlpool uses different mounting layouts for in-door vs. side/freezer inline ice makers, and the harness and water-feed design vary by style. Also note whether your unit is a modular drop-in module or a larger kit assembly; this affects how the part physically connects and what you’ll need during installation.
Identify whether you need a full kit or just the module
Before ordering, determine whether you need the full ice maker kit or only the replacement module. If your housing is cracked, the motor/auger assembly is failing, or the electronics/control board is damaged, a full replacement kit is the most reliable option because it includes the complete set of mating components. If only a single controllable component is failing (for example, an ice maker module in an otherwise intact housing), you may be able to replace only the module. Use your model label and the part diagram in the replacement listing to ensure the connectors, mounting points, and water inlet features match.
Gather the basic tools and parts
Collect what you’ll need so the swap is clean and fast. Gather a screwdriver set (commonly Phillips and/or Torx), a flat tool for removing covers if applicable, and a towel/pan for drips near the water connection. Have the correct replacement ice maker kit/module ready, including any included screws, gaskets, or mounting hardware. If your model requires it, also grab a new water filter (if it’s overdue) because poor supply can mimic ice maker failure. Keep a flashlight handy so you can see harness clips and routing points clearly.
Safety First: Power, Water, and Food Prep
Unplug the refrigerator and shut off the water supply
Start with power and water secured. Unplug the refrigerator from the wall outlet, then shut off the household water supply valve feeding the refrigerator (typically behind the fridge or in the basement/utility area). If your refrigerator has a dedicated shutoff valve, turn it fully clockwise until it stops. This prevents accidental water discharge when you disconnect the inlet line or loosen the ice maker assembly. After shutting off the water, leave the freezer door closed as much as possible to protect food temperature while you work.
Protect the freezer floor and nearby parts
Prepare for drips and avoid cracking plastic liners. Lay a dry towel or absorbent pad on the freezer floor under the ice maker area, and clear any items that could fall or get wet. Use a gentle hand when removing covers so you don’t stress brittle tabs. If your ice maker sits near wiring harness routing, keep the harness elevated and avoid yanking—strain can damage the connector. Protecting the liner matters because a cracked freezer wall can create airflow leaks and ongoing frost problems.
Move food and ice bin contents out of the way
Clear the immediate work zone so you can access screws and connectors without forcing anything. Remove the ice bin and any trays or internal covers that block access (set them on a towel). Move nearby food containers away from the ice maker to prevent them from sliding when you pull the assembly forward. If there’s existing ice inside the mold area, let it loosen naturally or remove safely as instructed by your part kit instructions; don’t chip at frozen components with metal tools. Keeping the area open also helps you see the wiring harness clip points clearly.
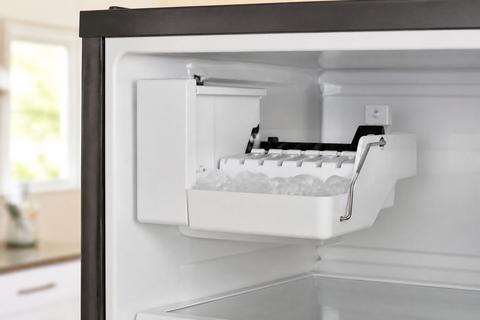
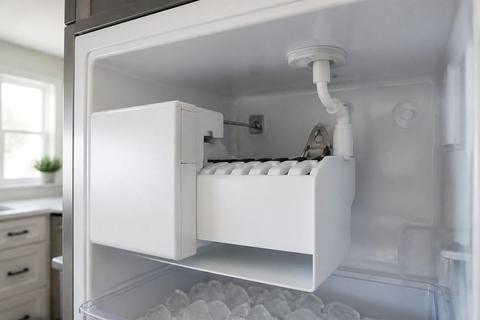
Remove the Old Whirlpool Ice Maker
Take off the cover and mounting hardware
Access the ice maker assembly by removing the interior cover(s) that expose it. Remove the screws holding the mounting cover or ice maker frame using the correct driver size, and set hardware aside in a small container so no screws get lost. For some Whirlpool models, the cover is retained by clips—use steady finger pressure or a plastic pry tool to avoid breaking tabs. Once the cover is off, locate the full ice maker mounting points. Remove the ice maker mounting screws so the assembly can be lifted out without flexing the freezer liner.
Disconnect the wiring harness carefully
Before lifting the module, disconnect the wiring harness. Find the connector at the rear or side of the ice maker and press the release tab on the plug—pull on the connector body, not the wires. If the connector feels stuck, stop and recheck for a secondary latch or plastic locking clip. Many ice makers use keyed plugs so they won’t reconnect easily if rotated—note the plug orientation before pulling it apart. Proper handling prevents cracked housings and bent pins, which can cause intermittent “no ice” issues after installation.
Release the ice maker assembly without cracking the liner
Loosen and remove the ice maker assembly with controlled movement. Support the module with one hand as you free the mounting points with the other, then slide or lift it straight out according to your model’s fit. Avoid twisting—twisting stresses the surrounding liner and mounting brackets. If the unit resists, recheck for missed screws or a water line clip that’s still holding it. Once free, set the old ice maker on a towel so any residual water doesn’t run across the freezer floor.
Install the New Ice Maker Assembly
Position the replacement unit in the same orientation
Install the new ice maker so it sits exactly as the old one did. Position the replacement unit in the same orientation relative to the freezer wall, mounting rails, and any water inlet path. Align mounting holes before tightening screws so you don’t force the plastic housing into place. If your new kit includes a gasket or spacer, install it exactly where the old assembly sealed—do not omit included seals. Keep the wiring routing similar to the original path so the harness rests flat and isn’t pinched behind the cover.
Reconnect wiring and secure the mounting screws
Reconnect the wiring harness by aligning the keyed connector and pressing it in until the release tab clicks or sits fully seated. Next, reinstall the mounting screws and tighten them firmly but without overtorquing the plastic tabs. Recheck that the harness has enough slack to move with minor assembly alignment changes but isn’t taut. Secure any grounding points or additional clips included with the kit. Proper connector seating prevents common symptoms like the ice maker cycling but never advancing to water fill.
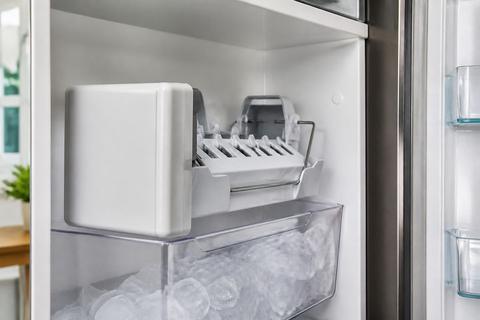
Reinstall the ice bin, tray, and any covers
Reinstall components in the correct order so the ice maker can detect and eject cubes properly. Place the ice bin back into position and make sure it sits level and fully engaged with any sensor or chute connection. If your model includes a tray, splash cover, or delivery chute cover, reinstall those parts so water and cubes channel correctly into the bin. Finally, reinstall the interior cover and tighten its screws. This step matters because misaligned covers can block cube ejection or disrupt the shutoff arm’s movement.
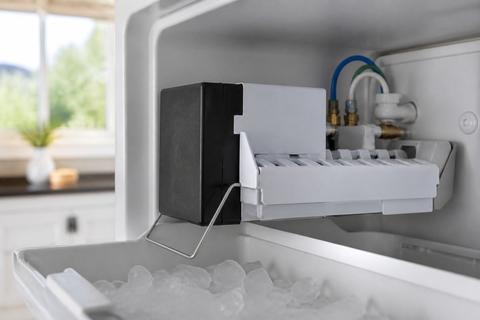
Restore Water Flow and Test the New Unit
Turn the water back on and check for leaks
Turn the water supply back on slowly, then inspect the connection area under and around the ice maker for any drips or moisture. Look for wet spots on the water line connection, inlet fitting, or behind the freezer panel where water may pool unnoticed. If your model has an access panel or rear water line cover, check that area too. Wipe dry with a towel, then wait a few minutes while observing for renewed moisture. If you see water leaking, shut the water back off immediately and reseat the connection before continuing.
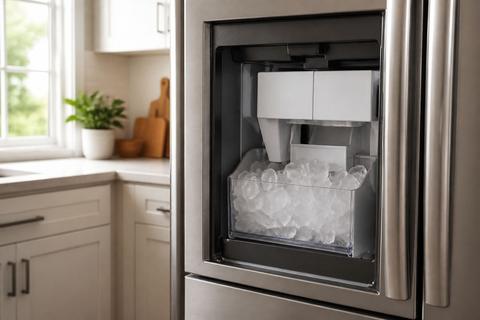
Run the first harvest cycle and discard the first batch of ice
After installation, run the first harvest cycle and discard the first batch of ice. Whirlpool recommends discarding the first 2–3 full batches after installing a new ice maker, after a long shutoff, or after replacing the water filter, because initial cubes can be small, hollow, or off-tasting. Depending on your model, the ice maker may start automatically within the production window once the freezer is at temperature. If your model includes a manual test mode, follow the kit guidance; otherwise, allow the normal cycle to occur and discard the initial output.
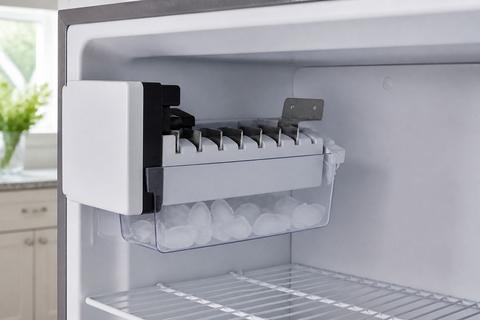
Verify cube shape, fill level, and ejector movement
Verify the ice maker’s performance using clear indicators: cube size/shape, fill level, and ejector movement. In a correct cycle, the mold fills with water to the proper level, cubes freeze to a consistent shape, and the ejector arm advances to release cubes into the bin. If the cubes are thin, small, or partially frozen, check for a restricted or frozen fill tube and confirm the freezer temperature is in the 0–5°F range. Also confirm the shutoff arm/feeler is in the ON position—on many Whirlpool models, lifting it turns the ice maker OFF and lowering it turns it ON.
Troubleshooting After Replacement
Fix common issues like no fill, no eject, or thin cubes
If your new Whirlpool ice maker runs but doesn’t produce ice correctly, isolate the failure mode. No fill means water isn’t reaching the mold; no eject means cubes aren’t being released; thin cubes often indicate incomplete freezing or insufficient water flow. Start by checking the ice maker shutoff arm/feeler position—many “no ice” complaints come from the arm being left up (OFF). Next, look for a frozen fill tube (the thin tube feeding water into the ice mold) and thaw it with a hair dryer set to warm or by running warm water over the exterior portion of the tube area safely. Then reattempt harvest after the system stabilizes.
Check the water inlet valve, shutoff arm, and freezer temperature
For no-ice or slow-ice issues, check the three most common upstream causes. First, confirm the shutoff arm is lowered/ON so the ice maker can cycle; many models will not fill or eject when the arm is in the raised position. Second, verify freezer temperature is correct: the ice maker needs about 0–5°F to freeze properly; if the freezer is too warm, cubes come out hollow or melt/never harden. Third, if water still won’t fill the mold, inspect for a water inlet valve supply issue (loose connector, incorrect water line connection, or restricted flow). A frozen water line can also mimic a dead inlet valve.
Know when the problem is not the ice maker itself
Not every “ice maker problem” is caused by the ice maker. Slow ice, small cubes, or repeated no-dispense often trace to a clogged or overdue water filter or low household water pressure. Whirlpool recommends replacing filters on schedule (EveryDrop filters are rated around 6 months / 200 gallons) and aiming for roughly 35–120 psi at the supply line. If the filter is old, replace it before concluding the new ice maker is defective. Also consider a disconnected or partially blocked water line behind the refrigerator, and don’t ignore freezer airflow—an obstructed vent can keep the mold area too warm.
When to Replace vs. Repair
Signs the ice maker is worth swapping instead of repairing
Replace the ice maker when the core assembly is failing in ways that are hard to fix reliably. Clear signs include recurring motor/eject failures, repeated fill problems even after verifying the shutoff arm and thawing any frozen fill tube, or electrical issues that return after component swaps. If the housing is damaged (warped mounts, cracked plastic, broken injector parts), repair becomes unreliable because the mating seal and alignment will never be perfect. Also swap instead of repair when your diagnostics point to the ice maker module’s electronics, because chasing small board/sensor failures can cost more than a matched replacement kit.
Cost and time factors for DIY replacement
DIY replacement is most cost-effective when the part is accessible and the swap follows a straightforward harness-and-mount design. Your biggest time cost is disassembly and careful reassembly without breaking clips or cracking liners—plan for about an hour for a basic modular replacement, plus any time needed for the freezer to reach temperature. If you already confirmed the correct model number and you have the needed tools, cost stays close to the price of the unit. If the problem turns out to be the water filter or water pressure, replacing the ice maker won’t solve it—address those upstream factors first if you haven’t yet.
When to call a technician
Call a technician when you see persistent leaks, electrical burning or melted connector evidence, or repeated no-fill after replacing obvious supply items like the filter and confirming correct freezer temperature. If your water connection requires specialized fittings or you don’t have access to the shutoff valve, professional help prevents water damage. Also get assistance if the ice maker module still won’t cycle after a correct installation and you’ve confirmed the shutoff arm is ON, wiring is seated, and the fill tube isn’t frozen. Technicians can test the inlet valve and control functions more precisely and safely.
Frequently Asked Questions
How do I know if my Whirlpool ice maker needs replacement or just a reset?
If the ice maker has power but still will not fill, freeze, or eject after basic checks, replacement may be smarter than repeated resets. Start by confirming the water supply is turned on and the shutoff arm/feeler is in the ON position (many Whirlpool models stop ice when the arm is lifted up). Check freezer temperature for the 0–5°F range because warm temps cause thin cubes and “no eject” behavior. If you’ve verified water flow, thawed a frozen fill tube, and the new unit still fails to harvest, then replacement is the next step.
Do I need the exact Whirlpool model number for a replacement ice maker?
Yes, the model number matters because it ensures the replacement matches your refrigerator’s mounting points, wiring harness style, and water fill design. A near-match may physically fit but still fail to connect correctly or deliver water to the mold. Use the model label inside the refrigerator, then match the ice maker part number shown for your exact model. This avoids wasted purchases and reduces install time spent correcting mismatched connectors or brackets.
Can I replace a Whirlpool ice maker myself?
In many cases, yes—if the part is accessible and you can safely unplug the refrigerator and shut off the water supply. A basic swap is manageable with common hand tools like screwdrivers and without specialty plumbing work. Follow the correct order: remove covers, disconnect the harness, secure mounting screws, reconnect the line, then reinstall the bin and covers. If you notice melted wiring, persistent leaks, or you can’t safely reach the shutoff valve, stop and get professional help.
Why does the new ice maker still not make ice after installation?
The issue can be elsewhere even after a correct installation. Common causes include the water inlet valve not receiving enough water, a water line connector left loose, freezer temperature still too warm, or the shutoff arm left in the OFF (up) position. Also remember that ice production won’t be immediate—run a harvest cycle and allow the system time to complete freezing. If water still won’t reach the mold, check for a frozen fill tube and clear it before assuming the ice maker is defective.
Should I replace the whole ice maker kit or only one part?
If the housing, motor, or electronics are failing, a full replacement kit is often the most reliable option because it restores the complete set of mating parts and controls. If the rest of the assembly is in good condition and only a single module component is the clear culprit, targeted repair or module replacement can be enough. Use the replacement listing and part diagram for your exact model to decide—when alignment, seals, or electrical control components are uncertain, choose the full kit to avoid repeat work.