How to Replace and Install a Whirlpool Ice Maker
If your Whirlpool ice maker stopped producing ice—or only makes small batches—you’re probably trying to decide whether to replace the ice maker itself or fix something upstream. How to Replace and Install a Whirlpool Ice Maker comes down to matching the right part, restoring correct water flow, and getting the freezer ready for ice production. Start with the most likely failure point, then follow the model- or component-specific steps so the new unit can actually fill, harvest, and dispense ice.
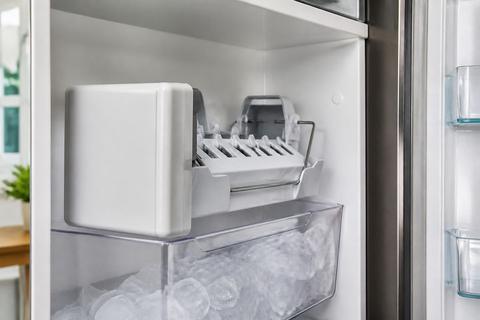
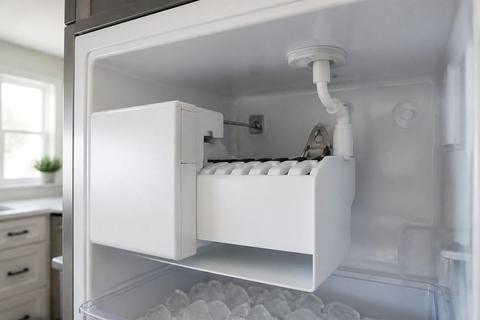
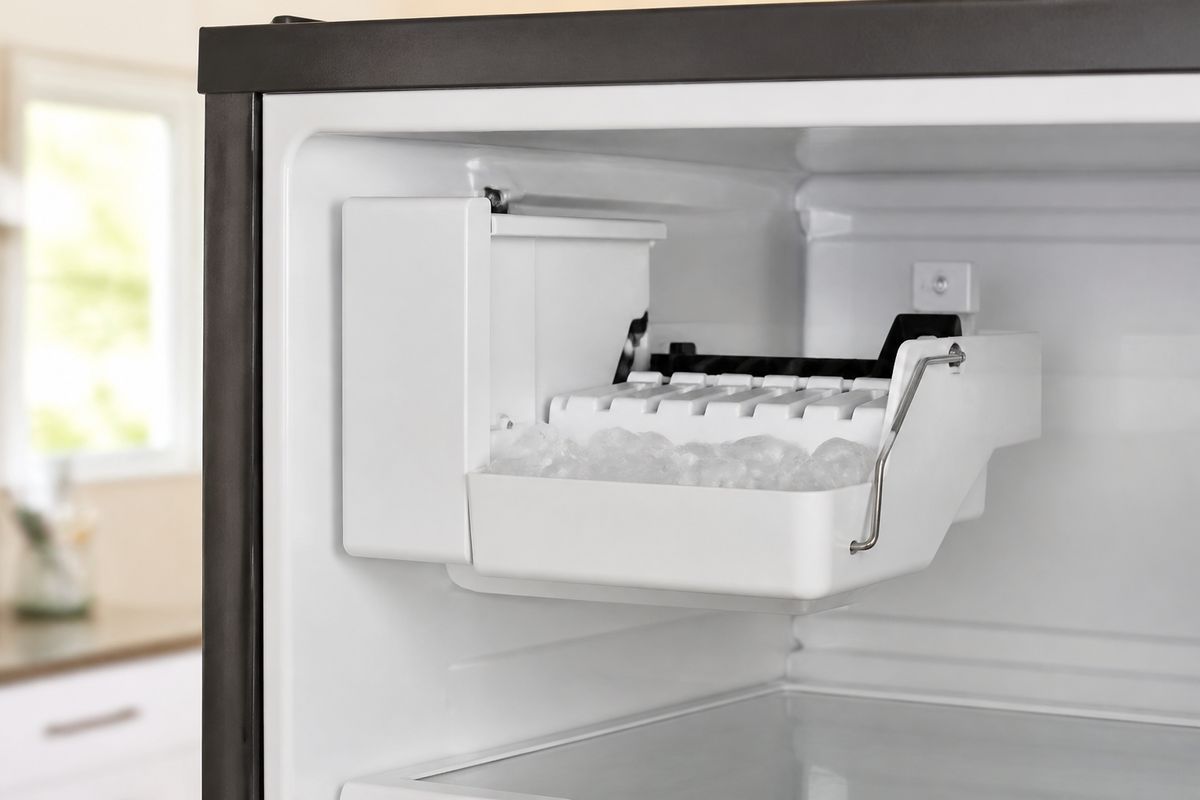
How to Install or Replace a Whirlpool Freezer Ice Maker
Before you buy parts or start pulling the ice maker out, confirm you’re dealing with an inline/freezer ice maker (not an in-door or French-door ice system). Gather the model number from inside the refrigerator compartment or on the fresh food compartment wall so you can match the correct ice maker style and electrical connector. Also check whether the refrigerator has power-to-ice wiring that’s intact and whether the freezer is cold enough to run the ice cycle.
Then use the dedicated walkthrough for the exact removal approach, wiring/reconnection details, and the fit checks specific to your Whirlpool freezer ice maker design.
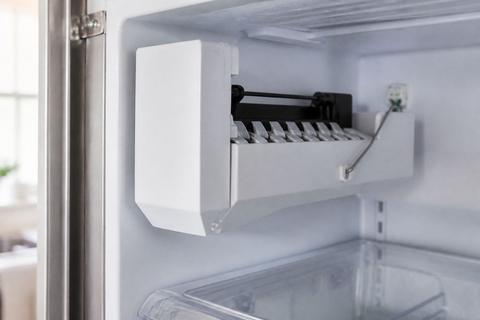
How to Install or Replace a Whirlpool Freezer Ice Maker (Steps)
- Disconnect power to the refrigerator (unplug it or switch off the breaker feeding it).
- Shut off the household water supply to the refrigerator.
- Remove the freezer ice maker cover panels/guards as needed to access the ice maker assembly and wiring harness.
- Disconnect the electrical connector from the ice maker, then disconnect the water feed tube or fitting from the ice maker module.
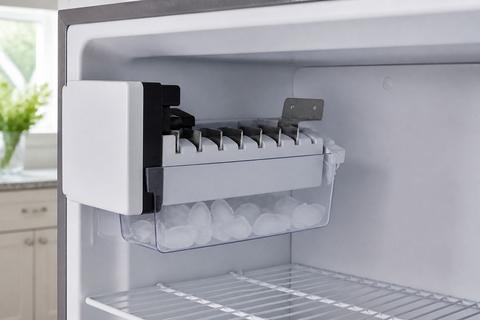
- Pull the existing ice maker out, then compare the mounting points and connector orientation to the replacement.
- Install the new ice maker: mount it securely, reconnect the water line (no kinks, snug fit), and reconnect the electrical harness.
- Restore water and power, then run the ice maker through the normal first-cycle routine (and allow time for production to ramp up).
Full Guide: How to Install or Replace a Whirlpool Freezer Ice Maker
How to Replace a Whirlpool Ice Maker: Basic Swap Steps
If you’re swapping one Whirlpool freezer ice maker for another like-for-like unit, the job follows a straightforward pattern: remove the failed ice maker, reconnect the electrical and water feed, and then verify the ice maker completes a fill/harvest cycle. This overview focuses on the core workflow so you don’t miss a step like leaving the shutoff arm up or reconnecting the water line with a restriction.
For the exact procedure, use the linked walkthrough that matches your refrigerator layout and ice maker type.
How to Replace a Whirlpool Ice Maker: Basic Swap Steps (Steps)
- Unplug the refrigerator (or turn off its breaker).
- Shut off the refrigerator’s water supply.
- Locate the ice maker in the freezer and turn OFF the ice maker if your model has a wire feeler/shutoff arm (lift to OFF, lower to ON).
- Remove the ice maker assembly (disconnect the electrical plug and the water line before fully removing it).
- Install the new ice maker in the same orientation, then reconnect:
- the electrical harness, and
- the water feed line/tubing (ensure it’s fully seated and not kinked).
- Turn the ice maker back ON (lower the feeler/shutoff arm if applicable).
- Restore water and power.
- Allow roughly 24 hours for ice production to return to normal rate after replacement.
Full Guide: How to Replace a Whirlpool Ice Maker: Basic Swap Steps
Replace Whirlpool Ice Maker Models W10190966 and W10873791
Model matching matters with Whirlpool ice makers because hardware, connector styles, and water-routing paths differ between part numbers—even when they look similar. If you’re replacing W10190966 or W10873791, confirm the replacement part number exactly before you open the freezer panel and start disconnecting lines. An incorrect match can lead to poor water fill, improper mounting alignment, or a connector that doesn’t lock fully.
Use the model-specific article for compatibility notes, fit details, and the exact replacement considerations for these two Whirlpool ice maker models.
Replace Whirlpool Ice Maker Models W10190966 and W10873791 (What to Check)
- Record the refrigerator model and the ice maker part number currently installed.
- Confirm the replacement part number is either W10190966 or W10873791 as required for your unit (do not substitute a “close” part number).
- Compare connector shape and mounting screw locations between the old and new ice maker before attaching water.
- Check the shutoff arm position after installation; the arm must be in the correct ON position for the new assembly to run.
- After reassembly, allow ice production to ramp up over the next day so you can see a full harvest cycle.
Full Guide: Replace Whirlpool Ice Maker Models W10190966 and W10873791
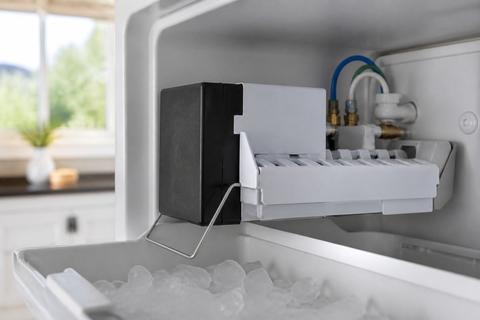
How to Replace the Whirlpool Ice Maker Water Inlet Valve
If your Whirlpool ice maker isn’t producing ice consistently, the ice maker itself is not the only suspect. The water inlet valve controls when water flows into the ice maker’s fill path. If the valve is weak, stuck, or not opening long enough, the ice maker can run through cycles without getting enough water.
Replace the water inlet valve when your symptom points to a water supply failure rather than a harvest problem, then follow the dedicated valve replacement instructions for correct wiring and tubing connections.
How to Replace the Whirlpool Ice Maker Water Inlet Valve (Steps)
- Unplug the refrigerator and shut off the water supply.
- Access the water inlet valve location behind the grille or inside the rear panel area (varies by model).
- Disconnect the valve electrical connector.
- Disconnect the water lines from the valve (have a towel ready to catch residual water).
- Install the new inlet valve, reconnect water tubing firmly (no kinks, correct seating), and reconnect the electrical plug.
- Restore water supply and power.
- Let the ice maker run and observe that it fills normally during a harvest cycle.
Full Guide: How to Replace the Whirlpool Ice Maker Water Inlet Valve
How to Replace and Defrost the Whirlpool Ice Maker Water Line
A restricted or frozen water path can stop an ice maker from producing ice even when the ice maker and inlet valve are functional. The most common causes are a frozen fill tube (the thin tube feeding the ice mold), a kinked water line, or debris that restricts flow. When the water can’t reach the ice maker fill area, you’ll see partial batches or no ice at all.
Use the water-line replacement/defrost article for the exact sequence to thaw, replace damaged sections, and reassemble without leaks or restrictions.
How to Replace and Defrost the Whirlpool Ice Maker Water Line (Steps)
- Unplug the refrigerator and shut off the water supply.
- Locate the ice maker fill tube/water line and inspect for kinks, crushed sections, or ice buildup.
- Thaw a frozen fill tube by warming it until water can move freely; use a hair dryer on low heat or carefully apply warm water to the affected section.
- Once thawed, check that water can flow to the ice maker feed path without obstruction.
- If the line is cracked or kinked beyond repair, replace the water line section using the correct tubing route.
- Reconnect all fittings/tubing, making sure the line is routed straight with no sharp bends.
- Restore water and power, then allow ice production to ramp up over the next day.
Full Guide: How to Replace and Defrost the Whirlpool Ice Maker Water Line
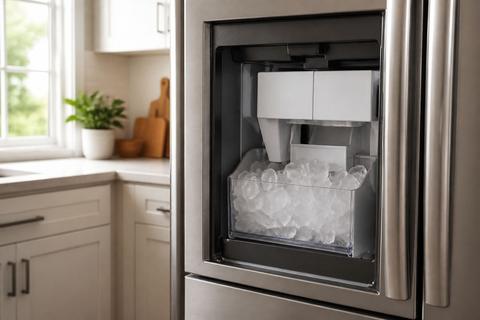
How to Set Up a Whirlpool In-Door or French-Door Ice Maker
In-door and French-door Whirlpool ice makers have setup steps that go beyond simply swapping an ice maker module. Your ice system may require enabling ice features, confirming the correct ice type setting, and making sure the ice maker is allowed to harvest and dispense based on the door/controls configuration. If you install a new refrigerator or reconfigure the ice system, incomplete setup can look like an equipment failure.
Follow the in-door/French-door setup article for the exact activation steps, feature checks, and any model-specific options that must be turned on.
How to Set Up a Whirlpool In-Door or French-Door Ice Maker (Steps)
- Turn power on to the refrigerator and locate the ice controls in the dispenser/panel area.
- Ensure ice is set to ON (or the ice mode is selected as Ice / Cubed / appropriate option for your model).
- Confirm the ice storage bin is seated correctly if your unit uses a removable bin component.
- Check for the correct water supply connection behind the refrigerator (no kinks and the connection is fully seated).
- Run the ice maker’s startup/initial fill routine per the control prompts (on many models this begins after activation).
- Discard the first 2–3 full batches of ice after install or after replacing the water filter, since early cubes can be small, hollow, or off-tasting.
- Allow about 24 hours for ice production to reach a normal rate.
Full Guide: How to Set Up a Whirlpool In-Door or French-Door Ice Maker
How to Level a New Whirlpool Refrigerator for Ice Performance
A new or recently moved refrigerator can perform poorly at making ice if it isn’t level. Leveling affects water flow to the ice maker and dispenser behavior; if the unit is tilted, water delivery and ice production can suffer. Proper leveling also supports door seal performance, which helps keep freezer temperatures in the correct range for ice production.
Leveling isn’t complicated, but it must be done correctly with the right points of adjustment—follow the linked leveling article for the precise steps and what to look for after adjustment.
How to Level a New Whirlpool Refrigerator for Ice Performance (Steps)
- Place a level on the refrigerator’s top surface (and re-check after each adjustment).
- Adjust the front leveling legs (turn the legs to raise or lower the front) until the refrigerator is level side-to-side and front-to-back.
- Ensure the refrigerator doors close fully and the seals contact the cabinet evenly.
- After leveling, confirm the freezer temperature is in the ice-making range (about 0–5°F).
- Allow up to 24 hours for ice production to stabilize after leveling, since water delivery and ice cycling need time to catch up.
Frequently Asked Questions
How do I know whether I need to replace the ice maker or another part?
Start with the symptom: if the unit makes little or no ice, check the most common upstream causes before assuming the ice maker is bad. These include the freezer temperature not reaching the ice-making range, the ice maker shutoff arm left in the OFF position, restricted water flow from a clogged or restricted water filter, a frozen or kinked water line, or a failing water inlet valve. Then follow the most relevant replacement/setup section based on what you find.
Can I replace a Whirlpool ice maker myself?
Many Whirlpool ice maker replacements are manageable for a careful DIYer, especially when the replacement matches the original part number and connector style. Always disconnect power and shut off the water before removing the old unit, and route the water line so it has no kinks. Use the appropriate walkthrough for your ice maker type (freezer inline vs in-door/French-door) and your exact model/part number.
Why does my new Whirlpool ice maker still not make ice?
A new ice maker can still fail to produce ice if water never reaches the fill area or the refrigerator isn’t ready to run the cycle. Common causes include a restricted water inlet valve, a frozen fill tube, a kinked/restricted water line, the ice maker shutoff arm left OFF, improper initial setup for in-door/French-door systems, or the refrigerator not leveled so water flow is impaired. Also consider slow water flow from an overdue filter; Whirlpool recommends discarding the first 2–3 full batches after install, but you should still see normal fill and cycling within a day.