Whirlpool Ice Maker Water Line Replacement: Defrost Guide
When your Whirlpool ice maker stops filling—or freezes solid inside the line—water trouble is right behind it. Completing a whirlpool ice maker water line replacement may fix the leak or crack, but frozen components can keep the problem alive. This guide walks you through replacing the line and defrosting it safely, while also covering the common cooling/defrost failures that mimic water-line issues.
For more help, see our How to Replace and Install a Whirlpool Ice Maker guide.
What You’ll Need Before Starting
Tools, tubing, and fittings that match your model
Get the correct parts before you pull the refrigerator out. You’ll need a Whirlpool-compatible ice maker water line (with the right length and connector style), matching shutoff/tee fittings (if your setup uses one), and the proper water filter housing or bypass connector if applicable. For common jobs, have a flashlight, microfiber towels, painter’s tape or a marker for labeling wires/hoses, and a small bucket to catch water. Use a hand towel and a shop vacuum with a crevice tool for spills behind the unit. If your model uses quick-connect fittings, make sure you have the correct release clips or the specific type of coupling required for the inlet valve.
How to shut off water and protect the floor
Start by turning off the refrigerator water supply at the saddle valve or the dedicated shutoff behind the fridge. Then, relieve pressure by dispensing water at the dispenser (or using the ice/water button) until flow slows to a stop. Lay down a heavy towel or waterproof mat in front of the refrigerator and along the pull-out path, because water remains trapped in the line. Keep a bucket ready when disconnecting the tubing. If you find water already pooling under the fridge, stop and inspect the source before proceeding—wet drywall or soaked insulation can indicate a more involved leak path.
When to unplug the refrigerator for safety
Unplugging reduces risk whenever you’re working near electrical connections, the ice maker module, or inlet valve wiring. If you’re only replacing the external supply tubing at the rear, some people keep power on to avoid losing refrigerator settings—but for safety and to prevent accidental shorts, unplug the refrigerator when you remove panels, disconnect the ice maker feed, or access the inlet valve. If your refrigerator stores food that cannot wait, plan for a quick swap: pull the fridge only as far as needed, keep freezer doors closed, and do the water work in one continuous session.
Finding the Water Line and Ice Maker Connections
Locate the supply line at the back of the refrigerator
Pull the refrigerator forward just enough to access the rear service area. Look for the 1/4-inch or ice-maker-specific water tubing that runs from the shutoff to the water inlet area—often near the bottom rear. Use a flashlight to trace the line along the frame and into any strain relief guides. On many Whirlpool models, the tubing routes through a channel or grommet to prevent rubbing and vibration damage. If your fridge has an in-line filter housing, check the tubing connections before the filter and after it, because a failed fitting or kink here can look like an “ice maker line” problem.
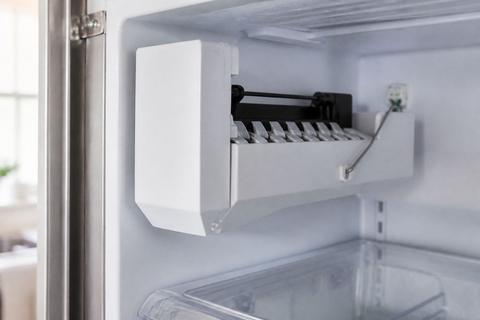
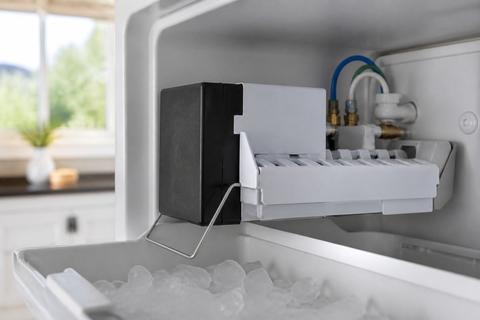
Trace the line to the ice maker inlet valve
Follow the tubing from the rear supply until it reaches the water inlet valve feeding the ice maker. The inlet valve is where the water stops and turns on when the ice maker requests a fill cycle. Locate the exact connection point and note whether the line is held with a clamp, compression fitting, or quick-connect adapter. If you must remove a rear cover or protective shroud, do it carefully so you don’t pinch tubing or damage wiring harnesses. Label the connection orientation if the fitting uses an angle or specific alignment—misalignment can cause leaks or a weak seal.
Check for cracks, kinks, or mineral buildup
Before swapping anything, inspect the entire visible run for damage. Look for flattened sections (kinks), sharp bends, loose clamps, and hairline cracks near the inlet valve and where the tubing turns toward the cabinet. Mineral buildup can form crust around connectors or restrict flow, causing partial fills and intermittent freezing. Wipe the line clean so you can see what’s actually there. If the line feels hard or brittle near the ice maker connection, replace that section with the correct matching tubing instead of attempting to “patch” it.
Replacing the Whirlpool Ice Maker Water Line
Remove the old line without damaging the cabinet or tubing
After shutting off the water and unplugging for safety, remove the old tubing carefully at both ends. Start at the ice maker inlet valve: release the quick-connect fitting (using the correct release mechanism if your model has one) or loosen the compression fitting without twisting the valve body. Next, disconnect the tubing from the rear shutoff side or filter connection. When pulling the fridge back out, keep the tubing guided so you don’t scrape it against the cabinet edge. If the line is glued into a channel with clips, remove the clips rather than forcing the tubing free.
Install the new line and secure each connection
Install the new Whirlpool-compatible water line using the same route as the old one. Ensure the tubing isn’t rubbing on metal edges; run it through any existing grommets or clip points. At the inlet valve, seat the fitting fully—quick-connect should click/lock; compression fittings must be tightened snugly without over-torquing plastic or damaging threads. Repeat at the rear supply connection. After connecting, inspect visually that the line has gentle bends and no tight loops. Wipe away any excess moisture and keep towels under the valve area.
Test for leaks before restoring full water flow
Turn the water shutoff back on slowly. Then check every connection point—rear filter/shutoff, inlet valve, and any inline adapters—for wetness or drips. If you see a seep, turn the shutoff off immediately and correct the fitting before continuing. For the dispenser flow test, use the water dispenser after connections are dry enough to confirm water can move through. Once you’ve confirmed water flow without leaks, return panels/shrouds you removed so tubing stays protected from vibration and future freezing.
Defrosting Frozen Lines and Ice Maker Components
Safe ways to thaw a frozen water line
If water flow stops due to a frozen section (common in the thin fill tube feeding the ice mold), thaw gently and locally. Use a hair dryer set to low/medium heat held a few inches away, warming the frozen area gradually—avoid melting or warping plastic tubing. Alternatively, place a warm, damp cloth near the frozen section and re-wet it as it cools. Do not use open flames, boiling water, or direct high heat; those can damage plastic fittings and nearby components. Once thawed, restore water and check that water begins flowing to the ice maker inlet.
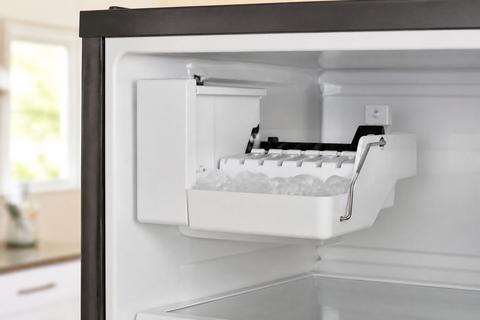
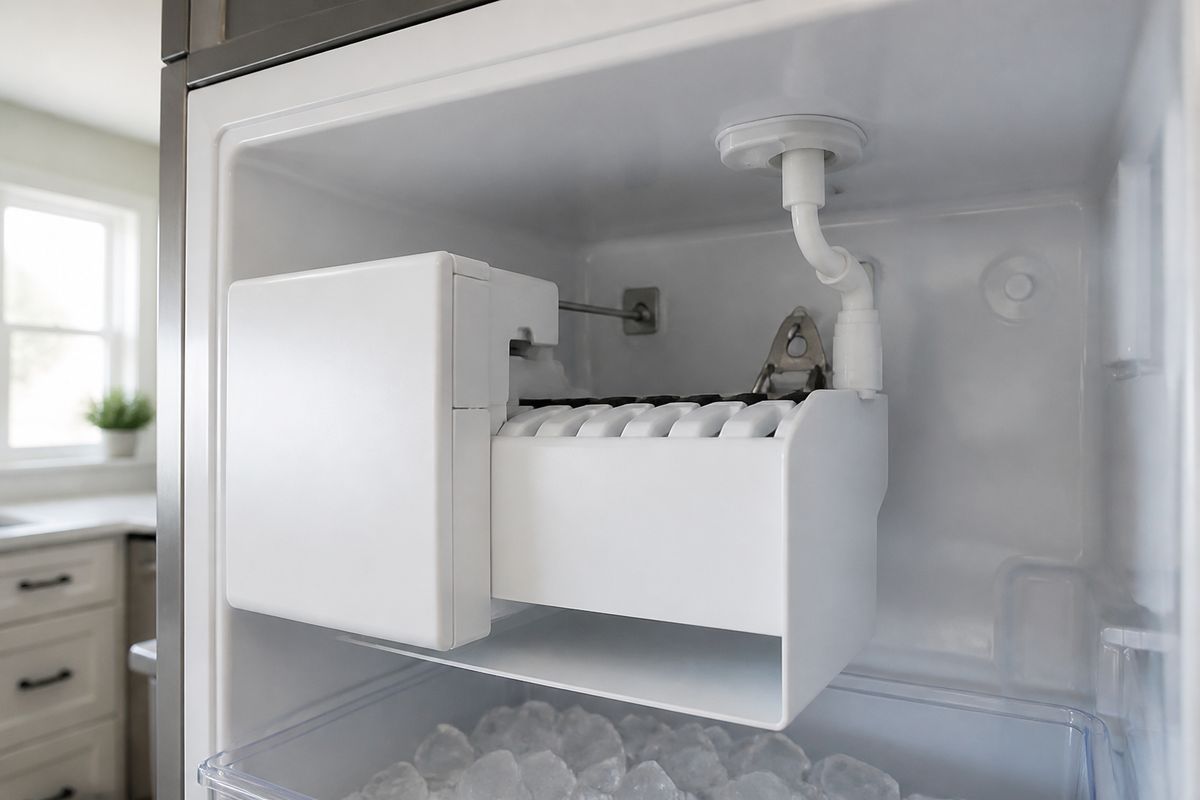
When the ice maker needs manual defrosting too
Sometimes the fill line isn’t the only thing frozen—frost can build inside the ice maker assembly or around the inlet area. If the ice maker is stuck with ice, stop forcing cycles and focus on thawing the ice maker inlet path. Use warm, room-temperature air and careful warming near the inlet. If your model has an accessible ice mold or fill channel, clear frost without scraping plastic surfaces. After thawing, wait for the unit to stabilize before running fresh cycles—frozen airflow paths can keep production from restarting.
Signs the issue is freezing, not a bad line
Freezing problems show patterns: no fill or partial fill that returns after thawing, plus ice maker delays that correlate with cold snaps or temperature changes. Look for frost accumulation near the water inlet valve area, a frozen thin fill tube, or intermittent dripping that stops when temperatures drop further. If a replacement line still freezes quickly, the root cause is not just the tube—it’s usually freezer temperature, airflow, a sealing issue, or defrost system failure. Distinguish freezing from cracking by checking whether water resumes immediately after thawing and warms to consistent flow.
Diagnosing Related Defrost and Cooling Problems
How a failed defrost thermostat can mimic water-line trouble
When defrost fails, frost builds on cooling components and airflow paths, and that can starve the ice maker area of proper heat/airflow. The result is delayed or stopped water fill even though the water line is intact. If you notice persistent frost accumulation around vents or the back panel of the freezer compartment, suspect the defrost thermostat or related defrost components. Replace only after diagnosing with the temperature/condition clues your fridge shows, because “frozen line” symptoms can be a downstream effect of a system that never properly melts accumulated ice.
When the defrost timer may need replacement
If the refrigerator never enters a defrost cycle (or does so inaccurately), the freezer stays frost-choked and the ice maker response can look like a water-line failure. Watch for a pattern: rapid or recurring frost build despite correct freezer set temperature. Many Whirlpool models use a defrost timer that controls when the compressor stops and heating activates; when it fails, the refrigeration loop continues instead of defrosting. If other checks point to defrost timing issues, replace the defrost timer with the exact Whirlpool part for your model number so the ice maker receives the correct thermal conditions.
Why recurring ice buildup can point to a larger refrigerator fault
Recurring ice buildup after you replace a water line means something else is driving freezing: freezer temperature too low, door seals that let warm air in, restricted airflow from blocked vents, or a clogged water filter causing pressure/flow issues that worsen freezing at the inlet. Also consider low household water pressure (Whirlpool spec roughly 35–120 psi) if the inlet struggles to fill evenly, leading to inconsistent water movement. If ice maker operation is still abnormal after line replacement and thawing, focus diagnosis on the refrigeration and defrost system first, not repeated line swaps.
Reconnecting and Testing the Ice Maker
Restore water supply and check the inlet valve
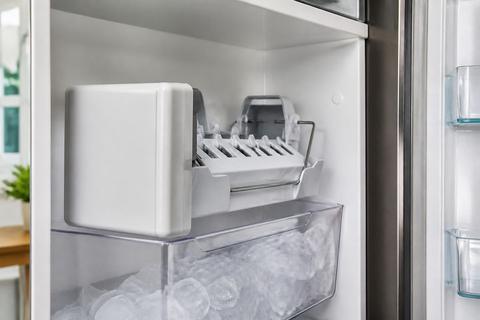
With the line installed and defrost completed, restore water supply by turning the shutoff fully on. Check the inlet valve area for any leaks again after pressurizing. If your model has a water valve screen or filter housing, ensure it’s properly seated. At the ice maker, confirm the water fill path is unobstructed—frost or debris can prevent flow even with a new tube. If your refrigerator has a shutoff arm on the ice maker (often a wire feeler or sliding paddle), place it in the ON position so the unit can begin harvesting and filling.
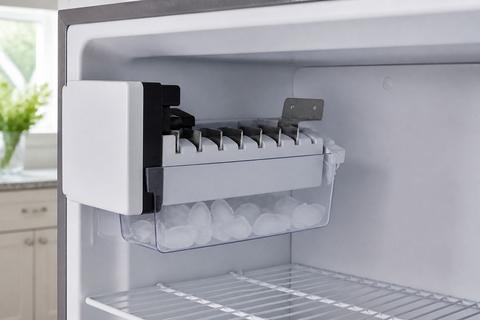
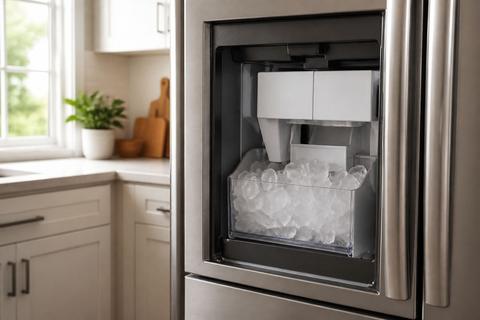
Run a few ice-making cycles and inspect the first cubes
After power and water are restored, let the ice maker complete a few cycles. Many Whirlpool systems produce a batch roughly every 90 minutes to 2 hours once freezer temperature is correct (about 0–5°F). Whirlpool recommends discarding the first 2–3 full batches after install, after a long shutoff, or after replacing the water filter because early cubes can be small, hollow, or off-tasting. During the first cycles, inspect ice size and clarity—small or watery cubes can point to low flow or a clogged filter, while no cubes indicates a persistent fill interruption.
Fix slow fill, no-ice, or leaking issues
If you get slow fill or small cubes, start with the water filter: replace an overdue filter (Whirlpool EveryDrop filters are rated around 6 months / 200 gallons). Next, check household water pressure; low pressure can reduce flow and cause freezing at the inlet. For no-ice, confirm the ice maker shutoff arm is down/ON (or the sliding feeler paddle is in the ON position) and check for blockages in the inlet path. If you see leaks, stop water immediately and re-check the inlet valve fitting and the rear connection—leaks usually come from an improperly seated connection or a kinked line.
Maintenance Tips to Prevent Future Freezing
Keep the freezer at the right temperature
Set the freezer to 0–5°F so the ice maker mold area stays cold enough to freeze ice but not so cold that water sits and freezes early in the feed path. After any repair, give the refrigerator time to stabilize—ice production resumes after about 24 hours for many models once temperatures and water flow are correct. Avoid placing warm items or blocking vents in the freezer compartment, because uneven airflow can create colder pockets that freeze the inlet path. If your freezer frequently runs colder than needed, adjust the thermostat and monitor for consistent behavior over the next day.
Avoid pinched tubing behind the refrigerator
When you move the refrigerator back into place, do not let tubing get trapped behind the cabinet edge or kinked between the unit and the wall. Use the existing tubing clips and guides, and keep bends gentle rather than tight. If your floor is uneven or the fridge rocks, vibration can rub the line against metal and eventually weaken fittings. After pushing the refrigerator back, visually confirm that the tubing run at the rear has slack appropriate for pulling the fridge forward later without stretching the line.
Inspect the line during filter changes and cleanings
During every water filter change, inspect the water line at accessible connections for wetness, corrosion, or signs of mineral crust near fittings. Wipe the area dry and watch for fresh moisture after you pressurize the system. Cleanings can also expose problems: remove dust from vent areas so airflow stays consistent and prevents localized freezing that can affect ice maker inlet conditions. Keep a quick check routine for the inlet area whenever you notice ice production slowing—catching early mineral buildup or a developing kink prevents a full “no ice” event.
Frequently Asked Questions
How do I know if my Whirlpool ice maker water line is frozen or broken?
A frozen line usually stops water flow temporarily, while a broken line often shows visible leaks, cracking, or persistent dripping. If you thaw the frozen section and water returns cleanly, freezing is the likely cause. If water does not return after thawing—or you spot splits, wet spots at fittings, or brittle tubing—inspect for physical damage and check the inlet valve connection. Also pay attention to where frost forms: frost at the inlet or on the thin fill tube strongly points to freezing rather than a simple crack.
Can I replace the Whirlpool ice maker water line myself?
Yes, many homeowners can replace the ice maker water line themselves if they can safely shut off water, access the rear of the refrigerator, and make secure connections. Start by unplugging the refrigerator when you’re disconnecting the ice maker inlet or removing rear panels. Use the correct Whirlpool-compatible line and fittings for your model so the connectors seal properly. If the line is routed through tight cabinetry, if you find damaged fittings that require special adapters, or if you discover electrical/wiring interference, hiring a professional reduces the risk of leaks and improper routing.
What is the safest way to defrost a Whirlpool ice maker water line?
Use gentle room-temperature air or a warm cloth near the frozen section. A hair dryer on low/medium held a few inches away works well for thawing the frozen area without overheating nearby plastic. Keep the heat localized and do not force water flow until the frozen section is fully thawed. Avoid open flames, boiling water, or high direct heat because plastic tubing and connectors can deform or crack. Once thawed, restore water slowly and watch for consistent fill toward the ice maker inlet.
Could a defrost thermostat cause ice maker problems?
Yes. If the refrigerator is not defrosting properly, frost builds around cooling components and can block airflow, changing temperatures where the ice maker feed and inlet area rely on normal thermal conditions. That can affect ice production and make the water line seem like the culprit. If you repeatedly see frost buildup on freezer surfaces or the back panel alongside ice maker symptoms, inspect the defrost system—starting with the defrost thermostat and related components—before replacing tubing again.
Why does my Whirlpool ice maker keep freezing up after replacement?
Recurring freezing after a new line typically means the root cause is elsewhere: freezer temperature too low, poor door sealing, restricted airflow, a clogged water filter, low household water pressure, or a defrost system problem that never melts frost correctly. If the inlet path freezes quickly even with fresh tubing, focus on refrigeration and defrost performance first. Also confirm the ice maker shutoff arm is in the ON position so it cycles correctly and doesn’t sit with water where it can freeze.