Whirlpool Ice Maker Water Inlet Valve Replacement Guide

If your Whirlpool fridge is running but the ice maker won’t fill, you’re likely dealing with a failed water path. Whirlpool ice maker water inlet valve replacement is one of the most common fixes when water isn’t entering the ice mold on schedule. Before you buy parts, you can diagnose the symptoms, rule out simple clogs, and replace the valve with the correct Whirlpool-compatible part for your model.
For more help, see our How to Replace and Install a Whirlpool Ice Maker guide.
How the Whirlpool Ice Maker Water Inlet Valve Works
What the inlet valve does during each fill cycle
The water inlet valve controls when pressurized water flows from your household supply into the ice maker’s fill tube. During a harvest/fill sequence, the ice maker control sends power to the valve solenoid; the solenoid opens a small internal port, allowing water to run only for the timed fill amount. When the ice maker completes the fill, power is removed and the valve closes to stop the water stream and prevent overflow into the freezer. If the valve sticks, opens weakly, or won’t open at all, you’ll see slow/no filling and a knock-on effect on ice production.
How to tell the valve from the ice maker assembly
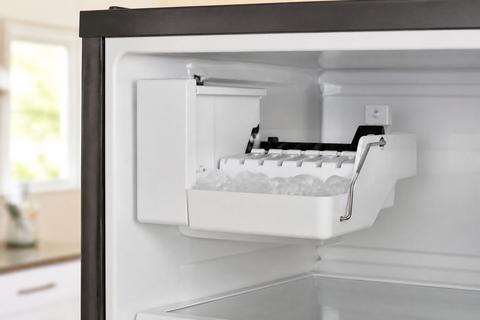
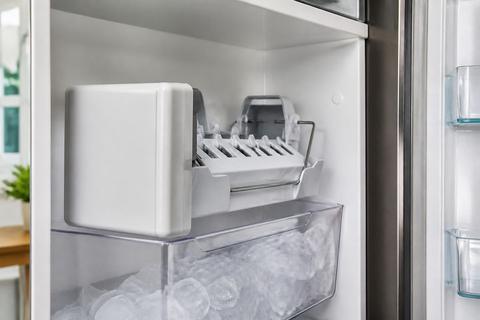
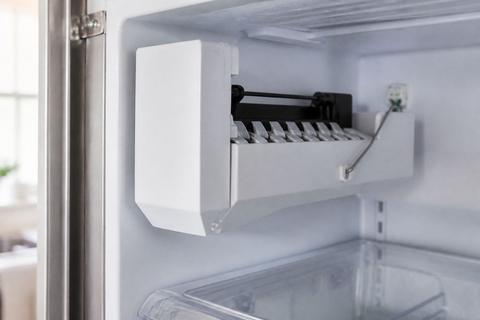
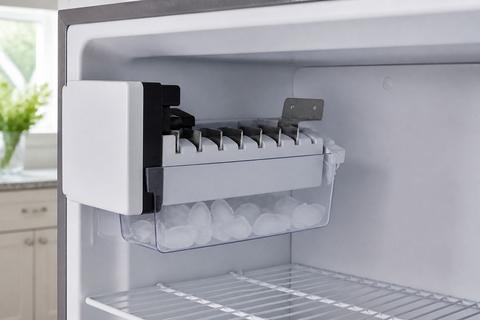
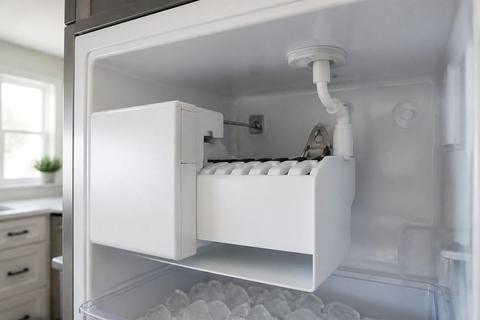
The ice maker assembly is the whole unit that includes the ice mold and the motor/harvest mechanism (and controls depending on model). The water inlet valve is separate: it has an electrical connector and two water connections (inlet/outlet) and is usually mounted at the back or lower rear area where water lines run. To identify it, locate the water line coming from the refrigerator’s water filter area and follow it until you reach the component with the solenoid and water fittings. If you’re staring at a modular ice maker, the valve will still be downstream of the household plumbing, not inside the ice mold housing.
Where the valve is usually located on Whirlpool refrigerators
Most Whirlpool refrigerator ice maker valves are located at the rear service area behind the refrigerator, near the bottom back panel where the water lines and filter plumbing connect. On some layouts, you may access the valve from a lower access panel without removing the entire back cover. The valve will be in the water path feeding the ice maker—between the filter inlet plumbing and the line that runs up to the ice maker. If you have a left/right-side water line route, still trace the plumbing first; the valve’s location depends on the model’s cabinet routing rather than the ice maker style alone.
Signs the Valve Is Failing
Low or no ice production
Low or no ice is the most common symptom when the inlet valve can’t deliver water to the ice mold. In a healthy system, the ice maker fills during the timed cycle; if the valve doesn’t open, the ice mold remains dry and cubes never form. In a partial failure, the valve may open weakly or intermittently, leading to reduced output. Check also that the ice maker is turned on (many models use a wire feeler arm or sliding paddle that must be down/on for production). After confirming power and ice maker mode, valve failure becomes a strong suspect if water never reaches the fill tube.
Ice cubes that are too small or misshapen
Small cubes, hollow cubes, and misshapen ice often point to insufficient water volume during each fill. If the inlet valve opens but restricts flow—due to sediment, internal wear, or a sticking solenoid—the ice mold doesn’t receive the proper timed quantity. Another clue is inconsistent cube fill: one batch may produce barely formed cubes while later cycles produce less noticeable but still undersized ice. If you replaced a water filter recently and noticed the change right after, the valve could be restricting flow alongside other factors, but flow restriction from clogging is still a primary cause worth addressing.
Water dripping, buzzing, or repeated filling
A failing valve can also behave “wrong” after it should close. Water dripping from the ice maker fill area, persistent moisture around the rear plumbing, or water in the wrong place indicates the valve may be leaking internally. Buzzing at the back of the refrigerator is a common sign the solenoid is trying to actuate—yet it may be stuck or clogged. Repeated filling or water continuing longer than expected indicates the valve isn’t closing properly, which can cause overflow, wet ice, or water pooling.
Before You Replace Anything
Rule out frozen fill tubes and clogged filters
A frozen fill tube is a frequent cause of no or partial ice that can look identical to valve failure. Locate the thin fill tube leading into the ice maker; if it’s iced over, thaw it and restore flow. Use a hair dryer on low heat or gently warm it—avoid direct scorching and keep water away from electrical parts. Next, check the water filter status: a clogged or overdue filter restricts flow and can mimic valve problems. Replace the filter if it’s past its service life (Whirlpool EveryDrop filters are rated around 6 months / 200 gallons), then run a fresh cycle.
Check the ice maker water level sensor and fill settings
Even with a good valve, an incorrect fill level setting or a faulty water level sensor can prevent normal ice production. Inspect the ice maker controls for the correct ice level or fill setting for your household use and model type. Many Whirlpool models also use an ice maker feeler/arm or an ice thickness adjustment; if it’s set too high, the ice maker can stop calling for water prematurely. If the ice maker has a sensor or control that detects water level or harvest completion, a malfunction can interrupt the fill cycle and lead to symptoms you might incorrectly attribute to the valve.
Confirm the water supply and pressure are adequate
The inlet valve needs adequate water pressure to deliver the proper flow during each timed fill. If your household pressure is low or the supply line is kinked, the valve may attempt to open but water won’t reach the ice mold. For Whirlpool refrigerators, a typical water pressure target is roughly 35–120 psi. Check the supply line for kinks, ensure the shutoff valve is fully open, and confirm there are no household plumbing restrictions. If you recently installed a new filter or line, verify the tubing is seated correctly at both ends.
Tools, Parts, and Safety Prep
Choose the correct Whirlpool-compatible replacement valve
Match the replacement valve to your exact Whirlpool refrigerator model number and confirm the part number in the valve diagram. Use only a Whirlpool-compatible water inlet valve so the electrical connector type, solenoid operation, and water fitting sizes align with your unit’s plumbing. If your model has two ice-making components (some configurations include water dispense and ice supply sharing plumbing), confirm you’re replacing the ice maker supply valve—not a separate dispenser valve. Ordering the wrong valve can force unnecessary returns and delays, and mismatched fittings can cause leaks.
Gather basic tools and protect the freezer area
Plan for the rear access and water-line handling. Gather a screwdriver set (and nut drivers if your model uses them), a towel or shallow pan to catch water drips, and a flashlight for the underside fittings. Protect surfaces inside the freezer area by moving food away from the path where you might need to reach the ice maker connection. Have paper towels and a small bucket ready for any residual water in the lines. If your model uses plastic back panels, use care to avoid cracking tabs—set screws aside in a cup so they don’t get lost.
Shut off water and power safely
Before touching any plumbing, shut off electrical power and water supply to prevent leaks and accidental actuation. Unplug the refrigerator or switch off the dedicated breaker, then close the water shutoff valve behind the fridge (turn fully clockwise). Allow the water line to relieve pressure—open a nearby dispenser or wait a few minutes until dripping stops. Keep the fridge stable and avoid pulling the unit aggressively; many models require careful clearance to access the lower rear service area without damaging the water line.
How to Replace the Water Inlet Valve
Access the rear panel or lower back service area
Start by removing only the panels needed to reach the valve while keeping the refrigerator stable. If the valve is behind the rear cover, remove the back panel screws and lift the cover away from the liner. If your model uses a lower access panel, remove that panel instead to reduce exposure and reach the fittings quicker. Use a flashlight to locate the valve with the electrical connector and two water connections. Once you can clearly see how the line routing runs to the ice maker, you’re ready to disconnect the old valve.
Remove the old valve and label the hoses or wires
Before disconnecting anything, take a quick photo of the valve’s wiring and hose orientation. Label hoses with tape marks so you reinstall them in the same inlet/outlet configuration. Unplug the valve connector by pulling the plug body, not the wires. Then loosen the water line fittings using the correct tool size; be ready for a small amount of water to spill. Remove any bracket screws or retaining clips holding the valve in place. Once free, set the old valve aside and check the hose ends for damage or mineral buildup that may need cleaning.
Install the new valve and reconnect everything securely
Position the new inlet valve into the original mount or bracket so the water lines and electrical connector reach without strain. Reconnect the water lines using the same orientation you labeled—tighten fittings snugly but avoid overtightening that can crack plastic parts or distort seats. Plug the electrical connector back in firmly until it clicks or seats fully. Route the wiring away from sharp edges and moving parts, then reinstall the rear or lower access panel. Double-check that no hoses are kinked and that the valve doesn’t contact cabinet edges or insulation that could wear through over time.
Test the New Valve and Ice Maker
Restore water and power and check for leaks
With the new valve installed, turn the water shutoff valve back on slowly (open fully). Restore power by plugging the refrigerator back in or turning the breaker on, then wait a few minutes while you inspect all fittings. Look specifically at the water line connections at the valve and at the ice maker feed line for any wetness or drips. If your model has a water filter housing nearby, check there too. If you see leakage, shut off water immediately, tighten the fitting carefully, and recheck—don’t continue with an active leak.
Run a fill cycle or diagnostic test
Run the ice maker through a controlled fill cycle to confirm the valve opens and water reaches the ice mold. On many Whirlpool models, you can use the ice maker’s test mode through the control panel menu; follow your refrigerator’s on-screen prompts or the labeled test button/sequence on the unit. If your ice maker has a service/test access port, use the manufacturer method for that module (for modular units, a service jumper at labeled T and H test holes is a common approach only when power is off and you follow the printed marking). The goal is simple: confirm a full timed water fill occurs.
Verify ice production over the next 24 hours
After successful filling, ice production won’t be instant. Many Whirlpool ice makers produce the first batch after a normal startup interval; once water and freezer temperatures are correct (about 0–5 degrees F), you should see regular harvesting. Expect roughly one batch every 90 minutes to 2 hours depending on model and conditions. Over the next 24 hours, watch for a return to normal cube size and consistent batch output. Also ensure the ice maker doesn’t keep filling when it shouldn’t—normal operation means water fills during cycles and then stops cleanly.
When Replacement Does Not Fix the Problem
Signs the ice maker module or control board may be the issue
If the new inlet valve is installed correctly and still no water reaches the ice mold, the issue may be upstream in control logic. Symptoms include the valve not energizing during a requested fill cycle (no buzz or actuation), or ice maker harvest timing that never triggers filling. Faulty ice maker control boards, sensors, or wiring harness issues can prevent the ice maker from calling for water or from completing the fill/harvest sequence. Use your model’s diagnostic test to observe whether the control commands the valve; if it doesn’t, replacing the valve won’t restore normal ice output.
When a blocked line or filter housing is the real cause
Even with a good valve, a blockage can stop water flow. Common culprits include a clogged water filter, sediment lodged in the filter housing, or mineral buildup in the water line leading to the ice maker. If you thaw a frozen fill tube and water flow remains inconsistent, inspect the thin fill tube path for restrictions and look for partial clogs at joints. Replace the filter if you haven’t recently, and re-check that the filter is seated correctly and the housing isn’t cracked or misassembled. Any restriction can reduce water volume enough to create small or hollow cubes.
When to call a qualified appliance technician
Call a qualified technician when you can’t restore normal ice production after replacing the valve and resolving obvious flow problems like frozen tubes and clogged filters. Also call for help if you find damaged copper/lines behind the unit, leaking water inside inaccessible compartments, or repeated valve failures that suggest a wiring or pressure issue. If your model requires specialized diagnostics, or you observe error codes during the built-in test, a technician can interpret them and perform safe repairs. Professional service is also the best choice if you’re not comfortable moving the refrigerator safely for rear access.
Frequently Asked Questions
How do I know if the Whirlpool ice maker water inlet valve is bad?
Common signs include no ice, slow filling, small cubes, buzzing at the back of the fridge, or water leaking into the ice maker when it is not filling. Start by confirming the ice maker is turned ON and that freezer temperature is in the proper range. Then look for water flow problems during the fill cycle; if the valve doesn’t open or flow is weak, the inlet valve is a likely culprit.
Can I replace the Whirlpool ice maker water inlet valve myself?
Yes, many homeowners can do it with basic tools if they can safely shut off the water and power and access the valve. If the unit is hard to reach, you’re seeing persistent leaks, or you can’t safely access the rear service area, a technician may be safer—especially if you’re concerned about damaging water fittings while moving the refrigerator.
Do I need to replace the ice maker if the valve fails?
Not always. The valve may be the only faulty part, but it’s smart to check the fill tube, water filter, water pressure, and ice maker controls before replacing the valve. If the new valve opens but the fill still fails, then the problem may be in the ice maker module, sensor, wiring, or a blockage in the line.
Why is my Whirlpool ice maker valve buzzing but not filling?
Buzzing can mean the solenoid is trying to open but the valve is stuck, clogged with sediment, or not receiving proper water pressure or power. First check water supply/shutoff position and verify your freezer is calling for ice. If pressure is correct and the ice maker is requesting fill, the valve’s internal opening is the most likely cause.
Will a new water inlet valve fix small ice cubes?
It can, if the valve was restricting flow. But small cubes can also come from a clogged filter, low water pressure, or a misadjusted ice maker fill level. Replace the valve only after you’ve ruled out frozen lines and confirm you have adequate water flow and the ice maker’s fill settings are correct.