How to Level a GE Refrigerator for Proper Ice Making
If you’re dealing with slow ice, inconsistent cubes, or an ice maker that won’t shut off, the cause is often closer than you think. Knowing how to level a GE refrigerator can fix ice harvest problems caused by a slight tilt in the cabinet. Even a small difference side-to-side or front-to-back can disrupt water fill, arm movement, and shutoff timing.
For more help, see our Fix GE Ice Maker Water, Leak, and Clog Problems guide.
Why Refrigerator Leveling Affects Ice Production
How an uneven fridge changes water flow and ice harvest
Leveling affects how water flows into the ice maker fill cup and how the ice maker assembly completes each harvest cycle. When a GE refrigerator sits uneven, the freezer’s ice area can receive water inconsistently, causing cubes to freeze unevenly or to arrive in the bin later than expected. A tilt can also change how the feeler arm (wire bail) and shutoff parts sit relative to their stops, which can lead to missed shutdowns or extra production.
Numbered checks you can do quickly:
- Look at the cabinet base for rocking when you gently push the refrigerator side-to-side.
- Ensure the freezer section isn’t obviously slanted (doors look misaligned or water drips unevenly near the ice zone).
- Watch ice fill behavior: if cubes arrive in bursts instead of a steady cycle, the water path and harvest timing are being affected.
Symptoms that point to a leveling issue rather than a bad icemaker
Leveling problems show up as mechanical “timing” symptoms: inconsistent ice fill, delayed harvest, or ice production that won’t stop cleanly—without clear signs of electrical failure. If your ice maker powers on normally, but the ice bin fills too fast or the arm doesn’t pause at the right level, the cabinet tilt can be forcing misalignment.
Use these clues to distinguish leveling from a truly bad module:
- Ice production changes right after you move the refrigerator, replace flooring, or adjust the leveling feet.
- Door closing behavior changes (one door hangs open or both doors creep), pointing to a base that isn’t stable.
- You see uneven cube size or clumps forming where water isn’t freezing evenly.
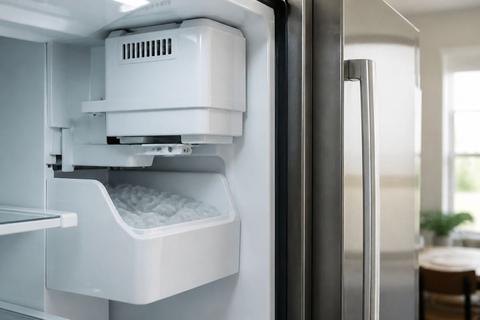
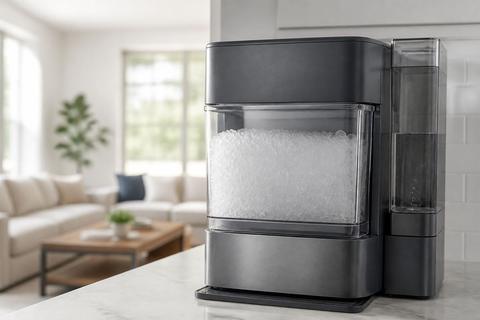
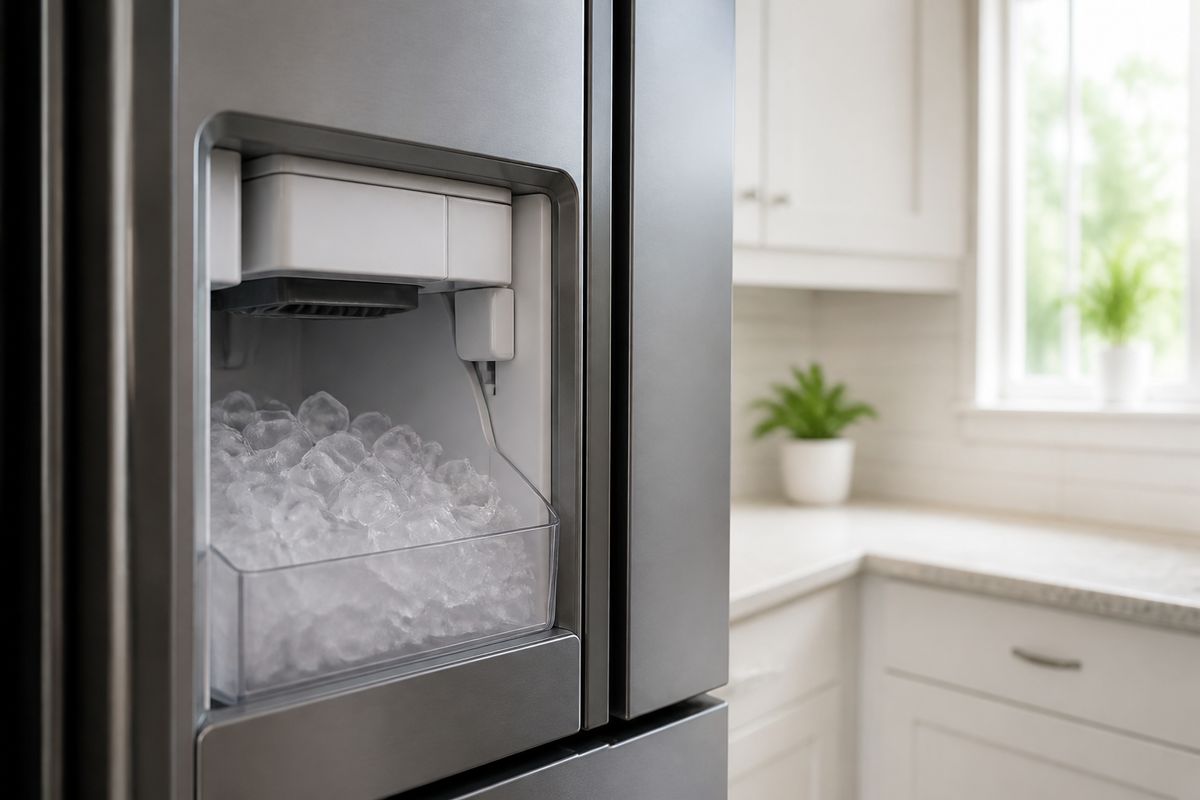
When too much ice means the bin, arm, or sensor is out of position
If you’re seeing a full bin faster than normal—or ice keeps dumping after the bin appears full—the shutoff mechanism is likely not landing correctly. Many GE ice makers stop based on the position of the ice level (through the arm or sensor). When the cabinet is tilted, the arm may reach its stop too early or too late, and the sensor may read the ice level incorrectly.
To confirm this cause:
- Open the freezer and check whether the ice maker feeler arm moves freely through its full range.
- Confirm the shutoff arm returns to its intended position after cycling.
- Inspect for ice in the wrong places: excess ice around the arm area can physically block correct movement.
Find and Check the Level the Right Way
Use a level on the cabinet, not just the doors
To level a GE refrigerator correctly for ice making, measure the cabinet base—not the door edges. Doors can sit slightly off due to hinge adjustment, food load, or gasket compression, and that doesn’t mean the ice maker zone is aligned.
Do this instead:
- Place a bubble or digital level on the refrigerator cabinet side trim or top front rail area where it’s solid (not on the door).
- Check that the refrigerator doesn’t shift when you lightly press the cabinet corners.
- Use the same measurement points on both sides so your readings are consistent.
If the cabinet isn’t stable, the ice maker will fight the tilt even when the doors “look close enough.”
Check side-to-side first, then front-to-back
Start with side-to-side leveling because it most directly affects how the ice bin area and fill cup align with gravity. Once that’s correct, adjust front-to-back so the doors close properly while maintaining stable ice harvesting.
Follow this order:
- Measure side-to-side: place the level across the cabinet and note which side is high.
- Fix side-to-side first by adjusting the feet under the higher side.
- Measure front-to-back by placing the level front-to-rear on the cabinet base area and adjusting the front legs if needed.
This sequence prevents you from “chasing” the door alignment with repeated adjustments that don’t correct the ice maker’s internal alignment.
Look for flooring, shims, or caster issues that throw the fridge off
Most leveling failures come from the surface under the refrigerator. Thick rugs, uneven tile, cracked wood subfloors, or a missing shim can cause a cabinet to sit tilted even when the feet are set properly.
Inspect these common culprits:
- Check for carpet pile compression or uneven flooring thickness under the feet.
- Look for misplaced or missing shims; feet should contact the floor securely.
- If your refrigerator has rollers/casters or adjustable legs, confirm none are caught up or partially off the ground.
Correct the base before you adjust the refrigerator. If the floor shifts, your re-leveling will never stay accurate.
Adjust a GE Refrigerator Safely
Unplug only if needed and clear access to the front grille
Before changing leg height, make sure you can safely access the front adjustment area. You may not need to unplug in every situation, but you should unplug if you can’t pull the unit forward enough to access the leveling legs or front grille safely.
Do this safely:
- Open the freezer and remove items near the ice area so you can access and move the unit without snagging shelves.
- Pull the refrigerator forward slightly only as much as needed to access the front legs and grille.
- Unplug the refrigerator if you must slide it farther or reach behind it; otherwise, keep access focused and avoid stressing the water line.
Raise or lower the front leveling legs in small increments
Make changes one step at a time. Large adjustments quickly overshoot, and a tilted cabinet can worsen ice harvest even if the doors end up “close.”
Use small increments:
- Use a wrench or the correct leveling tool for your feet and adjust the front legs in 1–2 turn increments.
- After each adjustment, measure cabinet level again side-to-side and front-to-back.
- Keep the cabinet stable: if it rocks after adjustment, you need to correct floor contact or shim placement.
When the cabinet is stable, the ice maker’s fill and shutoff mechanisms have the best chance to land correctly.
Recheck door swing and stability after each adjustment
Door alignment is a secondary result of leveling the cabinet. Still, door swing matters because it signals whether the cabinet is sitting correctly at the base and not twisting.
After each leveling change:
- Open both doors and release them gently; they should close smoothly without sticking or uneven resistance.
- Confirm the refrigerator doesn’t rock when you lightly press the front corners.
- Look for twisting: if one door sits higher due to the cabinet tilt, return to cabinet measurements and correct the base first.
Door behavior helps you spot when the cabinet is stable enough to support consistent ice production.
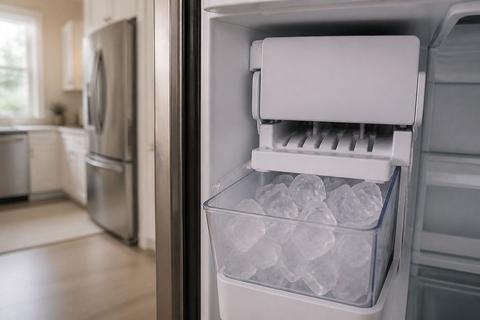
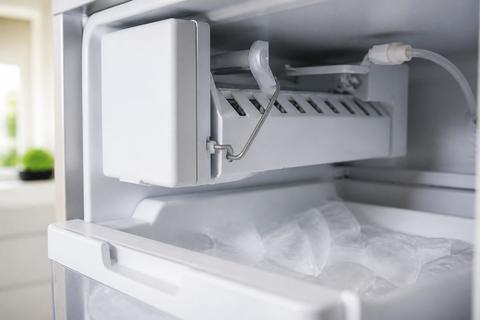
Set the Ice Maker Arm and Shutoff Correctly
Make sure the ice maker arm moves freely and is not blocked
The ice maker arm must move without obstruction for the shutoff control to work. If the arm is physically blocked by ice buildup, a drawer/shelf position, or a storage item, the unit can overproduce or never properly harvest.
Check the arm like this:
- With the freezer door open, locate the ice maker feeler arm (wire bail) and move it carefully through its range.
- Remove any ice that’s stuck near the arm path.
- Ensure no food packages or stored items in the freezer are pushing against the arm area.
If the arm binds, leveling won’t fix the shutdown timing because the control mechanism cannot respond.
Position the shutoff arm so it can stop production at the right time
On many GE ice makers, the arm position controls when production starts and stops. If the arm is held up or sits in the wrong position because of tilt or bin contact, it won’t regulate ice output correctly.
Use these positioning rules:
- Let the arm rest in its natural “down/ready” position after clearing the area.
- If your model has a manual stop position, set it to ON for production—then allow the arm to cycle naturally.
- Watch the arm after harvest: it should move as ice fills and then allow shutoff when the level is reached.
A mispositioned arm can mimic a bad ice maker even when the module is fine.
Test for overfilling, weak shutoff, or a stuck arm
You can confirm the arm and shutoff behavior by observing one controlled cycle. Overfilling points to a shutdown control that isn’t stopping in time; weak shutoff points to a bin/arm position issue, including leveling-induced misalignment.
Try this evaluation:
- Restart the ice maker (if it’s in OFF/stopped mode) so it can begin a new harvest cycle.
- Observe whether ice levels rise and whether the arm moves appropriately during fill.
- Watch for a stuck arm: if it fails to drop when ice accumulates, clear obstruction and correct bin/arm seating.
If overfilling persists even with a free-moving arm, the cabinet alignment and sensor/assembly position must be checked next.
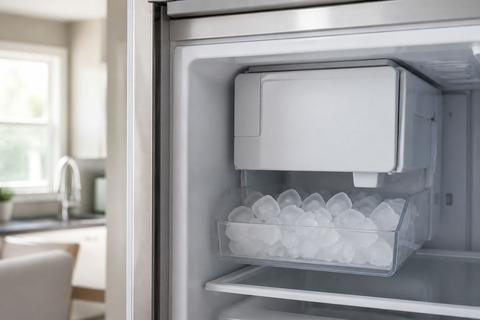
Confirm Proper Water and Ice Maker Operation
Inspect the water line, fill tube, and freezer temperature
Even a perfectly leveled refrigerator won’t make good ice if water delivery is restricted or freezing temps are wrong. GE ice makers rely on a steady water supply and a freezer environment cold enough for fast freezing.
Focus on these items:
- Check the water line connection behind the refrigerator for kinks and ensure it’s not pinched.
- Inspect the fill tube for ice buildup or blockage.
- Set the freezer temperature so ice maker cycling can work effectively (aim for about 0–5°F).
If water can’t reach the fill cup or freeze quickly, the ice maker won’t harvest properly.
Run a test cycle and watch for normal harvest timing
Many GE modular ice makers allow a manual test/harvest cycle that helps you verify the motor and water valve are working. Locate the ice maker control cover and use the model’s test method.
Do this:
- Find the ice maker’s power switch or status LED on the front cover (some models use a recessed test button next to the LED).
- Slide the switch to ON or press the recessed test button to start a manual harvest cycle.
- Observe whether water fills at the correct stage and whether the ice releases during harvest.
If the cycle is abnormal, leveling is not the only issue—water delivery and ice maker function must be addressed.
Compare the bin fill level before and after leveling
A practical way to confirm the impact of leveling is to compare how quickly and consistently the bin fills once the cabinet is corrected. If the bin fill level and arm behavior improve after leveling, you’ve likely fixed the root mechanical alignment issue.
Use this comparison:
- Note the bin fill level (or ice amount) and how long it took to reach that level before adjustment.
- After leveling, allow one full ice-making cycle timeframe and observe the same bin fill condition.
- Compare clumping and uneven cube formation as well as total fill.
A meaningful improvement strongly indicates the tilt was disrupting harvest and shutoff.
When Leveling Is Not the Real Problem
Signs of a faulty ice maker assembly or bin sensor
If leveling fixes stability and door behavior but ice problems persist unchanged, the issue may be internal to the ice maker assembly. Look for symptoms like no ice after correct water delivery, repeated failed harvests, or shutoff that doesn’t respond even when the arm moves freely.
Common “not leveling” clues:
- The ice maker never initiates harvest even with the arm in the ready position.
- The ice maker runs but repeatedly produces low amounts or thin, partially formed cubes.
- The bin sensor/arm control doesn’t trigger shutdown even when ice levels reach expected heights.
In those cases, mechanical alignment isn’t the only factor.
How to rule out a defective part such as WR29X43990
A specific replacement part may be needed when the symptoms match what the part controls—especially when the ice maker harvest behavior is wrong despite stable cabinet leveling. WR29X43990 is associated with GE ice maker assemblies used in certain models; if your unit shows consistent non-production or incorrect harvest behavior, the ice maker assembly could be failing.
To rule it in/out without guessing:
- Confirm water reaches the fill area (water valve and fill tube not blocked).
- Confirm freezer temperature is within the range for ice cycling.
- Confirm the arm/switch control is moving and responding during manual test/harvest.
If the unit fails the same way through a test cycle, part failure becomes the most likely cause.
When to replace a part versus calling for service
Replace parts when you can clearly match symptoms to a controllable component and you can verify the water delivery and arm operation already. Call for service when the problem involves sealed system components, electrical control boards, or when repeated test cycles show complex failures you can’t safely diagnose.
Use this decision checklist:
- Replace the ice maker assembly when harvest fails consistently and mechanical controls (arm, shutoff) behave correctly during manual cycles.
- Replace a clogged filter or water-related component when the issue is starved water flow.
- Call service when you suspect control board failures, wiring issues, or when the ice maker behavior is erratic across multiple cycles.
If safety access is limited behind panels or involves electrical components you can’t verify safely, professional help is the right choice.
Quick Help for Other Brands and Universal Ice Maker Basics
Why ice maker on/off switches differ by brand and model
Different refrigerators place the ice maker control in different locations and with different behaviors. Some brands use a front switch, others use a recessed button, and some ice makers rely on an internal mode that changes only after cycling.
For any model:
- Use the control label on your ice maker cover or the printed diagram inside the freezer compartment.
- If there’s an LED status light, use the documented meanings (green/red or blinking patterns) to interpret mode.
- Don’t assume ON/OFF positions are identical across models.
Accurate control operation is necessary before you blame leveling or the ice maker assembly.
Avoid copying another refrigerator’s reset or arm procedure
Reset instructions vary widely. Copying someone else’s procedure can hold the arm incorrectly, disable the ice maker, or trigger a harvest sequence at the wrong time. This leads to confusion because you may change multiple variables at once.
Instead:
- Only follow the procedure printed on your model’s ice maker cover or in the owner’s manual.
- Check that the arm is free and in the correct rest position before starting any reset.
- After changes, focus on one controlled observation: ice production behavior after one cycle, not multiple mixed adjustments.
Check the owner’s manual before turning the icemaker back on
Before resuming production, confirm the recommended steps for your exact GE (or other brand) ice maker style. Manual steps can vary by modular ice maker versus unit-integrated designs, and some models require a specific reset or a water purge after service.
Use this safe approach:
- Locate the ice maker instructions in the owner’s manual for your specific model number.
- Confirm whether your unit needs a water purge period after startup.
- Follow the documented timing before you judge ice production results.
Manuals prevent repeated “fix attempts” that don’t apply to your specific ice maker design.
Frequently Asked Questions
How do I know if my GE refrigerator is level enough for ice making?
The cabinet should sit stable with no rocking, the doors should close on their own, and the freezer should be level enough for the ice maker to fill and harvest consistently.
Does a refrigerator need to be perfectly level?
Not always. Many refrigerators are set with the front slightly higher than the back so the doors close properly, but the cabinet still needs to be stable and close to level side-to-side.
Can an unlevel refrigerator cause too much ice?
Yes. If the icemaker arm, shutoff, or harvest cycle is affected by tilt or poor alignment, the unit may overfill or fail to stop ice production at the right time.
Should I level the doors or the refrigerator cabinet?
Level the cabinet first. Door alignment can be adjusted afterward, but the base unit must be stable for proper ice maker operation.
What if leveling does not fix the ice maker?
Then the issue may be a clogged fill tube, low water pressure, a stuck arm, or a failing ice maker part that needs repair or replacement.