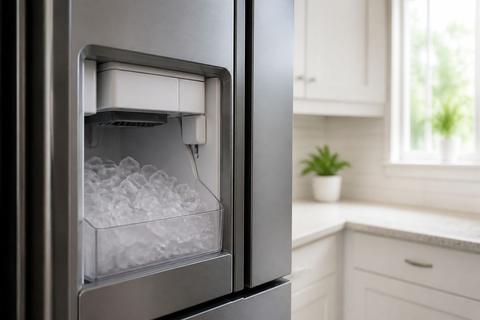
GE Opal 2.0 Nugget Ice Maker Leaking Water: Fixes
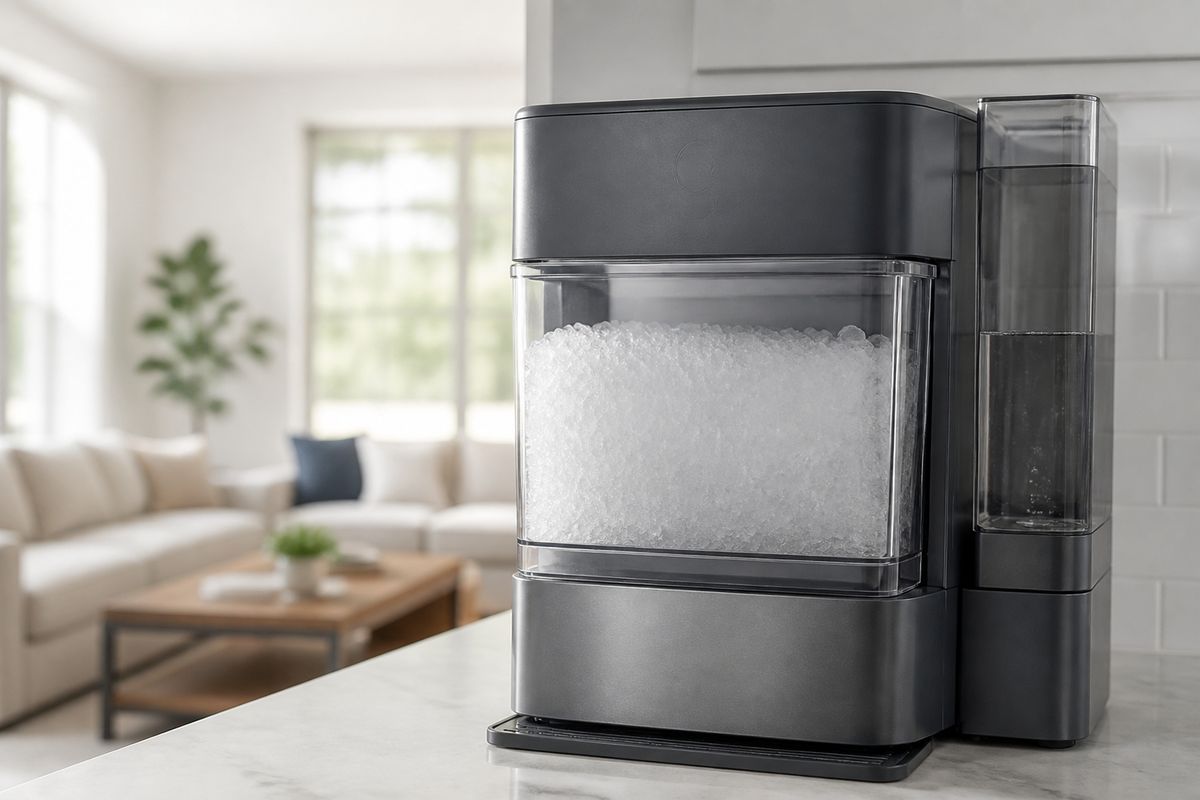
If you’re seeing water pooling around your GE Opal and you searched “ge opal ice maker leaking water,” you’re not alone—this is one of the most frustrating countertop-ice issues. Most leaks come from the side tank connection, a cracked fitting/seal, or water that’s flowing where it shouldn’t. The fastest way to stop it is to identify where the water is actually originating, then fix the specific water-path problem.
For more help, see our Fix GE Ice Maker Water, Leak, and Clog Problems guide.
First, Find the Source of the Leak
Check whether the water is coming from the rear, bottom, or side tank area
Start by locating the wet area while the machine is actively cycling. Rear leaks usually point to the water inlet path, hoses, or a loose connection at the back. Bottom leaks point to the drain area, tank seating, or a compromised reservoir/collection area. Side tank leaks point to the tank connection, the gasket/seal, or overflow from improper alignment.
- Place a towel on the floor around the Opal (front/side/rear) to track where the first water shows up.
- Run a short ice-making cycle (or watch during the fill stage) until water appears.
- Note the first wet spot—your first location determines the next checks.
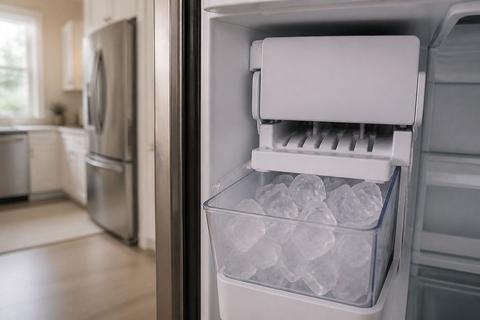
Inspect the reservoir, drain cap, and hoses for obvious cracks or looseness
Once you know the general area, power the unit down and inspect the parts that can fail under pressure or vibration. Look closely at plastic reservoirs, the drain cap, and any visible hose segments for cracks, warping, or looseness. Even a slightly mis-seated connector can spray or drip during the fill cycle.
- Unplug the Opal.
- Remove the side tank and inspect the internal reservoir area for cracks, missing rubber grommets, or wet seams.
- Check drain cap seating (hand-tight, not cross-threaded) and inspect hoses for kinks or damp spots around fittings.
- Re-seat anything loose; replace anything cracked.
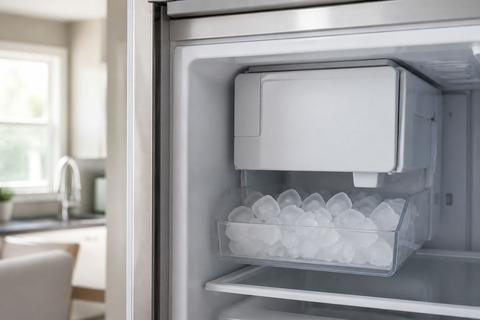
Separate a true leak from overflow, condensation, or splashing
Not all water you see is a “leak.” Condensation builds on cold surfaces and can drip, and splashing can occur if the tank isn’t seated or ice discharge is disrupting water flow. Overflow typically happens when the tank is overfilled or not aligned so the internal valve can’t close correctly.
- After removing the side tank, check whether water is dripping from joints (true leak) or from surfaces (condensation/splash).
- Confirm the side tank fill level is not above the marked max line.
- Look for droplets only during movement/harvest (splashes) versus continuous dripping during fill (leak).
Fix the Most Common Water-Supply Problems
Reseat the side tank and confirm the connection points are fully engaged
The single most common cause of side tank-area leaking is the tank not seated squarely. When the connection points aren’t fully engaged, water can escape before it reaches the intended internal reservoir path.
- Remove the side tank completely.
- Wipe the tank’s connection area and the machine’s mating surface dry with a clean cloth.
- Reinstall the tank: press it down evenly and ensure it sits flush—no rocking or gaps.
- Run the next cycle and watch for water at the connection seam.
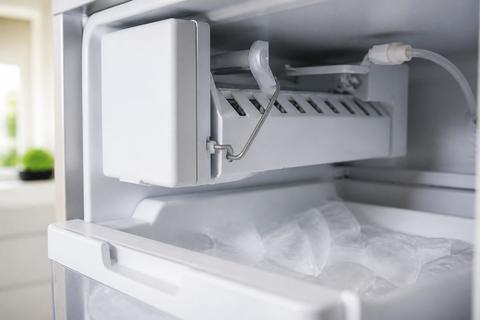
Clean and align the water inlet and outlet fittings
Scale and residue can prevent valves and fittings from sealing correctly, which leads to slow drips or spurting during water fill. Cleaning and aligning the inlet/outlet fittings restores proper flow and reduces the chance of overflow.
- Unplug the unit.
- Remove the parts you can access around the inlet/outlet fittings (follow your model’s standard removal steps).
- Clean fittings with warm water and a soft brush to remove mineral buildup from threads and contact surfaces.
- Reassemble with correct alignment—never force a fitting at an angle.
Test the machine with the side tank removed to isolate the problem
This isolation step tells you whether the leak depends on the side tank connection. If the machine leaks without the tank installed, you likely have an internal reservoir or hose/seal problem.
- Unplug and remove the side tank.
- Plug the unit back in and let it sit briefly while monitoring the interior reservoir area and seams.
- If water appears without the tank, stop troubleshooting the tank seating and move to reservoir/seal inspection or service.
When the Opal Says Add Water but the Tank Is Full
Clear airlocks and verify water is reaching the internal reservoir
An airlock can stop water from reaching the internal reservoir, so the Opal interprets the system as low and triggers “add water” even when the side tank is full. Clearing the airlock restores flow through the pump/valve path.
- Ensure the tank is seated flush and the connection area is dry.
- Remove and reinstall the side tank once to re-prime the inlet path.
- Fill the side tank to the max line and keep it steady (don’t shake).
- Start a cycle and observe whether water movement resumes through the internal fill stage.
Clean mineral buildup that can block sensors or flow paths
Scale can clog narrow water passages and interfere with sensors, causing false low-water readings and poor water flow. Cleaning removes the obstruction and restores normal operation.
- Run the machine’s cleaning/descale routine using Opal-approved cleaner (or a vinegar-water solution if that’s what you’ve been using).
- Follow with a full rinse cycle so no cleaner residue remains.
- After cleaning, wipe the connection areas dry and remove any visible mineral around fittings.
Check for a faulty water level sensor or pump issue
If cleaning and reseating do not fix the “add water” message, the unit may have a failed sensor reading or a pump that isn’t moving water. This is where physical symptoms matter: no water sound/flow during fill points to pump trouble; persistent sensor errors point to sensor failure.
- Listen during the fill attempt—if the pump doesn’t engage or no water movement occurs, suspect the pump or blocked path.
- If the pump runs but the message persists, suspect the water level sensor or sensor contact/position.
- If you see repeated errors after cleaning, shift from DIY adjustments to replacement parts or GE support.
Why the Opal Stops Making Ice
Review common reasons the machine pauses production
When the Opal stops making ice, it usually detects a condition that prevents safe or complete freezing—most commonly water delivery problems, airflow issues, or a dirty harvest path. A pause can also occur during self-protection when components are not reaching the right cycle conditions.
- Confirm you have water in the side tank and it’s seated flush.
- Ensure the unit has clear airflow around the vents and that nothing blocks the intake/exhaust.
- Check that the bin and ice path are not jammed with stale ice.
Look for clogged filters, blocked airflow, or dirty components
Dirty components restrict heat transfer and water flow, which can stop the cycle before ice fully forms. Clogged filters and blocked airflow are top causes when the machine runs but produces little or no ice.
- Inspect accessible water/air components and remove any buildup.
- Vacuum dust from nearby intake/exhaust vents on the unit.
- If your water system uses a household filter, replace it if it’s past its service life (a clogged filter reduces incoming water flow).
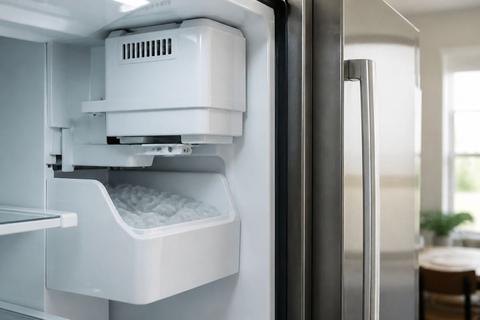
Confirm the ice bin, cutter, and evaporator are clean and dry
Ice production depends on a clean evaporator and a clear harvest path. If the cutter area or evaporator has residue or moisture issues, the unit can stop to prevent poor harvest or repeated faults.
- Remove the ice bin and discard any wet/stale ice.
- Wipe the bin and cutter area dry with a clean cloth.
- Inspect the evaporator surface for scale or residue and clean it using the Opal cleaning/descale routine.
Resetting the Opal 2.0 the Right Way
Use a basic power reset for temporary glitches
A power reset can clear temporary control issues, lockups, or missed sensor reads. Use this when the Opal pauses or shows odd behavior but there’s no clear physical damage or confirmed water leak path.
- Unplug the Opal from power.
- Wait 3–5 minutes.
- Plug it back in and restart the normal cycle.
Perform a full factory reset when settings or sensors behave erratically
If the Opal’s behavior is inconsistent—repeating messages, odd button response, or persistent faults after cleaning—perform a factory reset to restore default settings and recalibrate how the unit interprets signals.
- With the unit powered, locate the reset method in your Opal 2.0 control panel instructions.
- Follow the exact button sequence to enter reset mode and confirm.
- Restart a cleaning cycle after the factory reset if the unit indicates cleaning is due.
Re-test the machine after reset to confirm the fix
After a reset, you need to see whether the symptom changed. Run the cycle long enough to cover the fill and harvest stages, focusing on the exact issue you were addressing.
- Start a cycle and observe the side tank fill stage for any dripping.
- If the unit again shows “add water” with a full tank, stop and move back to the water path/sensor steps.
- If ice production resumes without pooling water, proceed with normal use and monitor the same area the leak previously appeared.
Prevent Future Leaks and Failures
Descale on a regular schedule and use the right water type
Mineral buildup causes leaks, poor flow, sensor errors, and ice-making pauses. Descale at a consistent interval and use the water type that your Opal manual recommends to reduce scale formation.
- Descale using Opal Nugget Ice Maker Cleaner (or the approved vinegar-water method) on your scheduled cadence.
- After descaling, run the rinse cycle so scale won’t redeposit from remaining residue.
- Use recommended water quality (for many households, filtered water helps reduce mineral buildup).
Keep the machine level and avoid overfilling the side tank
Countertop ice makers rely on correct leveling and proper tank seating. If the Opal tilts or the tank is overfilled, water can flow into areas that should stay dry and cause apparent leaks.
- Place the Opal on a level counter surface.
- Fill the side tank only to the max line.
- Seat the tank flush every time—no rocking or partial engagement.
Inspect wear-prone seals, tubing, and connectors before they fail
Wear parts degrade from heat, vibration, and repeated pressure cycles. Catching early looseness or cracking prevents the “sudden leak” stage.
- During cleaning, inspect the tank seal area and any accessible gaskets for flattening or cracks.
- Check connectors for play—if a fitting feels loose, re-seat it and correct alignment.
- Replace any hardened or cracked seal/tubing components instead of continuing to run the unit.
When to Repair, Replace, or Contact Support
Know the signs of a damaged pump, cracked reservoir, or failed sensor
Some leaks and “add water” errors point to parts that should be repaired or replaced rather than endlessly reseated. Persistent leaking from internal seams, non-moving pumps, and repeated sensor messages after cleaning are the strongest indicators.
- Damaged pump signs: no water movement during fill and repeated low-water errors even with a full, properly seated tank.
- Cracked reservoir signs: water appears from inside seams or a persistent wet spot that doesn’t change with reseating.
- Failed sensor signs: the Opal repeatedly reports incorrect water levels after reseating and complete cleaning.
Decide when a warranty claim makes more sense than a DIY fix
If your Opal is under warranty and you’re seeing a physical water escape from internal components, it’s usually better to pursue warranty support. DIY repairs risk worsening damage or voiding coverage depending on your terms.
- If you see cracked plastic or continued leaking after reseating/cleaning, prioritize warranty or service.
- If replacement parts require opening internal assemblies you’re not comfortable servicing, choose professional repair.
- Keep photos and note error messages/timing before contacting support.
Prepare model details and symptoms before contacting GE support
Getting fast help depends on clear information. Gather the model identifiers and document what the Opal does so support can route you correctly.
- Record your exact model and serial number from the unit label.
- Note what happens: where the water leaks (rear/bottom/side), when it starts (fill/harvest), and the exact on-screen message pattern.
- List what you already did (reseated tank, cleaned/descales, reset steps) so support can narrow the cause quickly.
Frequently Asked Questions
Why does my GE Opal ice maker keep saying add water when the tank is full?
This points to a flow problem, airlock, blocked water path, or a sensor reading issue rather than a truly empty tank. Start by reseating the side tank flush and making sure the connection area is dry, then clear any mineral buildup by running a proper clean/descale cycle. If the message continues after cleaning, check whether the pump engages during fill; no water movement indicates a pump/flow failure, while pump activity with persistent errors indicates a sensor issue.
Why is my GE Opal 2.0 leaking water from the side tank area?
The most common causes are a loose tank connection, a damaged seal, a cracked fitting, or overflow from improper seating. Remove the side tank, wipe the connection surfaces dry, and reinstall it evenly so it sits flush with no gaps. Inspect the gasket/seal and any visible fittings for cracks or warping—if water still escapes from the same seam after reseating, the component is likely damaged and needs replacement or service.
Can I reset my GE Opal ice maker to fix leaking or no-ice issues?
A reset can clear temporary glitches, but it will not fix a cracked part or an actual physical leak. Use a power reset after you’ve already inspected the tank seating and cleaned the water system, then watch for the symptom during the next fill stage. If the unit continues leaking from the same location or keeps showing add-water errors with a full tank after cleaning, the issue is mechanical or sensor-related—not just a software/logic hang.
Why is my GE Opal not making ice even though it has water?
Common reasons include scale buildup, restricted airflow, a dirty evaporator, sensor problems, or a fault that stops the freeze cycle. Run a full cleaning/descale routine to remove mineral buildup, and ensure vents are clear and unobstructed. Also confirm the ice bin and cutter area are clean and dry, since residue or jam conditions can prevent proper harvest. If the machine pauses immediately with recurring sensor messages, the root cause is likely a sensor/flow component issue.
When should I stop troubleshooting and replace a part?
Stop when you find cracked plastic, a damaged seal/gasket, or repeated leaking after correct reseating and cleaning. If you see no water movement during the fill stage despite the tank being full, the pump or internal flow components likely need replacement. Persistent sensor errors after descaling and resetting also indicate a failed sensor or related hardware, which is best handled with replacement parts or GE support.