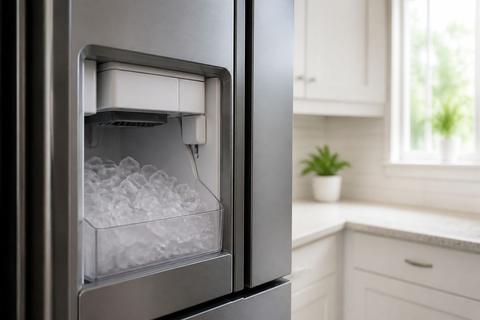
GE Ice Maker Leaking Water: Locate the Source and Fix
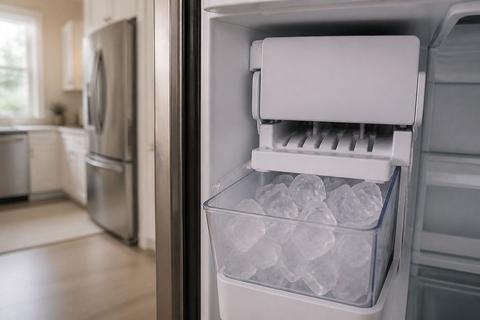
If you’re dealing with ge ice maker leaking water, you’re probably seeing puddles in the freezer or a wet area under the ice bin. The frustrating part is that the leak can come from several places: the ice maker mold, the fill tube, or the refrigerator’s water supply system. The good news is you can usually pinpoint the source quickly—then fix it without guesswork.
For more help, see our Fix GE Ice Maker Water, Leak, and Clog Problems guide.
Start With the Leak Source
Check where the water is pooling
Start by locating the wettest area. Remove the ice bin and look closely for water trails that lead to the mold, the fill tube opening, or the back wall of the freezer. If the water collects mostly directly under the ice maker/mold assembly, the ice maker side is the most likely source. If you find water spread wider across the freezer floor or toward the rear vents, the leak may be related to ice buildup, meltwater, or a water line issue feeding the unit.
- Wipe the area dry with a towel.
- Wait 10–30 minutes (or watch during the next ice-making cycle).
- Note the exact starting point of fresh water.
Differentiate a fresh-water leak from overflow or defrost water
Fresh leaks look like clear, watery flow from a specific point (fill tube, valve area, or water line). Overflow or defrost-related water often appears as meltwater from ice buildup and may show up more as thin puddling or water tracks tied to defrost patterns. A clear sign of a fill problem is water that appears around the ice maker during or right after it fills the mold. If the leak seems tied to frost/ice melting, reduce the ice maker’s contribution by checking for excessive ice or an overfill condition first.
- Compare where the water appears relative to the ice-making cycle.
- Check for heavy frost or ice buildup on/near the ice maker.
- If water appears right after filling, treat it as a fresh-water leak.
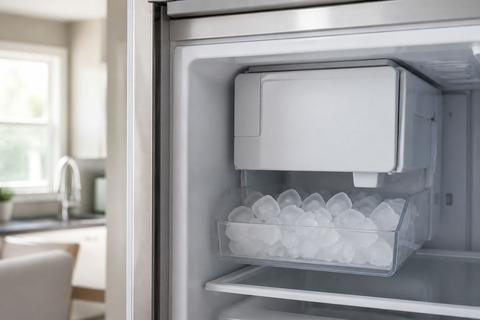
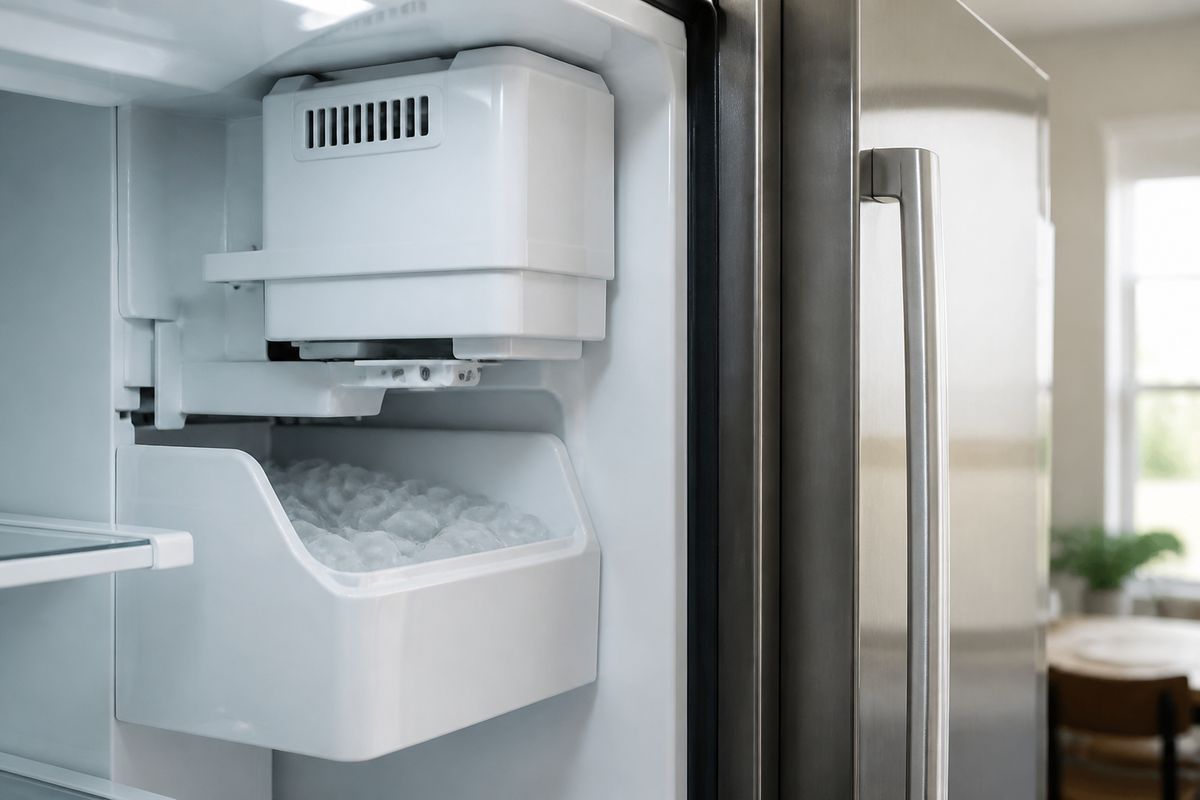
Inspect the ice bin, dispenser area, and freezer floor
Once you’ve identified the general direction, inspect the most common leak-adjacent spots. Check the ice bin for a split seam or damaged base that can divert meltwater. Inspect the dispenser chute and the area where ice drops in—stuck ice can block flow and cause water to pool. Finally, examine the freezer floor edges and corners near the ice maker to see whether water is coming from above (gravity-fed leak) or from a blocked drainage/defrost path.
- Remove and empty the ice bin; look for cracks and warped plastic.
- Check the dispenser opening and chute for jammed ice.
- Shine a flashlight under the ice maker area and inspect seams.
Quick Causes You Can Fix Without Tools
Look for a clogged or misaligned fill tube
A clogged or misaligned fill tube disrupts how water enters the mold, which can cause overflow onto the freezer floor. The fill tube should feed water straight into the mold opening. If it’s off-center or blocked with ice scale, water can spill outside the mold area and keep pooling. Clear the path carefully and realign the tube so it seats properly at the mold inlet.
- Unplug the refrigerator or switch the ice maker off.
- Remove the ice bin and access the fill tube area.
- Clear any visible ice/sediment from the fill tube opening using gentle pressure (no metal scraping).
- Re-seat the tube so it points directly at the mold opening.
Confirm the water line is fully seated and not kinked
A water line that isn’t fully seated can seep at the connection and drip into the freezer. A kink in the line can restrict flow and create irregular fill patterns that lead to overfill and meltwater confusion. Slide the refrigerator slightly forward and inspect the supply tubing path behind it for bends, crimps, or sections that look pinched. Then check the line connection at the ice maker inlet area for a firm seat.
- Pull the refrigerator forward enough to access the water line.
- Inspect for kinks, crushed sections, or sharp bends.
- Reseat the connection at the ice maker inlet until it fully locks.
- Wipe the area dry, then observe during the next fill.
Make sure the ice maker is level and secure
If the ice maker is not level, water can spill during harvest or fill, causing repeated pooling even when the water line is fine. Check for rocking or looseness where the ice maker mounts. Also verify that the freezer is not uneven from front-to-back or side-to-side—an unlevel refrigerator can distort the ice maker’s fill behavior. Leveling fixes are straightforward and prevent the same leak from returning after a temporary adjustment.
- Place a level on the freezer floor or the ice maker mounting surface.
- If it’s out of level, adjust the refrigerator feet per the manual.
- Tighten any visible ice maker mounting points (if accessible).
- Run one ice-making cycle and watch where the first fill lands.
Adjust the Ice Maker the Right Way
Use the water level adjustment only if your model supports it
Some GE ice makers include a water level adjustment, but many do not. If your model has an adjustment screw, use it to fine-tune fill amount—especially if you see consistent overflow water around the mold. If your unit lacks a screw or menu-based water setting, do not force changes. Instead, focus on fill tube position, water line seating, and inlet supply health.
- Locate the ice maker adjustment screw/knob on the ice maker housing.
- If there is no adjustment control, stop and move to fill tube and supply checks.
- Use only a small correction per attempt—overcorrection creates more overflow.
Find the adjustment screw and test in small increments
When adjustment is available, change it in controlled, small steps so you can see the impact. Too much adjustment can flood the mold and push water into the freezer. After each small change, allow the ice maker to cycle so you observe how the fill behaves during the next mold fill and harvest. If you have a model with a manual test/harvest function, use it to speed up confirmation.
- Turn the adjustment screw only 1 increment (or about a quarter-turn depending on design).
- Initiate a manual harvest/test cycle if your model has a button or switch.
- Observe the mold fill area for spills beyond the mold opening.
- Repeat with another small increment only if you still see overflow.
Avoid overfilling the mold after each change
Overfilling is the most common mistake when adjusting. If you increase water level too far, you’ll see puddling near the mold, melted ice on the freezer floor, and wet ice that may clump. Keep adjustments minimal and stop as soon as water remains inside the mold during fill. If water keeps appearing outside the mold even after you reduce the setting, the problem is no longer “adjustment”—it’s a blocked/misaligned fill tube, failing inlet valve, or a mold/ice maker assembly issue.
- Reduce adjustment immediately if you see water leaving the mold opening.
- Check for ice blockage at the fill tube and mold inlet.
- Return to the prior setting if the leak worsens after change.
Model-Specific Checks for GE Refrigerators
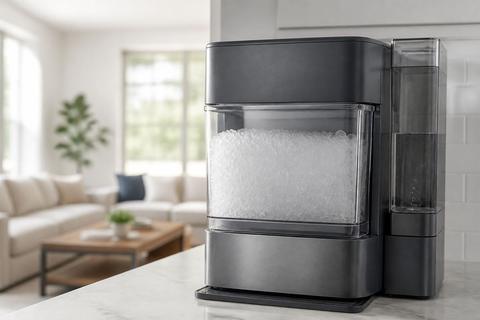
Troubleshoot add-on ice makers separately from the refrigerator
If your GE setup includes an add-on ice maker (separate module) installed on the freezer door or as an add-on unit, treat it as its own water path. Leaks can come from the add-on module’s internal lines, its fill tube, or the shutoff/valve feeding it—separate from the main refrigerator water system. Inspect the add-on’s ice chute area and its internal fill path first, then check the module’s connection to the household supply line.
- Turn off the add-on ice maker using its module switch/button.
- Inspect pooling around the add-on’s mold/fill area and ice chute.
- Verify the add-on inlet connection is seated and the line is not kinked.
- If the add-on has its own water filter/housing, inspect that component next.
What to inspect on GE French door models
On GE French door models, the ice maker components and water routing can be impacted by ice buildup around the dispenser and the freezer-side ice area. Check the dispenser chute for stuck ice and inspect around the ice bin/mold area for water tracks that indicate overfill. Also inspect the back panel area behind the ice maker zone for signs that water is dripping from above. If the unit has a dispenser, ensure the chute and ice feed are clear so water doesn’t pool around an obstructed path.
- Remove the ice bin and inspect the chute opening for blocked ice.
- Look at the sides and underside of the ice maker area for dripping points.
- Clear any visible ice buildup that can melt and mimic leaks.
- Watch the water entry point during the next fill.
Check for door seal issues that send warm air into the freezer
Warm air entering the freezer door area can create extra frost and meltwater, which can look like a leak. Inspect the gasket for gaps, tears, or areas that don’t seal flat. If the door seal leaks warm air, you’ll see more frost buildup near the ice-maker area and then increased meltwater during defrost. Fixing the gasket restores stable freezer temps and reduces the meltwater that pools near the ice maker zone.
- Close the freezer door on a dollar bill and check resistance along the gasket.
- Replace or reseat a gasket that releases the bill easily.
- Clean gasket surfaces so they seal fully.
- After correcting the seal, monitor for reduced frost and meltwater pooling.
When the Problem Is in the Water Supply System
Test the inlet valve for sticking or seepage
A faulty inlet valve can drip water into the ice maker line or cause irregular filling, which can lead to repeated pooling and overflow. If the valve leaks, you may see water near the ice maker fill area even when the cycle isn’t actively filling. Visually inspect around the valve connection points for moisture and examine whether the line area stays wet. The inlet valve can also stick, causing delayed shutoff.
- Unplug the refrigerator (or switch off the ice maker).
- Inspect the inlet valve area and line connections for wet spots.
- Plug back in and watch for drips during idle and the fill portion of a cycle.
- If it seeps, replace the inlet valve assembly—repairing internal seals is rarely reliable.
Replace a damaged water filter or housing
A clogged or damaged filter can starve flow and force inconsistent fill behavior, leading to overflow patterns or water that doesn’t disperse correctly. If the filter housing is cracked or the gasket seal is compromised, water can leak at the filter connection and drip into the refrigerator zone before reaching the ice maker. Replace the filter with the correct GE model and check that the housing gasket seats evenly. After replacement, purge air by running a few water/ice cycles.
- If the filter is older than 6 months, replace it.
- Inspect the filter housing and gasket for cracks or misalignment.
- Install the correct filter type for your model (GE XWF/XWFE/MWF series are common).
- After installing, run a few dispense cycles to purge air.
Inspect the shutoff valve and household water pressure
A partially closed shutoff valve or uneven household water pressure can cause flow irregularities that contribute to improper ice fill and leaking behavior. Inspect the shutoff valve behind the refrigerator for being fully open. Check the water line for freezing or pressure restriction; if the line is restricted, the ice maker can behave unpredictably. Restoring steady flow helps the fill cycle land correctly in the mold and reduces overflow/meltwater.
- Ensure the refrigerator shutoff valve is fully open.
- Inspect the saddle valve connection for leaks and proper seating.
- If your home pressure is very low, address it at the supply source.
- Watch for reduced pooling after stable flow returns.
If the Ice Maker Itself Is Failing
Watch for cracks in the mold, tray, or reservoir
Physical damage in the ice maker—cracks in the mold, tray, or reservoir—creates a direct path for water to escape into the freezer. Look for hairline splits around the mold inlet area and check the plastic seams where water collects before freezing. If you see cracks, adjustment won’t fix the root cause; the assembly needs replacement or a parts-level repair approved for your exact model.
- Remove the ice bin and inspect the mold/tray surfaces closely with a flashlight.
- Check for cracks around the mold inlet and corners where water pools.
- If you find breaks, replace the affected ice maker components/assembly.
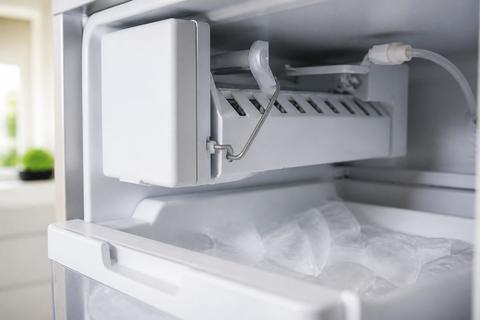
Check the fill sensor, float, and shutoff arm
If the ice maker’s control components fail, it can keep filling too long or not stop water flow at the right time. On many GE ice makers, the feeler arm (wire bail) shuts the unit off when raised; if it’s stuck up or pushed up by food or ice, the ice maker behavior changes and can contribute to overflow and leaks. Also inspect sensors/float mechanisms for stuck positions due to ice buildup or wear.
- If your model has a wire bail, lower the feeler arm so it hangs freely.
- Clear ice that jams the float/sensor area.
- Check that the shutoff arm moves without resistance.
- If sensors/arm no longer respond correctly, replace the ice maker assembly.
Know when the ice maker assembly needs replacement
Replacement is the right move when the leak is caused by internal failures you can’t reliably correct—like persistent overfilling after adjustments, leaking valves inside the assembly, or repeated sensor/float problems. If the mold or reservoir is cracked, replacing the assembly prevents water from escaping again. If multiple components have failed or repairs keep adding up, replacement is the most cost-effective path to stopping recurring puddles.
- Replace the assembly if the mold/reservoir has cracks.
- Replace if adjusting water level doesn’t stop overflow.
- Replace if the unit repeatedly fails due to sensor/valve issues.
Prevent Repeat Leaks
Clear ice buildup and keep the freezer temperature steady
Ice buildup changes how water behaves during the fill and harvest cycles. When frost accumulates near the ice maker zone, meltwater can pool around the same areas that appear to be “water leaks.” Keep the freezer at the correct setting so the unit freezes water properly and reduces melt cycle surprises. Remove built-up ice from the ice maker area so water can flow into the mold without obstruction.
- Remove the ice bin and clear visible ice buildup around the ice maker zone.
- Set the freezer temperature to about 0 to 5 degrees F.
- Avoid propping the door open; warm air drives excess frost.
Perform a simple monthly inspection
A short monthly check prevents most “mystery leaks.” Inspect the water line behind the refrigerator for kinks or loosening, check the ice bin area for consistent pooling, and look for signs of ice scale in the fill tube. Also verify the door gasket seals properly, because seal issues indirectly create meltwater pooling that looks like an ice maker leak. This routine catches early problems before they turn into repeat puddles.
- Wipe the ice maker area dry and check for new water after the next cycle.
- Inspect the water line connection for moisture trails.
- Confirm the freezer gasket seals evenly around the perimeter.
Know when the issue may be a broader GE refrigerator water leak
If water appears behind the refrigerator, underneath the fridge, or near the water filter housing—not just around the mold/ice bin—your leak may be in the refrigerator’s water system rather than the ice maker assembly. In that case, focus on the supply connection, filter housing, inlet valve, and water line routing. Don’t keep adjusting the ice maker as a first response when the puddling location points upstream.
- If water is under/behind the fridge, inspect the supply line and connections.
- If water is near the filter housing, inspect the filter gasket and housing for leaks.
- If water appears even when the ice maker is off, prioritize the refrigerator water system components.
Frequently Asked Questions
Why is my GE ice maker leaking water into the freezer?
The most common causes are a clogged fill tube, a loose water line, a leaking inlet valve, or an ice maker that is overfilling the mold. Start by identifying exactly where the water is appearing, then work from the supply line toward the ice maker assembly.
Can I adjust the water level on my GE ice maker?
Some GE ice makers include a water adjustment screw or setting, but not all models do. If your unit supports it, make only small changes and test after each adjustment to avoid overfilling or making weak ice.
How do I know if the leak is from the refrigerator or the ice maker?
If water is collecting only near the ice bin, mold, or fill tube, the ice maker is the likely source. If you see water under the fridge, behind it, or near the filter housing, the leak may be in the supply line, valve, or refrigerator water system.
Is a leaking GE ice maker the same problem as on an LG ice maker?
No, the brands use different parts and service layouts, but the troubleshooting logic is similar: check the fill tube, water line, inlet valve, and ice maker assembly. The exact fix depends on the refrigerator model.
When should I replace the ice maker instead of repairing it?
Replacement is usually the best option when the mold is cracked, the fill system keeps overfilling after adjustments, or the unit has repeated failures with sensors or valves. If the assembly is old or repairs are adding up, replacement is often more cost-effective.