GE Bottom-Freezer Ice Maker Leaking Water: Seal, Drain Fixes
If you’re dealing with ge bottom freezer ice maker leaking water, you’re probably finding puddles inside the freezer, water collecting near the bottom drawers, or ice that melts and refreezes. The good news: most leaks come from a small set of predictable problems—door sealing, a clogged defrost drain, or a leaking water line/inlet valve. Work through the checks below in order to pinpoint the source fast and stop the drip.
For more help, see our Fix GE Ice Maker Water, Leak, and Clog Problems guide.
Start With the Most Likely Leak Sources
How to tell whether the leak is from the ice maker, fill line, or freezer floor
Start by locating where the first water shows up. Look for these clues:
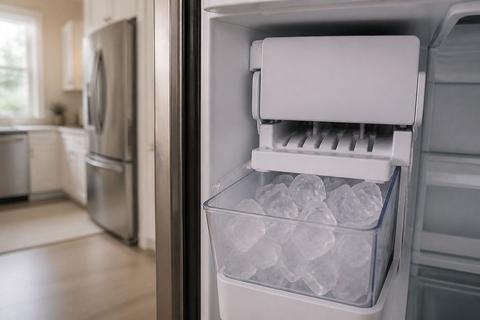
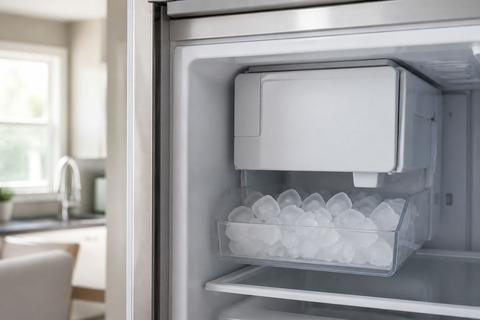
- Ice maker (top area of the freezer floor area): water appears near/behind the ice maker housing, or you see water tracking from the ice bin area.
- Fill line (back/side of freezer): water trails along the rear wall, behind drawers, or near tubing access points—often more noticeable when the ice maker cycles.
- Freezer floor/defrost area: water pools under the drawers or near the center bottom where defrost meltwater drains—often after defrost cycles.
After you spot the likely origin, wipe the area dry with a towel, then watch the next ice-making cycle or defrost period to see where fresh water first appears.
Check for an overflowing ice maker tray or misaligned shutoff arm
An overfill or a stuck shutoff arm forces water and ice to go where it shouldn’t. Do this:
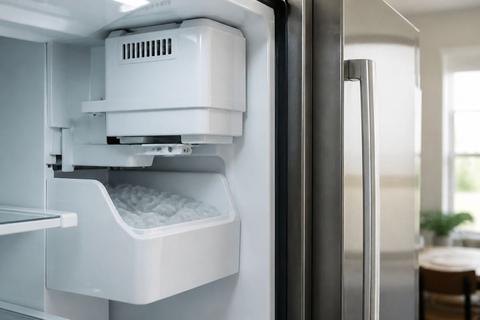
- Open the freezer and inspect the ice maker area for a full or overflowing ice tray/bail arm.
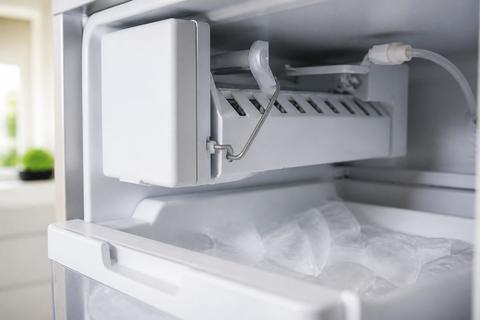
- Find the ice maker’s shutoff feeler arm (wire bail). On most GE bottom-freezer units, raising the arm stops the ice maker.
- If the arm is stuck up, blocked by ice, or pushed out of position by stored items, gently lower it back to its normal position.
Then observe for a new cycle. If overflow was the cause, the leak typically stops once ice level and arm position return to normal.
Inspect the door seal for warm air and frost buildup
A failing freezer door gasket can leak warm air in, leading to frost that blocks drainage and causes water to collect. Check the seal like this:
- Run your hand around the perimeter of the freezer door to feel for gaps.
- Look for frost buildup along the gasket line—frost indicates warm air is getting in.
- Close the door on a thin sheet of paper (or a strip of receipt). Pull it out:
- You should feel strong resistance around the whole seal.
- If the paper slides out easily in one section, that section is leaking.
If you find frost and a weak section of the gasket, address the seal before chasing drain or line problems.
Fix Seal Problems That Let Water Escape
Clean and warm the gasket to restore a tight seal
Cleaning and reseating the gasket restores compression and stops warm air intrusion. Do this:
- Remove loose ice or debris around the gasket edges with a plastic tool.
- Use warm water on a clean cloth and wipe the gasket surface.
- If the gasket feels stiff, close the door for 5–10 minutes so the material warms and relaxes.
- After warming, open and press the gasket back into place along the corners, then close the door again.
If the leak is caused by poor sealing (often shown by frost along the gasket), cleaning and reseating the gasket typically stops meltwater problems downstream.
Replace a damaged or flattened freezer door gasket
If the gasket is cracked, stretched, torn, or permanently flattened, it won’t hold pressure no matter how much you clean it. Replace it:
- Unplug the refrigerator or switch off the ice maker if water is actively leaking.
- Pull the old gasket out of its channel along the door perimeter.
- Clean the gasket channel so no old residue or ice remains.
- Install the new GE-compatible gasket by working it into the channel starting at the corners.
- Close the door and press along the perimeter to seat the gasket evenly.
After replacement, the door should close with consistent resistance and minimal frost at the seal line.
Verify the freezer door closes level and fully
Even with a good gasket, the door won’t seal if the refrigerator is out of level or the door is misaligned. Fix alignment:
- Move items away from the freezer so the door sits correctly.
- Check whether the freezer door sits evenly compared to the frame.
- If the door looks uneven, adjust the refrigerator leveling feet (front) until the doors align and close fully without gaps.
- After adjustment, close the freezer door and inspect the perimeter for even contact.
A level, properly aligned door prevents warm air leaks that can trigger frost buildup and drainage overflow inside the freezer.
Clear Drain Blockages and Ice Dams
Find the defrost drain and test for standing water
A clogged defrost drain is a top cause of bottom-freezer water. Locate and check the drain path:
- Remove the freezer drawers to access the bottom area.
- Find the defrost drain opening near the freezer back wall (often behind or under the back cover).
- Shine a flashlight into the area. Standing water around the drain area indicates blockage.
- Look for ice crusting near the opening—this can redirect meltwater into the freezer.
Once you confirm where water is pooling, proceed to removing ice buildup so the drain can flow again.
Remove ice buildup that redirects meltwater into the freezer
Ice buildup can act like a dam, forcing meltwater to overflow into places it shouldn’t. Clear it safely:
- Turn off the ice maker or unplug the refrigerator to avoid ongoing ice production.
- Let the freezer warm just enough to melt ice—use towels to catch water.
- Once softened, remove loose ice carefully with a plastic scraper (don’t puncture tubing or wiring).
- Focus on the drain area and any ice that forms a ridge above the drain.
Remove enough ice to restore the normal downhill path for meltwater into the drain.
Flush the drain tube and drain pan correctly
With the ice cleared, you need to restore full flow through the drain tube and ensure the drain pan can receive meltwater:
- Use a turkey baster or a soft squeeze bottle filled with warm water.
- Pour warm water into the defrost drain opening slowly to push out debris.
- If the tube has an accessible clean-out point, flush from that direction as needed to clear the path.
- Check the drain pan location behind or beneath the refrigerator (depending on model design) for signs of overflow or damage.
Stop if water backs up—backed-up flow usually means deeper blockage that may require more thorough access.
Check the Water Supply Line and Inlet Valve
Tighten fittings and look for cracks, kinks, or pinholes in the line
If water appears in cycles near the rear tubing area, the supply line is a prime suspect. Inspect and correct it:
- Pull the freezer drawers and access the water line routing behind or to the side of the ice maker.
- Check for kinks, sharp bends, or areas where the line rubs a metal edge.
- Look for pinholes or wet spots around the line length and at clamp points.
- Tighten any loose compression fittings using the correct wrench size.
If you find a crack or pinhole, replace the damaged section—patching with tape doesn’t hold up under repeated pressure and freeze/thaw cycles.
Inspect the water inlet valve for slow leaks or failure to close
A failing inlet valve can drip water even when the ice maker isn’t calling for it. Check it like this:
- Unplug the refrigerator or switch off the ice maker.
- Locate the inlet valve (rear access area where the water line connects to the valve body).
- Inspect the valve and nearby connections for moisture trails.
- Reconnect power briefly only long enough to observe during an ice-making cycle if your model allows safe observation.
If the valve stays wet or drips after the cycle, it likely doesn’t close fully and needs replacement.
Replace brittle tubing or damaged connectors
Plastic tubing and connectors can become brittle and fail at the worst time. Replace them correctly:
- Shut off household water supply before disconnecting tubing.
- Cut out damaged tubing sections to clean, square ends.
- Install replacement tubing of the same type and size, using proper GE-compatible connectors.
- Seat connectors fully and check for snug engagement without cross-threading.
- Turn water back on and watch the connection points for leaks during the first ice cycle.
Use only the correct connector style for your model (compression, push-fit, or saddle connections vary by design).
If Your GE Has More Than One Ice System
Separate issues in the main freezer icemaker from a secondary dispenser or craft ice maker
Dual-ice setups can confuse the source of the water. A freezer icemaker leak may look similar to a dispenser leak, but they come from different components. Compare where water accumulates:
- If water pools near the freezer bottom drawers, suspect the freezer icemaker/defrost/drain area.
- If water is mostly in the door/dispenser area or around the dispensing chute, focus on dispenser plumbing and fittings.
- Inspect which ice system is active when the leak happens (especially if one system makes ice while the other is idle).
By matching timing and location, you avoid replacing the wrong part.
Use model-specific parts and manuals for dual-ice setups
With multiple ice mechanisms, parts aren’t interchangeable across GE models. Use the model number from the refrigerator’s label (usually inside the refrigerator compartment door frame or behind a drawer) to ensure correct components, especially for:
- Ice maker module selection (main freezer vs craft ice vs secondary system).
- Inlet valve and harness compatibility.
- Drain and cover differences that affect access points.
A model mismatch can lead to improper fit and recurring leaks even after repairs.
Know when a top-freezer or side-by-side layout changes the repair path
Ice-system plumbing and drain routing vary by refrigerator layout. If your GE isn’t a standard bottom-freezer design, the “defrost drain location” and access method change. For example:
- Bottom-freezer units commonly have a drain that feeds meltwater toward the freezer base area.
- Side-by-side designs may route meltwater differently and place valve connections in distinct locations.
If your layout differs, follow the correct layout-specific access points and avoid forcing tubing through covers designed for another system.
Prevent Repeat Leaks After the Repair
Level the refrigerator and confirm proper door alignment
After repairs, prevent recurring gasket and drainage issues by restoring correct cabinet alignment. Do this:
- Use a level on the freezer or refrigerator top surface to ensure the cabinet is level front-to-back and side-to-side.
- Adjust the front leveling feet until the freezer door sits evenly and closes without gaps.
- Inspect the gasket contact line after adjustment—there should be uniform compression around the full perimeter.
Proper alignment reduces warm air intrusion that creates frost, which then blocks drains and leads back to pooling water.
Keep the fill tube, drain, and ice bin clear of frost and debris
Clear pathways stop water from being forced into the wrong area. Focus on the components that move water and manage melt:
- Keep the ice fill tube and the ice maker area free of ice fragments that can redirect water.
- Remove any ice crusts near the drain opening and along the freezer bottom.
- Empty and clean the ice bin if ice has melted and refrozen around it.
A clean ice maker area prevents overflow conditions and reduces drain blockages caused by debris.
Monitor the first 24 hours for dripping, pooling, or refreezing
Once the repair is done, you need only one targeted observation window. For the next 24 hours:
- Place a dry paper towel or small cloth near the suspected leak origin (rear tubing area and/or the drain pooling area).
- Watch for new wet spots after the ice maker cycles and after defrost periods.
- If you see dripping, fresh pooling, or water that refreezes into new ice, stop and re-check the corresponding section (seal, drain flow path, or inlet valve/line connections).
This is the fastest way to confirm whether the problem is truly resolved.
Frequently Asked Questions
Why is my GE bottom freezer ice maker leaking water into the freezer?
The most common causes are a weak door seal, a clogged defrost drain, an overfilling ice maker, or a leaking water supply line or inlet valve.
Can a bad freezer gasket cause ice maker leaks?
Yes. If the gasket leaks warm air into the freezer, frost can build up and block drainage, which can make water collect or drip inside the freezer.
How do I know if the drain is the problem?
If you see pooled water under the drawers, ice buildup near the bottom of the freezer, or water that refreezes after defrost cycles, the drain is likely clogged.
Is it safe to keep using the refrigerator if the ice maker is leaking?
Usually yes for a short time, but continued leaking can cause ice buildup, floor damage, and electrical or component issues, so it should be repaired soon.
Do I need a technician for a GE ice maker leak?
Not always. Basic seal cleaning, drain clearing, and line inspection are often DIY-friendly, but valve replacement, hidden drain issues, or complex dual-ice systems may need service.