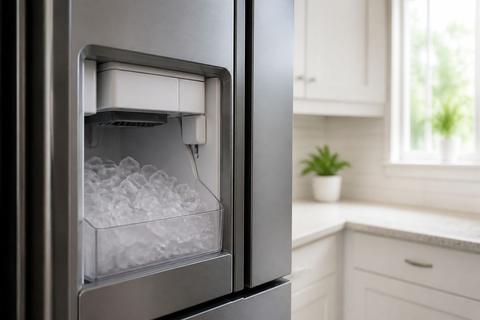
Fix GE Ice Maker Water, Leak, and Clog Problems
If your GE ice maker is stuck with no ice, overflowing water, or only making a few cubes, the problem is almost always in the water path. Fix GE Ice Maker Water, Leak, and Clog Problems by isolating where the flow is stopping or where the leak is coming from—before you replace parts. Start with the symptom you see (no water, clog, leak), then follow the checks in order.
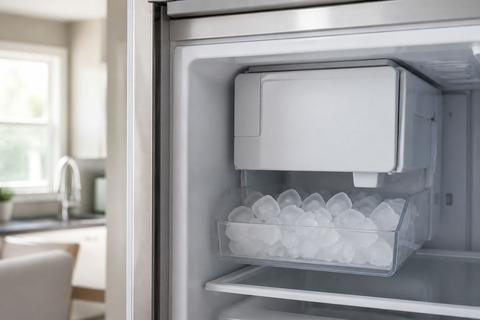
GE Ice Maker No Water: How to Diagnose the Water Path
When a GE ice maker stops getting water, the blockage is nearly always upstream of the ice maker. The fastest diagnosis is to follow the supply path in order: shutoff valve → water filter → inlet tube/fill line → inlet valve → ice maker fill components. This approach prevents you from swapping a working valve or motor while the real restriction is still in the line.
- Turn the ice maker off, then confirm water is on at the refrigerator shutoff valve (cold water line valve behind the unit).
- If the fridge has a water filter, replace it if it’s past 6 months or appears heavily restricted; then run 2–3 dispense cycles to purge air.
- Check the inlet tube for kinks, crushed spots, or freezing at the saddle/connection point.
- Inspect the inlet/fill tube routing into the ice maker area for ice blockage; remove any visible ice using safe thawing (do not puncture lines).
- Test for water at the inlet valve: with the ice maker calling for water, you should hear/see a fill attempt. If no fill occurs, the inlet valve or ice maker control isn’t opening the water path.
GE ice maker no water—what to check first
Start with the supply path, not the ice maker. Shutoff valve position must allow flow, the water filter must be fresh and unobstructed, and the inlet tube/fill line must be straight and ice-free. If any restriction exists, the ice maker will pause or produce no cubes.
- Locate the shutoff valve behind the refrigerator and ensure it’s fully open (handle aligned with the pipe).
- Replace the refrigerator water filter if it’s old or the dispenser flow is weak.
- Inspect the inlet tube and fill line for ice buildup or a kink.
- If water reaches the inlet valve but the ice maker never fills, move to inlet valve/ice maker diagnosis.
GE ice maker no water—how to confirm the inlet valve is receiving water
You’re confirming two things: water arrives at the inlet valve, and the ice maker triggers the valve to open during a fill cycle.
- Set the ice maker to the “on” position and initiate a harvest/fill request (use the ice maker switch or control as your model allows).
- Listen for the inlet valve opening sound during the cycle, or watch for water flow at the fill connection.
- If the inlet valve never opens, check for control/ice maker activation first (feeler arm not stuck, no power to the module).
- If the valve opens but water doesn’t reach the ice maker, the issue is the fill tube/line restriction.
Full Guide: GE Ice Maker No Water: How to Diagnose the Water Path
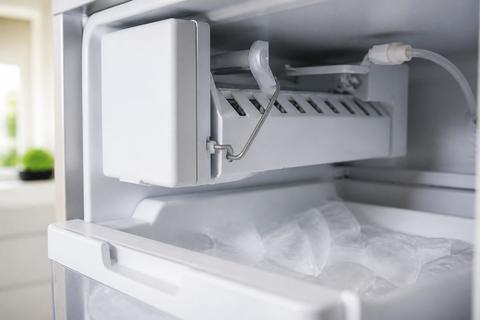
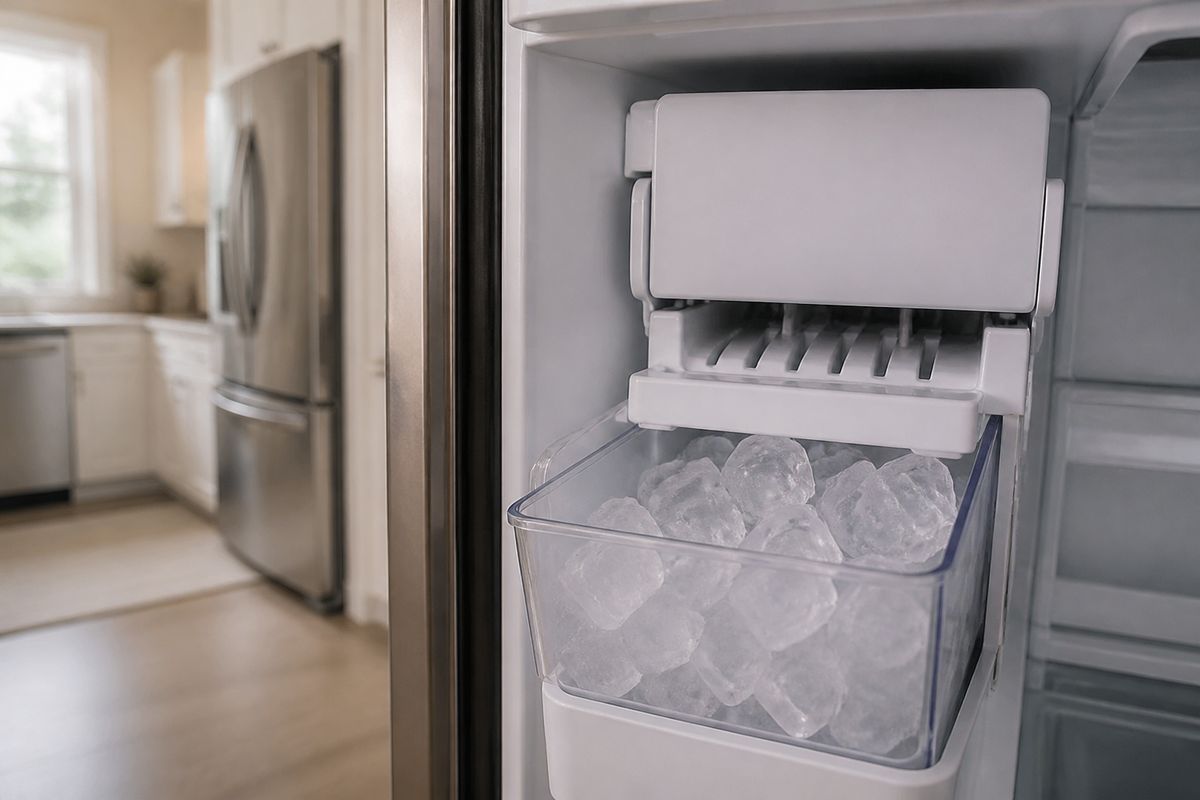
Unclog a GE Refrigerator Ice Maker Water Line Safely
A clogged fill line can look like a bad pump or inlet valve because the ice maker isn’t receiving enough water to make cubes or nuggets. Safe unclogging means thawing and clearing the restriction without cracking plastic lines or forcing water through an ice plug.
- Unplug the refrigerator or turn off the ice maker at the control to stop repeated fill attempts.
- Locate the fill tube/line feeding the ice maker and check for visible ice.
- Thaw the affected section with gentle, even warming (use a warm towel and time; avoid heat guns or open flames).
- Once the ice softens, carefully remove the obstruction if it’s accessible (do not puncture the line).
- Inspect for mineral scale: if flow returns slowly, flush by turning the ice maker back on and letting it complete a fill cycle, then discard the first batch of ice.
Signs your GE ice maker clog is ice vs. mineral buildup
Ice clogs present as sudden blockage after a freeze event, often after power loss or warm freezer changes. Mineral buildup builds gradually and typically causes weak flow, slow fill, or repeated “short fills” even when the line is not visibly frozen.
- If you see a hard white/clear ice plug near the fill connection, treat it as an ice clog first.
- If the line is not frozen but the fill flow is weak, suspect scale/minerals or a restricted filter upstream.
- If replacing the filter improves flow, minerals/scale were likely restricting the water path.
Full Guide: Unclog a GE Refrigerator Ice Maker Water Line Safely
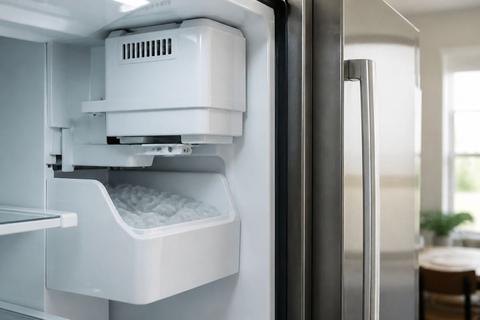
GE Ice Maker Leaking Water: Locate the Source and Fix
GE ice maker leaks aren’t one single failure—they’re a leak source puzzle. Loose connections, an overfill condition, a cracked inlet valve, a misaligned water tube, or melting ice that escapes the intended path can all create the same “water under/around the ice maker” symptom. Find the exact origin first, then fix the specific connection or blockage causing it.
- Dry the area completely and place a paper towel or absorbent pad under the suspected ice maker connection points.
- Run the ice maker for a short cycle and observe where the first wet spot appears (inlet connection, fill tube, base, or behind the unit).
- If the leak starts at a fitting, reseat the line firmly and check the water shutoff and compression connection.
- If the ice bin is filling incorrectly, confirm the ice maker is level and the feeler/arm assembly is not stuck in an “always full” or “always demanding” position.
- If you find ice buildup along the fill path, thaw and clear it so meltwater drains back through the correct route instead of dripping outside the line.
How to handle overfilling and stuck ice maker fill conditions
Overfilling usually points to an ice maker stopping/level-sensing issue, a restriction that causes delayed fills, or ice buildup that changes where water melts.
- Check the ice maker feeler arm (wire bail): it must move freely and not be pinned by food items or iced over.
- Remove the ice bin and inspect for ice preventing the sensing mechanism from returning to its normal position.
- After clearing ice, restart ice production and watch for a normal stop point rather than continuous filling.
How to fix a cracked or misrouted GE water line
A leak can come from a hairline crack or a tube that isn’t seated in its holder or bracket.
- Shut off water to the refrigerator before disconnecting any line.
- Inspect the entire exposed section of the water line for splits, cloudy spots, or abrasion wear.
- Re-route the tube so it follows the original cabinet path without sharp bends.
- Reconnect with the correct fitting type for your model and ensure the tube is fully seated before tightening.
Full Guide: GE Ice Maker Leaking Water: Locate the Source and Fix
GE Bottom-Freezer Ice Maker Leaking: Seal, Drain, and Line Fixes
Bottom-freezer layouts hide water lines and can cause leaks from places that are easy to miss: door seals that let warm air in, drain issues that overflow, and cabinet-routed water tubing that drips into the freezer floor. Your goal is to identify whether water is leaking from the ice system or entering the freezer compartment and melting elsewhere.
- Inspect the freezer door gasket for gaps, tears, or misalignment; close the door and look for uneven sealing.
- Check the freezer floor/drain area for ice buildup that blocks meltwater from draining properly.
- Trace the water line route to the ice maker and confirm it’s seated in its clips and not rubbing or kinked.
- If you find meltwater pooling near the ice maker base, thaw the area and clear the path so water can drain through the intended channels.
- After clearing ice, run an ice cycle and observe whether water now stays within the correct drain/freezer paths.
Bottom-freezer drain path: clear the route so water doesn’t overflow
A blocked drain forces melted ice and condensation to accumulate, creating leaks that look like a water-line failure.
- Turn off the ice maker before you start.
- Remove accessible ice from the drain area without puncturing plastic parts.
- Warm-thaw stubborn ice using gentle heat from a towel so you don’t damage liner surfaces.
- Clear the drain channel to restore flow back into the intended collection path.
Bottom-freezer door seal: stop warm-air leaks that create meltwater
When the gasket doesn’t seal, moisture builds up, then freezes and melts in the wrong place.
- Inspect the gasket edges for warping or debris.
- Clean gasket surfaces so the seal contacts fully.
- Adjust or align the door if it’s not closing flush; then re-check that the gasket compresses evenly.
Full Guide: GE Bottom-Freezer Ice Maker Leaking: Seal, Drain, and Line Fixes
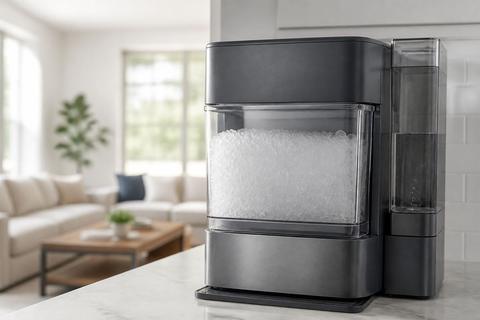
GE Opal 2.0 Nugget Ice Maker Leak and Side Tank Fixes
GE Opal 2.0 leaks commonly track back to the side tank/reservoir, hose routing, alignment, or mineral buildup that affects seals and ice flow. Before you assume the ice maker is “broken,” correct the parts that control water storage and delivery—then run a clean cycle to remove scale that can cause abnormal flow and overflow.
- Unplug the Opal and remove the side tank/reservoir.
- Reinstall it firmly, ensuring it sits flush and correctly seated in its guide.
- Check the water handling area for mineral residue; wipe buildup and clean per the manufacturer routine.
- Run the Opal clean/descale cycle (Clean function) after wiping and reseating to restore normal water movement.
- After the cycle, run ice production and inspect for leaks around the side tank, base seams, and hose connections.
Reset and clean steps that stop many Opal leaks
Opal leaks linked to side tank flow or scale often resolve after a proper reset and cleaning.
- Unplug the unit for several minutes.
- Plug back in and start the Clean cycle.
- If you have access to Opal Nugget Ice Maker Cleaner, use it through the Clean cycle, then run a rinse cycle if prompted by the unit.
- Recheck the side tank seating and inspect the seal surfaces for scale before restarting ice production.
Full Guide: GE Opal 2.0 Nugget Ice Maker Leak and Side Tank Fixes
How to Level a GE Refrigerator for Proper Ice Making
If your GE refrigerator is out of level, water may not flow through the ice maker correctly, and meltwater can drain in the wrong direction. That can lead to low ice production, irregular fill cycles, or water pooling where it shouldn’t. Leveling fixes the foundation so the ice maker’s water path behaves as designed.
- Move ice away from the unit so you can access the leveling area safely.
- Locate the front leveling feet and determine which side needs adjustment.
- Use a carpenter’s level placed on the top surface (or shelf area) and adjust until the refrigerator is level front-to-back and side-to-side.
- After adjusting, wait for the system to settle, then restart ice production.
- Observe the first fill cycle and ice bin behavior; proper leveling should align flow and drainage paths.
Step-by-step: leveling for ice maker performance
Use a real level and make small adjustments so you don’t overshoot.
- Place a level on the top of the refrigerator (or another flat, stable surface inside the cabinet area).
- Adjust one front leveling foot at a time until the bubble is centered.
- Re-check side-to-side level after front feet adjustments.
- Leave the refrigerator stable for a short period, then resume ice making.
Full Guide: How to Level a GE Refrigerator for Proper Ice Making
Frequently Asked Questions
Why is my GE ice maker not getting water?
Start by checking the water supply path in order: shutoff valve, water filter, inlet tube, fill tube, and inlet valve. A restriction anywhere in that path can prevent the ice maker from filling properly. Replace a clogged filter, clear ice or a kinked section in the line, and confirm the inlet valve opens when the ice maker calls for water.
What usually causes a GE ice maker to leak water?
Common causes include loose fittings, a cracked or misrouted water line, overfilling, blocked drains, and ice buildup that melts outside the intended path. The leak location usually determines the repair, so dry the area first and observe where water appears during a fill/harvest cycle.
Can a clogged water line stop ice production?
Yes. If the fill line is blocked by ice or mineral buildup, the ice maker may receive little or no water and stop making cubes or nuggets. Thaw ice safely, clear visible obstructions, and address upstream restrictions like an old or clogged water filter.
Does refrigerator leveling affect the ice maker?
Yes. If the refrigerator is not level, water may not drain or flow correctly, which can affect fill cycles, ice quality, and leak behavior. Level the refrigerator front-to-back and side-to-side, then restart ice production and recheck the water behavior during the next cycle.