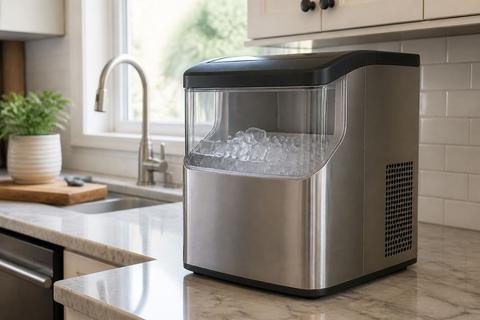
GE Refrigerator Ice Maker Not Working: Connection & Adjustment
If your ge refrigerator ice maker not working and you’re hearing the refrigerator run but getting no cubes, the cause is usually something simple you can check before replacing parts. Most issues come down to power control, water flow, a frozen/blocked fill tube, or a loose connection at the ice maker module. Use the steps below in order to trace the problem quickly—from basic settings to connection points, adjustment, and replacement.
For more help, see our Fix a GE Ice Maker Not Making Ice guide.
Start with the basics
Confirm the ice maker is turned on
Start by making sure the ice maker is actually enabled. On many GE models, the feeler arm (wire bail) turns the unit off when it’s raised; if the arm is stuck up, jammed by food, or pushed up during cleaning, the ice maker won’t cycle.
- Open the freezer and locate the ice maker’s feeler arm or control.
- If the wire bail is raised, lower it so it rests down freely.
- If your model uses a switch, slide it to ON.
- If your model has a control setting (inside the freezer or on the door panel), set Ice Maker to ON.
Then allow the unit to run through a cycle.
Check the water supply and shutoff valve
If the ice maker has power but no water reaches it, no ice will form. Confirm the household water supply and the ice maker shutoff valve are open and feeding steady flow.
- Locate the small shutoff valve behind the refrigerator (often a saddle valve or a dedicated quarter-turn valve on the supply line).
- Make sure the valve handle is turned fully open.
- Check that the refrigerator water line is not pinched or kinked behind it.
- If you recently moved the refrigerator or cleaned behind it, reseat the line so it isn’t stressed.
If you have an in-line filter, replace it if it’s overdue or you suspect it’s clogged.
Look for a simple reset or power cycle
When control logic locks up, a brief power cycle can restore normal operation. Some GE models also include an internal ice maker test/reset function.
- Turn the ice maker OFF, then wait 2 minutes.
- Unplug the refrigerator (or switch it off at the outlet) for 1 minute.
- Plug it back in and set the ice maker ON again.
- If your ice maker has a recessed test button, press it once to start a harvest cycle.
Watch for the ice maker to attempt a harvest—without forcing the mechanism by hand.
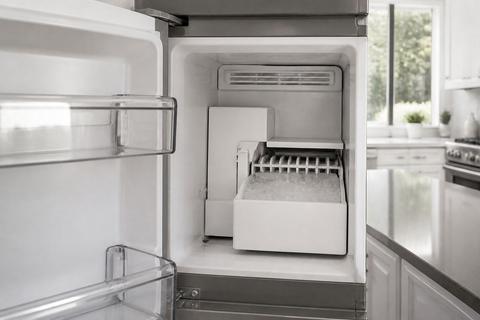
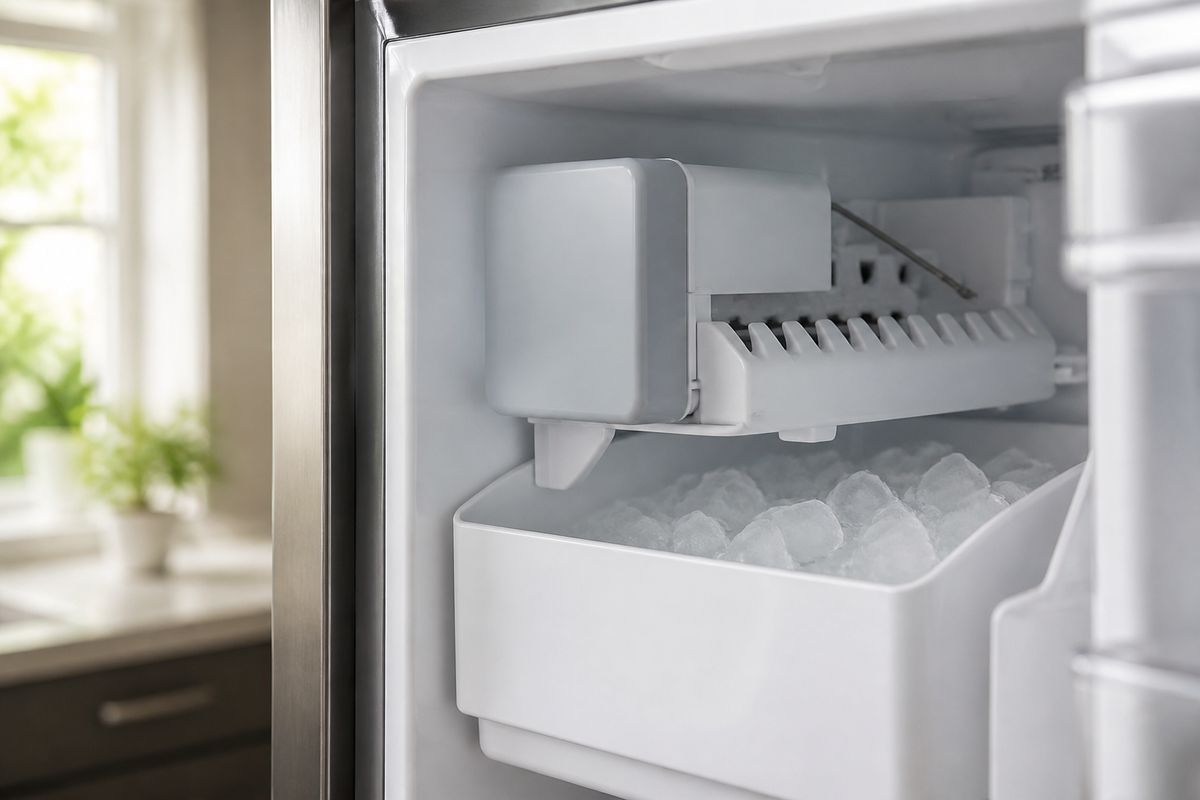
Inspect the connection points
Seat the ice maker module and wiring harness
A partially seated ice maker module can prevent the motor, fill valve, or sensors from working. If the connector isn’t fully locked, the unit may power up but never harvest or fill.
- Pull the freezer drawers away to access the ice maker assembly.
- Unplug the refrigerator for safety.
- Remove the ice maker cover (if present) and check the wiring harness is fully seated and latched.
- Press the connector straight in until it clicks/locks.
- Reinstall the ice maker module so it sits flush against its mounting points.
Reconnect power and let the ice maker run its cycle after reassembly.
Verify the water inlet line and fill tube
Even with correct settings, a disconnected or misrouted inlet line will stop filling. The fill tube inside the freezer routes water into the ice maker; blockages or incorrect placement stop ice production.
- Inspect the water inlet line at the back of the refrigerator and at the ice maker inlet connection.
- Look for loose fittings, missing clamps, or a line that pulled out during cleaning or moving.
- Locate the fill tube inside the freezer and check that it’s not cracked, detached, or blocked by ice.
- If ice is visible, defrost the area with gentle warmth (no open flame) until water can flow.
After clearing the line, ensure the tube is firmly in place before restoring power.
Check for kinks, leaks, or loose fittings
Leaks and kinks reduce or stop water flow and can also create freezing that blocks the fill tube. Loose fittings can cause intermittent filling—ice might start and then stop.
- Follow the water line from behind the refrigerator to the ice maker.
- Straighten any kinks and route the line so it doesn’t pinch when the door/drawer moves.
- Look for moisture around the saddle valve, connection points, and the ice maker inlet.
- Tighten loose compression fittings carefully (do not overtighten plastic parts).
- If you find active dripping, shut the valve off and repair the leak before turning the ice maker back on.
Fixing leaks restores steady water delivery for consistent ice production.
Adjust the ice maker for proper operation
Set the ice maker arm, switch, or control correctly
Wrong ice maker settings can stop harvest. Use the control you actually have—GE models vary by type—then make sure the mechanism can move freely.
- If your unit has a feeler arm, lower it so it can move without resistance.
- If your unit has an on/off switch, set it to ON.
- If your model uses a control setting, select Ice Maker ON or the closest equivalent.
- Ensure the ice bin is installed correctly—some models require proper bin placement for the dispenser/harvest control logic.
After adjustment, give it enough time to complete a harvest cycle.
Level the refrigerator and ice bin area
Ice makers depend on the correct angle of the refrigerator and the ice bin position. If the fridge is tilted or the bin is misaligned, the ice maker may not sense fill properly or could jam during ejection.
- Place a level on top of the refrigerator and check side-to-side and front-to-back.
- Adjust the leveling legs until the unit is level.
- Confirm the ice bin sits fully and evenly in its track.
- Remove any ice that’s piled up against the bin walls and blocks proper seating.
A level setup helps the ice maker eject and dispense without mechanical interference.
Tune the ice fill and harvest settings if available
Some GE ice maker setups include adjustable controls that affect how the unit fills and when it harvests. If the setting is too low, you’ll see partial or delayed production.
- Locate the ice maker control panel or internal adjustment (commonly inside the freezer area or on the ice maker assembly).
- Increase to a normal production setting (for example, raise from a “low” or “off” production level to standard).
- If your model has a harvest/fill timing option, set it to the default/default-normal value.
- Clear any ice buildup around the ejection area so the tuned settings can take effect.
Then monitor for a full harvest rather than expecting ice instantly.
Fix common production and dispensing problems
Clear ice clogs and frozen fill tubes
Clogs and frozen fill tubes are a top cause of “no ice” in GE refrigerators. If water can’t flow into the ice mold, the ice maker may cycle and then produce nothing.
- Unplug the refrigerator.
- Inspect the fill tube opening and remove any visible ice that blocks water entry.
- Thaw the frozen portion using gentle warmth (warm towels around the area work well).
- Reassemble and plug the refrigerator back in.
- Run the ice maker through at least one full cycle and discard the first batch if needed.
If the tube freezes repeatedly, check freezer temperature and water filter condition.
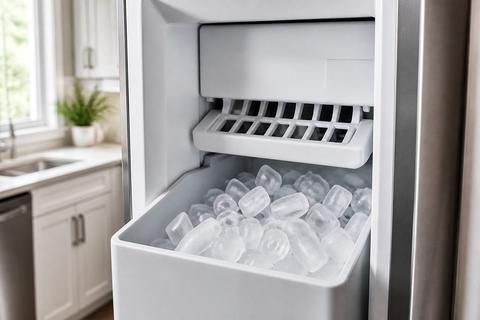
Remove blocked ice trays or jammed ejector arms
A jam inside the ice maker stops harvest or eject. The ejector mechanism must move freely to release cubes.
- Turn the ice maker OFF before clearing ice.
- Remove the ice bin and check for large clumps of ice that can block the eject path.
- Inspect the ice maker ejector area for a stuck or obstructed arm.
- Carefully clear ice so the ejector arm can move without binding.
- Reinstall the bin fully and ensure it’s seated correctly.
Once freed, switch the ice maker back ON and let it complete a harvest.
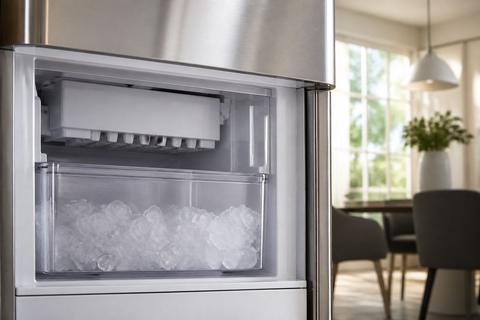
Troubleshoot a dispenser that will not release ice
A non-dispensing problem can happen even when the ice maker is producing ice. If ice is clumped, the auger or motor may fail to move cubes.
- Remove the ice bin and break up any large clumps inside it.
- Inspect the dispenser chute for ice blocks and remove any visible obstruction.
- Listen for a dispenser motor attempt when you press the paddle.
- If the motor runs but ice doesn’t move, ice clumps in the auger can be the cause—clear the blockage carefully.
- If the dispenser won’t run at all and the display shows a fault, address the dispenser power/control issue separately from ice production.
This isolates whether your problem is production or dispensing control.
When the ice maker needs replacement
Spot signs the module has failed
Replacement is appropriate when the ice maker cannot harvest or fill even after confirming power, water flow, and no clogs. Internal failure is common when the unit runs but never cycles the fill/harvest components.
- The ice maker does not harvest after a reset and manual test button press.
- Water is confirmed to reach the ice maker inlet, but the mold never fills.
- The unit repeatedly freezes/overheats without producing ice, despite clearing tubes.
- Wiring connections are secure and the module still shows no mechanical response.
If these symptoms persist, the module is often internally failed.
Decide between repair, replacement, or service
Before replacing anything, compare the likely fix to the cost of parts and labor. If the problem keeps returning due to a single failing module, replacement can be more efficient.
- If you can’t restore function after confirming water supply, filter flow, line condition, and connections, replacement is the likely path.
- If the freezer temperature is stable and the unit still won’t cycle, internal components are the more probable cause.
- If your model is under warranty, service may be the fastest option to prevent repeat failures.
Choose the option that resolves the issue for the long term with the least disruption.
Choose the right GE replacement part
Using the wrong assembly causes fitment and compatibility issues. Order the correct module for your exact refrigerator model.
- Locate your refrigerator model number (inside the fresh food compartment or on the door frame label).
- Match the ice maker assembly part number for that model, including any design differences (single vs. modular, different controls).
- Confirm whether your unit uses a specific water inlet configuration or harness style.
- Buy the replacement with the correct connectors and mounting scheme to avoid adapter problems.
Installing the correct assembly restores proper cycles and sensor operation.
Prevent the problem from coming back
Keep the freezer temperature in the right range
Ice makers rely on consistent cold to cycle and to prevent frozen lines. If the freezer runs warm, the ice maker won’t form ice reliably.
- Set the freezer temperature to around 0 to 5°F.
- Give the refrigerator several hours to stabilize after changing settings.
- Keep the freezer door closed and avoid overpacking near the ice maker area.
- Check for blocked air vents inside the freezer that can cause uneven cooling.
Stable temperature prevents clogs and improves harvest consistency.
Replace the water filter on schedule
A clogged or expired water filter starves the ice maker. Low flow prevents the fill valve from delivering enough water to make ice.
- Identify your filter model (for example, GE XWF, XWFE, or MWF series).
- Replace the filter if it’s past its recommended schedule (commonly 6 months).
- After replacing, run a few water and ice cycles to purge air from the line.
- Confirm the filter is installed correctly—incorrect seating can restrict flow.
Fresh filtration keeps water delivery strong for consistent ice production.
Inspect the ice maker after moving or cleaning the refrigerator
Moving the refrigerator can shift water lines, connectors, and alignment. Cleaning behind the unit can also create pinch points or loosen fittings.
- After moving, visually check the water line for kinks and the connections for tight seating.
- Recheck that the ice maker harness is fully latched and the module is mounted flush.
- Inspect the fill tube for ice buildup or displacement.
- Ensure the ice bin installs fully and isn’t warped from repeated removal.
These quick checks prevent repeat “no ice” failures.
Frequently Asked Questions
Why did my GE refrigerator ice maker suddenly stop making ice?
The most common causes are the ice maker being switched off, a blocked water line, a frozen fill tube, a bad water inlet valve, or a loose electrical connection.
Where is the on/off switch for a GE refrigerator ice maker?
It depends on the model. Some use a wire shutoff arm, some use a slide switch, and others have a control setting on the door panel or inside the freezer.
How do I reset a GE refrigerator ice maker?
Many GE models can be reset by turning the ice maker off, unplugging the refrigerator briefly, and then restoring power. Some models also have a test or reset button on the ice maker assembly.
Why is my GE refrigerator dispenser not dispensing ice?
A jammed auger, frozen ice bin, broken dispenser motor, or ice clump in the bucket can stop dispensing even when the ice maker itself is producing ice.
Should I repair or replace the ice maker assembly?
Replace it if the unit has failed internally, will not cycle after troubleshooting, or has repeated issues despite proper water supply and connections.