GE Nugget Ice Maker Not Making Ice: Reset and Checks
If you’re seeing no new cubes or nuggets and you know the unit should be working, you’re not alone—ge nugget ice maker not making ice is a common frustration after power fluctuations, cleaning buildup, or a water/temperature issue. Before you assume a failed part, you can narrow the cause quickly with a few targeted checks and the correct reset sequence.
For more help, see our Fix a GE Ice Maker Not Making Ice guide.
Start with the fastest fixes
Confirm the ice maker is turned on and has power
Start with the basics because a “no ice” problem is sometimes a switched-off unit.
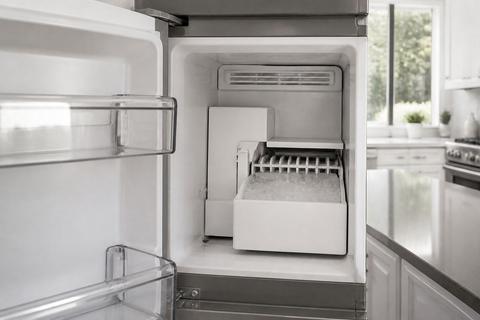
- Locate the ice maker control for your GE model (in the freezer compartment or behind the ice maker front cover).
- Slide any ice maker power switch to ON (many GE models show a status LED; green/red indicates operating state).
- If there’s a recessed test button next to the LED, press it once to start a short manual harvest/fill cycle.
- If the ice maker is paired with a bin-level feeler arm, lower the wire bail/feeler arm fully—if it’s stuck up, it stops production.
Power and “ON” is step one; if it still won’t run, move to water and obstructions.
Check water supply, water valve, and filter status
No water flow stops nugget ice production even if the motor works.
- Confirm the household water supply valve (usually behind the refrigerator) is open fully.
- Inspect the inlet line for kinks, crushed sections, or a recent bend that could restrict flow.
- Check the water filter status: if your filter is clogged or past about 6 months, replace it with the correct GE-compatible filter. (Common models include MWF, XWF/XWFE, depending on your refrigerator.)
- After installing a new filter, run a few water dispenser cycles to purge air before evaluating ice production.
If you have low flow or no fill sound, focus on the valve/line next.
Look for error lights, beeps, or a jammed bin
Many GE ice maker faults show up as signals on the ice maker cover or refrigerator control panel.
- Watch for error lights, flashing indicators, or beeps that correspond to ice system errors.
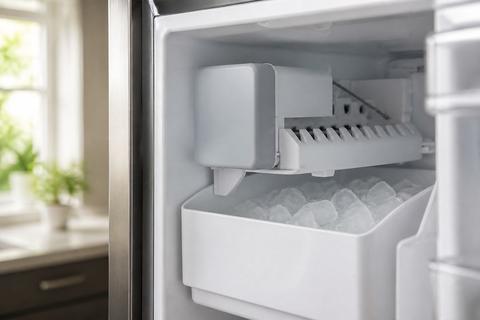
- Remove the ice bin and inspect it for ice that has compacted into a solid block.
- Check the chute and ice passage: if nuggets have frozen in place, the ice maker can’t complete harvest.
- Reinstall the bin correctly—misalignment can trigger a “bin full” condition and stop new ice.
If you see a jam or compaction, clearing it may restore normal operation without any parts replacement.
Reset the GE Nugget Ice Maker 2.0 the right way
Use the control panel reset or power cycle
A reset can clear a stuck cycle, but do it the right way for your GE Nugget Ice Maker 2.0.
- Turn off the ice maker using the control (or slide the ice maker switch to OFF), then turn it back ON.
- If the unit has a control-panel option for ice maker reset, select it per the model interface.
- If no reset option exists, do a power cycle: unplug the refrigerator or ice maker power for at least 5 minutes, then plug back in.
- Wait for the refrigerator to stabilize (compressor and controls come back online), then observe the ice maker’s next harvest/fill attempt.
This clears control glitches and re-initiates the ice-making sequence.
Wait for the full reboot and recovery period
After a reset, ice makers need time to complete harvest and refill before you’ll see new nuggets.
- Give the unit time to finish reboot logic and start a full production cycle, including harvest (dropping ice) and fill (feeding water).
- Do not repeatedly interrupt power during the first cycle; stopping mid-cycle can extend the no-ice period.
- Understand that nugget ice production is not instantaneous—until the next harvest completes and the bin receives ice, the bin can look “empty” even though the unit is working.
If the ice maker never attempts to harvest/fill after a reasonable recovery window, proceed to cleaning/blocked flow and system temperature checks.
Know when a reset is not enough
Reset is only the start; certain issues don’t clear themselves.
- If you get power/LED activity but hear no fill cycle and never see ice harvest, water flow or a failed valve/motor is likely.
- If the unit repeatedly tries and fails (cycling attempts but no production), assume a mechanical blockage, sensor fault, or component failure.
- If you find frozen debris/ice bridges in the ice path, you need defrost/clean steps—not another reset.
- If freezer temperature is too warm, the ice maker can’t freeze water into nuggets, so reset changes nothing.
Use reset to clear control state, then diagnose the real constraint.
Clean and clear common ice-making blockages
Remove mineral buildup and residue from the ice path
Minerals and residue restrict water flow and interfere with sensors and moving parts.
- Unplug or switch off the ice maker to prevent moving parts during cleaning.
- Remove the ice bin and take out any accessible ice/crumbs in the ice chute and ice path.
- Use a non-abrasive brush and warm water to remove residue from accessible surfaces. Avoid metal tools that can scratch sensors or plastic housings.
- For heavy scaling, use the correct GE cleaner (often Opal Nugget Ice Maker Cleaner for Opal countertop models) or the manufacturer-recommended cleaning method for your specific GE nugget system. Run the cleaning process fully, then perform the required rinse.
If ice flow is restricted by scale, cleaning restores the water-to-freeze cycle.
Defrost any frozen water line or internal ice bridge
Frozen lines or internal ice bridges stop water from reaching the ice-forming area.
- Turn off the ice maker and locate the water line feeding it. Check for frost or a hard ice plug along the tubing.
- If you see visible freezing, allow controlled warming: use a hair dryer on a low/cool setting held at a safe distance, moving constantly to avoid overheating plastic.
- For internal ice bridges, remove the bin and carefully clear loose ice from accessible areas; then let the system thaw until water can flow normally.
- After thawing, restore power and allow a complete fill/harvest cycle.
Never force parts to break ice—damage to sensors or auger components can turn a blockage into a bigger repair.
Clean the machine safely without damaging parts
You want the system clean, not damaged.
- Do not spray harsh chemicals directly into the ice mechanism. Use only approved cleaners or mild warm water for external surfaces and accessible areas.
- Avoid aggressive scraping inside the ice chute; use soft brushes and plastic-safe tools.
- Keep water away from electrical connectors, control boards, and wiring harnesses. Wipe with a damp cloth instead of soaking components.
- After cleaning, reassemble everything firmly—gaps or loose covers can trigger improper sensor readings.
Safe cleaning clears obstructions and prevents future “stuck” cycles.
Check for refrigerator or freezer issues that stop ice production
Make sure freezer temperatures are cold enough
Ice makers can’t make nugget ice when the freezer is too warm.
- Set the freezer temperature to a cold target—many GE systems require freezer temperatures around 0 to 5 degrees F to reliably freeze incoming water.
- Confirm airflow isn’t blocked: ensure vents inside the freezer aren’t obstructed by food packages or containers pushed against the back wall.
- Check whether the refrigerator was recently restocked or the door left open—temperature recovery delays ice production.
- Allow time for stabilization after adjusting temperature settings.
If the freezer isn’t actually cold, cleaning and resets won’t solve the root problem.
Rule out defrost problems that affect the ice maker
Defrost issues can create frost where water can’t travel or where ice bridges form.
- Look for signs of abnormal frost buildup inside the freezer that don’t clear normally.
- If your freezer has an error code related to defrost or temperature regulation, address it—ice production will stall when the ice maker area freezes incorrectly.
- If the freezer cycles normally but ice production is inconsistent, inspect around the ice maker feed area for ice bridges caused by failed defrost behavior.
- Ensure the refrigerator’s defrost system runs its cycle; persistent frost buildup is a strong indicator that the issue is beyond the ice maker itself.
Defrost faults need the correct service approach—often more than cleaning.
Check door seals and airflow around the appliance
Warm air intrusion prevents proper freezing and causes the ice maker to underperform.
- Inspect the freezer door gasket for tears, gaps, or warping. Close the door on a thin strip of paper—if it pulls out easily, the seal may be weak.
- Confirm the refrigerator level is correct so doors close fully and latch properly.
- Keep items from blocking the door from sealing; even small obstructions reduce airflow control.
- Make sure vents inside the freezer aren’t blocked, and that ice doesn’t pile up to the point it interferes with airflow.
If warm air is getting in, the ice maker will struggle regardless of reset attempts.
Test the parts that actually make and move ice
Inspect the ice maker motor and auger for movement
If the system has power but no mechanical movement, you may have a motor/auger issue.
- Remove the ice bin and observe the ice maker’s internal cycle area (do not put fingers where parts move).
- Start a manual harvest/test cycle using the ice maker test button or switch, if your model has one.
- Watch for auger movement or ice harvest action—there should be a clear mechanical response during the cycle.
- If you hear no motor response, or you get power but see no movement at all, the motor drive or control path may be failing.
Movement (or lack of it) quickly narrows the diagnosis.
Test the water inlet valve and solenoid
If the unit doesn’t fill, water inlet components are suspect.
- During a manual test/fill attempt, listen for a distinct water fill sound from the water inlet area.
- If you hear no water entry, check the water supply and confirm the filter is new/flowing, then focus on the inlet valve/solenoid.
- For many GE systems, a failing solenoid can still allow power to the ice maker while preventing water flow.
- Use your model’s diagnostics or multimeter testing per the correct service steps if you’re comfortable with electrical checks.
No fill plus power points to the valve/solenoid more than the reset.
Listen for the fill cycle and watch for mold refill
A normal nugget cycle depends on water reaching the ice-forming mold.
- During the next production attempt, observe whether water flows into the mold area as designed.
- If you see repeated behavior where the mold never refills, the system is blocked upstream (water line/valve) or the ice path is obstructed.
- If the unit fills but ice doesn’t form or gets stuck, inspect for internal ice bridge areas and re-run cleaning steps.
- Note whether the unit completes harvest—if it harvests but doesn’t refill, focus on valve/line; if it refuses harvest, focus on jam/sensors/mechanics.
This “fill and move” observation separates water problems from mechanical/ice-path issues.
When the issue is the model, not the reset
Identify symptoms of a failed ice maker module
Some GE nugget units fail in ways resets can’t correct.
- The ice maker repeatedly attempts cycles (power/LED activity) but never produces ice after water and cleaning checks.
- You get no meaningful mechanical response during a manual harvest/test cycle.
- Water flow fails despite verified supply, a fresh filter, and no kinks or freezing in the line.
- Error lights indicate hardware faults rather than simple cleaning or sensor states.
When symptoms align across multiple cycles, replacing the module or repairing the failed component is the practical path.
Check compatibility by GE refrigerator model number
Replacement parts must match your exact configuration.
- Locate the GE refrigerator model number on the interior wall, side wall, or behind the crisper drawer (varies by model).
- Match the ice maker type (GE Nugget Ice Maker 2.0 vs other variants) before ordering any module or kit.
- Confirm power supply characteristics and connector style; different GE ice makers may use different harnesses.
- Use the model number to confirm the correct part number for your exact freezer/ice compartment layout.
Using the wrong module wastes time and can cause repeated installation failures.
Decide whether repair or replacement makes more sense
Choose the fastest, most reliable outcome based on what’s failing.
- If diagnostics point to a single component (like inlet valve/solenoid) and the rest of the mechanism moves normally, repair is usually more cost-effective.
- If multiple checks fail—no movement, repeated fill failures, or hardware-fault indicators—module replacement is often the better long-term fix.
- Consider how old the unit is and whether prior repairs involved the same ice system parts.
- If the unit is under warranty, replacement through service may be the simplest option.
The goal is restoring ice production without repeated trial-and-error.
Prevent the problem from coming back
Set a regular cleaning and descaling schedule
Scale buildup is one of the most common causes of “no ice” on nugget systems.
- Clean on a predictable schedule based on water hardness—start with every 6 months for maintenance if you have moderate minerals.
- Use the manufacturer-approved cleaner and follow the exact clean/rinse cycle requirements for your specific GE nugget model.
- For systems that require it, run the cleaning cycle fully and then run any required rinse to clear cleaner residue.
- Replace water filters on time; a clogged filter accelerates mineral and flow problems that lead to blockages.
A consistent schedule prevents most blockages and sensor interference.
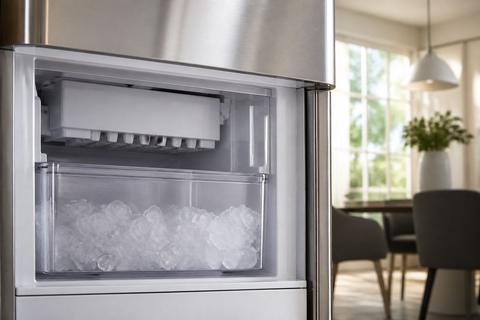
Keep the bin from overfilling and compacting ice
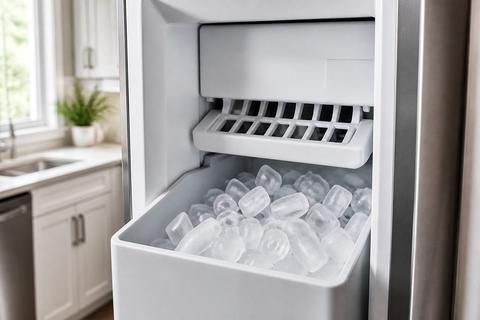
Compact ice blocks airflow and chute movement, which stops production.
- Remove ice before it overfills to the point it forms a solid mass.
- If nuggets start clumping, empty the bin and clear the chute area before restarting production.
- Ensure the bin sits correctly and the feeler/bail mechanism moves freely without rubbing ice.
- Don’t store bags or large items that physically block the ice maker components or door closure.
When the bin fills normally, the ice maker can keep making ice reliably.
Track temperature, water quality, and filter changes
Prevention depends on monitoring the inputs that control ice production.
- Keep freezer temperature near the required cold range so water can freeze into nuggets reliably.
- Replace the water filter at the recommended interval and after any cartridge failure warnings.
- If your area has hard water, plan more frequent descaling to prevent mineral buildup.
- After filter replacement, run several water dispenser cycles so the ice maker gets steady flow without air interruptions.
Tracking these three variables reduces no-ice incidents significantly.
Frequently Asked Questions
Why is my GE Nugget Ice Maker not making ice after a reset?
If a reset does not restore ice production, the most common causes are no water supply, a blocked fill line, a dirty or frozen system, a temperature problem, or a failed motor, valve, or control component.
How long should I wait after resetting the ice maker?
Give the unit enough time to complete a full restart and refill cycle. If it still does not produce ice after a reasonable recovery period, move on to water, temperature, cleaning, and component checks.
Can a dirty GE Nugget Ice Maker stop ice production?
Yes. Mineral buildup, residue, and frozen debris can block water flow or interfere with sensors and moving parts, which can make the unit stop making ice.
What refrigerator problems can prevent the ice maker from working?
Low freezer temperature, poor airflow, a defrost failure, a bad door seal, or a water supply issue can all keep a GE refrigerator ice maker from making ice even when the ice maker itself is fine.
How do I know if the ice maker motor or solenoid is bad?
If you hear power but see no movement, no fill, or repeated failed cycles, the motor, solenoid, or valve may be failing. Testing these parts helps separate a simple reset issue from a mechanical or electrical fault.