Whirlpool K40 Ice Maker Not Making Ice: Causes and Fixes
If you’re dealing with a whirlpool k40 ice maker not making ice, the cause is usually something simple—water isn’t reaching the mold, or the ice maker isn’t completing its cycle. Before you order parts, you can narrow it down quickly by checking the ice maker’s status, freezer conditions, and water flow. This guide walks through the most common failures and the safest fixes you can do at home.
For more help, see our Whirlpool Ice Maker Not Working: Fixes and Diagnosis guide.
How the K40 and K20 Ice Makers Work
What these Whirlpool ice maker models share
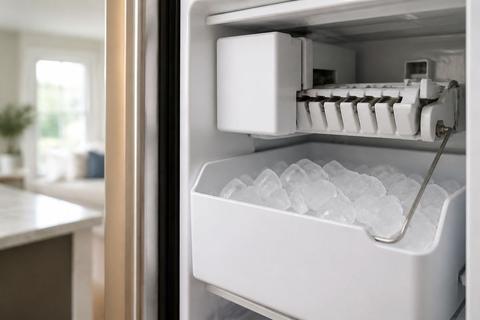
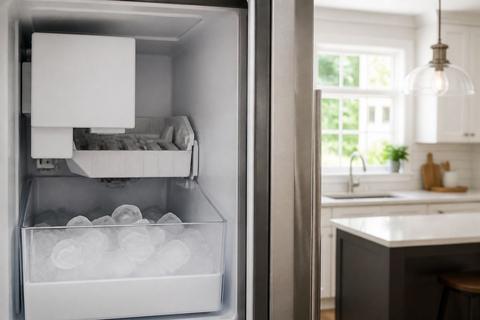
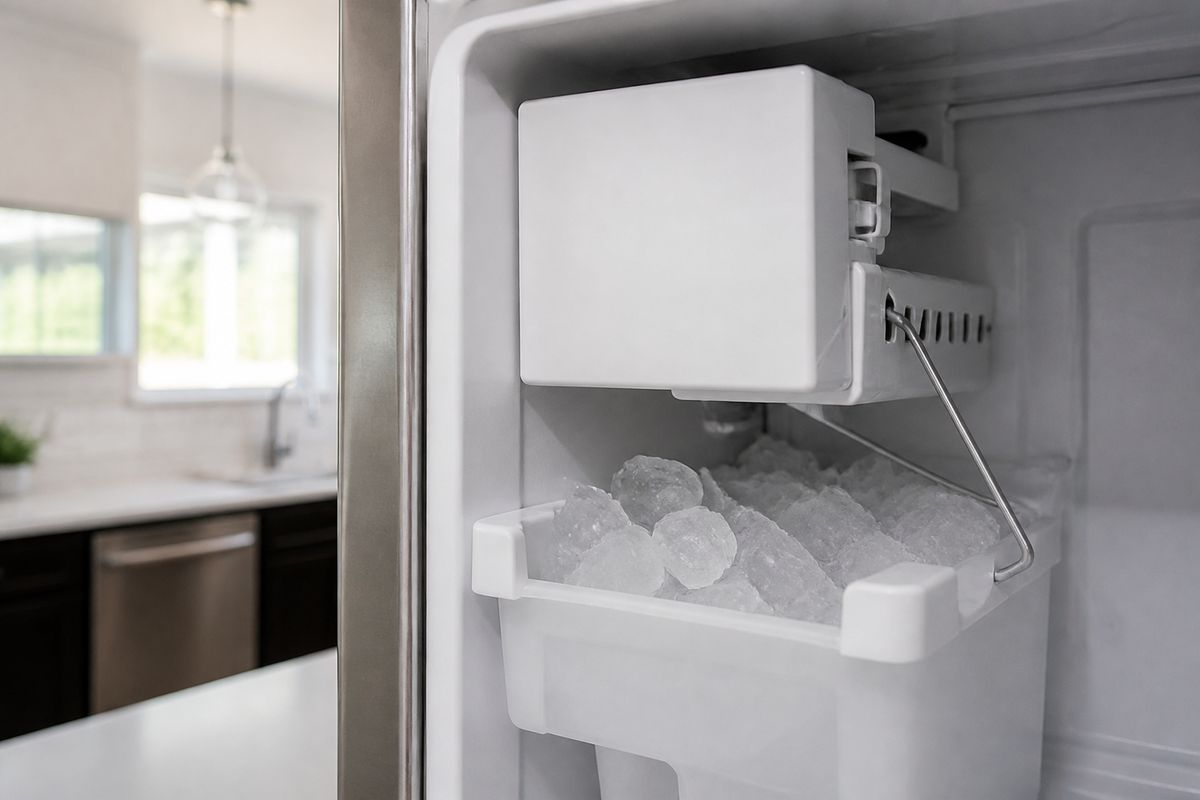
Whirlpool K20 and K40 ice makers both rely on the same basic sequence: water fills the ice mold, the mold freezes the cubes, then the ice maker ejects the cubes into the bin. When you have “no ice,” the problem is usually at one of three points in that sequence—water never enters the mold, freezing never completes, or the harvest/eject step stops production. Because the timing is dependent on freezer temperature and water flow, a water-supply issue and a temperature issue can look identical (empty bin).
Why a simple no-ice symptom can have multiple causes
“No ice” can happen even when the ice maker appears to be working. For example, the ice maker may cycle without receiving water due to a frozen fill tube, clogged filter, low water pressure, or a failed water inlet valve. Or it may receive water but fail to freeze because the freezer is too warm or airflow is blocked by an overpacked compartment. A jam in the mold or an arm/sensor that tells the ice maker the bin is full can also stop harvest, leaving the bin empty even though the system is powered.
When the problem is in the ice maker vs. the refrigerator
Start by separating “refrigerator conditions” from “ice maker components.” If the freezer temperature is warm, the ice maker won’t complete freezing even if the water inlet valve works. If the freezer is at the right temperature but the mold never fills, focus on water supply, filter, fill tube, and inlet valve. If the ice maker fills and freezes but stops harvesting, look for ejector arm/mold buildup or ice maker module/sensor problems. This distinction helps you avoid unnecessary part replacements.
Start with the Fastest Checks
Confirm the ice maker is turned on
Many Whirlpool ice makers include a shutoff feeler/arm that can be left in the OFF position. On many models, lift the wire arm or set the sliding feeler paddle to the up/off position turns the ice maker OFF; moving it down turns it ON.
Follow these steps:
- Open the freezer and locate the ice maker arm/feeler near the front of the ice maker or on the side of the module (model-dependent).
- Move it to the ON/down position (or to the position the manufacturer indicates for “ice maker ON”).
- Wait for the next cycle; once water and temperature are correct, most modular ice makers resume production within about 90 minutes to 2 hours.
Check the water supply and shutoff valve
A closed or partially closed supply valve is one of the most common causes of “no ice.” If the refrigerator was recently installed, moved, or shut off during maintenance, the valve can be turned off.
Do this:
- Locate the household shutoff valve feeding the refrigerator (behind the fridge or in the nearby wall cabinet).
- Make sure it is fully open (handle should be aligned with the tubing/pipe to indicate ON).
- Turn the water supply back on fully if it was closed, then allow the ice maker up to one cycle to draw water.
Inspect the freezer temperature and food load
If the freezer isn’t cold enough, the ice maker may never complete freezing and will stop producing. Whirlpool target freezing performance is around 0°F to 5°F. An overpacked freezer can block airflow and keep the ice mold from reaching freezing temperature.
Steps:
- Check the freezer display or thermometer; set/verify it is between 0°F and 5°F.
- Ensure vents inside the freezer aren’t blocked by food containers.
- Reduce clutter near the ice maker area so cold air can reach the mold.
Look for a clogged filter or kinked water line
Restricted water flow prevents proper mold fill and causes “no ice” or very small/odd cubes. If you have an in-line filter or the refrigerator filter is overdue, replace it. A kinked or pinched water line can also stop flow.
Steps:
- Inspect the water line behind the refrigerator for kinks or crushed sections.
- Check the filter status; if it’s past its service interval, replace the water filter.
- After restoring water flow, allow about 24 hours for normal batch production if the system was empty or newly refilled.
Common Reasons the Whirlpool K40 Stops Making Ice
Frozen fill tube or blocked inlet
A frozen fill tube is a frequent cause of no or partial ice because water can’t reach the ice mold. If the fill tube is iced over, the cycle may run but the mold never fills.
Steps to address this:
- Unplug the refrigerator or switch off power to the ice maker module for safety.
- Locate the thin fill tube feeding the ice mold.
- Thaw the tube using a hair dryer on low heat held at a safe distance, or by carefully warming the surrounding area (avoid direct high heat on plastic).
- Once thawed, wipe away any melted ice and plug the refrigerator back in.
Faulty water inlet valve
The water inlet valve controls when water flows into the ice mold. If it fails mechanically or electrically, the ice maker may cycle but water never enters the tray.
What to look for:
- If the ice maker attempts harvest but the mold stays dry, the valve is a prime suspect.
- If the water dispensing system works but the ice maker does not, focus on the ice-maker-specific inlet operation.
- If you’ve already confirmed the water supply and filter are good, the inlet valve replacement is often the next step.
Worn or stuck ice maker module
Modular ice makers have internal components (timers/sensors and the harvest mechanism). Wear or sticking can stop the cycle in the middle, leading to empty or irregular harvests. This is also common after power interruptions or if the ejector mechanism is obstructed.
To narrow it down:
- Observe whether the ice maker completes a full cycle (water fill → freezing → harvest).
- If it consistently stops in one phase—especially after the water supply is confirmed—consider module failure.
- If the assembly is dirty with ice buildup, remove the obstruction before assuming the module is defective.
Poor water pressure or air in the line
Low household pressure reduces the water flow rate needed to fill the mold properly. Air trapped in the water line can also prevent consistent fill, especially after filter changes, line work, or moving the fridge.
Steps:
- Make sure your household water pressure meets the refrigerator’s requirements (Whirlpool’s documented range is roughly 35–120 psi).
- If you just changed the filter or connected the line, run the water dispenser until the flow is steady before expecting ice production.
- If ice output is weak or slow, address the filter condition and water pressure before replacing parts.
Bin, arm, or sensor issues that stop production
Many ice makers stop when the bin is detected as full, when the feeler is stuck, or when an ice level sensor can’t read properly. If ice is present but production stops, jammed ice or a mis-positioned arm can be the reason.
Check these:
- Empty and inspect the ice bin for clumps that block the bin sensor.
- Move the ice maker arm/feeler through its full travel without forcing it.
- Look for ice packed around the sensor area that prevents accurate detection.
Fixes You Can Try at Home
Thaw a frozen fill tube safely
Start here if the mold is dry or you notice ice around the fill area. A frozen fill tube can stop the ice maker from completing its cycle even when everything else is powered.
Do it like this:
- Unplug the refrigerator (or switch off the ice maker module).
- Use a hair dryer on low heat to gently warm the area around the fill tube and the ice maker inlet.
- Keep the dryer moving and avoid overheating plastic.
- Once thawed, remove any loosened ice so water can flow normally during the next cycle.
Replace or flush the water filter
A clogged or overdue filter restricts water flow enough that the ice mold never fills properly. After replacing a filter, the first batches may be small or off-taste due to trapped air and initial flow characteristics.
Steps:
- Replace the water filter with the correct Whirlpool model.
- After installation, discard the first 2–3 full batches of ice.
- If water flow is weak, also check for air in the line by running the water dispenser until it runs smoothly.
Reset the ice maker after a power loss
Power outages and brief electrical interruptions can leave the ice maker in an incomplete state. A reset can restore the timing sequence.
Steps:
- Unplug the refrigerator for about 1 minute, then plug it back in.
- If the control has an “Ice Maker” or “Ice” button, toggle it OFF then back ON.
- Leave the freezer to reach stable temperature before judging results; production commonly resumes within about 90 minutes to 2 hours.
Test the freezer temperature and airflow
If freezing performance is off, the ice maker won’t build cubes. Temperature problems can come from a failed thermostat/control setting, but they also come from blocked vents and warm freezer loading.
Steps:
- Set and verify freezer temperature to 0°F–5°F.
- Check that air vents aren’t blocked by food or containers.
- Avoid placing hot items near the ice maker area; keep the freezer organized to maintain airflow.
Inspect the ejector arm and mold for ice buildup
Ice buildup can stop the harvest mechanism or interfere with sensors, turning a “water problem” into an “ice jam” problem. If you see hardened ice around the mold or ejector pathway, clear it to restore cycling.
Steps:
- Unplug the refrigerator.
- Remove any ice you can reach around the mold and ejector area.
- Let the ice maker area thaw if needed, then wipe dry.
- Plug back in and allow up to 24 hours for steady production after clearing a jam.
When the Whirlpool K20 or K40 Needs Parts Replacement
Signs the water inlet valve has failed
If water supply is on, filter is fresh, the fill tube isn’t frozen, and the ice maker still cycles without filling, the inlet valve is the likely failure. A failed valve means it won’t open or deliver the correct flow to the mold.
What points toward valve replacement:
- The ice maker attempts a cycle but the mold stays dry.
- The dispenser may still work, while the ice maker remains dry.
- Repeated cycles don’t improve after thawing and filter replacement.
How to tell if the ice maker assembly is worn out
Worn ice maker assemblies can fail internally—stuck mechanisms, worn harvest parts, or inconsistent cycle control. If the unit intermittently produces and then stops, or stops mid-cycle after you’ve corrected temperature and water issues, the module/assembly is suspect.
Look for:
- Consistent stalling during harvest/ejection even with normal water fill.
- Evidence of repeated ice jams that quickly reoccur after clearing.
- No response or erratic behavior after resets and basic checks.
When a replacement sensor or thermostat is the likely fix
Sensors and thermostats regulate freeze timing and monitor ice level. If the ice maker thinks the bin is full, or it doesn’t sense proper temperature changes, it can stop producing even with good water flow.
Replace-related clues:
- Water fills, but cubes never reach harvest timing and production halts.
- The ice bin detection or arm position seems correct, yet production stops.
- The ice maker behaves abnormally after temperature fluctuations or repeated power interruptions.
Choosing the right part for K20 vs. K40
K20 and K40 can share symptoms but not always the same exact components. Choosing the correct part depends on your refrigerator model number and the specific ice maker assembly design.
Steps to get it right:
- Locate your refrigerator model and the ice maker assembly identifier.
- Match the replacement part to the exact assembly/ice maker module, not just the overall K20/K40 label.
- If you’re unsure, record part numbers from the failed module before ordering.
Prevention Tips to Keep Ice Production Steady
Maintain proper freezer temperature
Consistent ice production depends on stable freezing conditions. Set and maintain 0°F to 5°F. If you frequently open the freezer door, keep the ice maker area clear and avoid warming the mold region.
Key habits:
- Keep the freezer set within the target range.
- Don’t block vents near the ice maker.
- After a long door-open period or loading day, give the unit time to return to temperature before expecting full batches.
Change filters on schedule
A restricted filter is a direct pathway to slow or stopped ice production. Follow Whirlpool’s filter interval (commonly around 6 months / 200 gallons depending on usage) and replace sooner if you notice slow water flow.
Do this:
- Track your filter replacement date.
- Replace when due rather than when ice production becomes poor.
- After changing the filter, discard the first 2–3 full batches of ice.
Keep the water line clear and unbent
Kinks and pinched lines reduce flow and can also lead to partial fill failures that look like a “bad ice maker.”
Prevention steps:
- Ensure the water line behind the refrigerator isn’t crushed during cleaning or moves.
- Leave a gentle bend radius when routing tubing.
- If the line was disconnected/reconnected, run water until flow steadies before expecting normal ice output.
Avoid overpacking the freezer around the ice maker
Overpacking blocks airflow and can delay freezing in the ice mold. It also increases the chance of ice jams caused by displaced items.
Best practices:
- Keep items from pressing against the ice maker’s airflow paths.
- Don’t store bulky containers directly against the ice maker housing.
- Keep the area around the ice bin and sensor unobstructed.
Troubleshooting by Symptom
Ice maker is on but the bin stays empty
If the arm is in the ON position and the freezer is cold enough, focus on water delivery. Empty bins usually mean no water reaches the mold or the ice maker is stuck before harvest. Start with water supply, then filter, then the fill tube.
- Confirm the ice maker arm/feeler is down/ON.
- Open the household shutoff valve fully and check for flow at the dispenser.
- Replace an overdue filter and inspect for a kinked water line.
- Thaw a frozen fill tube if the mold area looks dry or iced up.
Ice forms, but cubes are small or hollow
Small or hollow cubes point to restricted water flow, air in the line, or insufficient freezing time. A clogged filter or low pressure can reduce the amount of water that reaches the mold. After filter changes, trapped air can also contribute.
- Replace the water filter if it’s overdue.
- After filter install, discard the first 2–3 full batches of ice.
- Verify freezer temperature is 0°F–5°F and that vents are not blocked.
- Check water line condition for kinks and ensure the valve is fully open.
Ice maker cycles, but no water enters the tray
When the ice maker cycles but the mold never fills, the problem is almost always water flow control. The inlet valve may be failing, the filter may be blocked, the fill tube may be frozen, or water pressure is too low.
- Thaw the frozen fill tube if there is ice buildup near the inlet.
- Replace the water filter and clear any flow restrictions.
- Verify household water pressure is adequate (about 35–120 psi range).
- If water still never enters the mold, plan for water inlet valve or ice maker assembly service.
The unit worked before and stopped after a move or outage
After a move or power outage, “no ice” often comes from a shutoff valve turned off, a kinked supply line, an arm left OFF, or the ice maker stuck mid-cycle. Temperature recovery after a warm period can also delay production until the freezer returns to range.
- Ensure the ice maker arm/feeler is ON/down.
- Check the shutoff valve and inspect the water line for kinks.
- Reset by unplugging for about 1 minute, then reapplying power.
- Keep freezer at 0°F–5°F; allow up to 24 hours for steady production after disruptions.
Frequently Asked Questions
Why is my Whirlpool K40 ice maker not making ice at all?
The most common causes are a closed water supply, frozen fill tube, clogged filter, low water pressure, or a failed inlet valve or ice maker module. Start with the ice maker being turned on, then confirm the freezer is at 0°F–5°F and that water flow is restored through the filter and supply line.
Are the Whirlpool K20 and K40 ice maker problems usually the same?
They often share the same symptoms and many of the same causes, such as water supply issues, temperature problems, and failing components, though the exact part numbers can differ. The best approach is to match parts by your exact ice maker assembly/module and refrigerator model number.
What temperature should the freezer be for proper ice making?
A freezer around 0°F to 5°F is usually best. If it is too warm, the ice maker may not complete a full cycle or may stop entirely because the mold can’t freeze quickly enough to harvest ice.
Can a clogged water filter stop the ice maker from working?
Yes. A restricted filter can reduce water flow enough that the tray never fills properly or the ice maker produces very little ice. Replace the filter if it’s overdue, then discard the first 2–3 full batches after installation.
When should I stop troubleshooting and call for service?
If the water supply is good, the fill tube is clear, and the ice maker still will not cycle or fill, a failed valve or ice maker assembly may need professional replacement. At that point, further troubleshooting is likely to involve internal electrical components or controlled testing best handled by a technician.