Whirlpool Ice Maker Not Working: Fixes and Diagnosis
If your Whirlpool ice maker has gone quiet—or it makes ice but won’t dispense—you’re not alone. When Whirlpool Ice Maker Not Working: Fixes and Diagnosis becomes your search phrase, it usually means something basic is preventing the ice maker from powering, filling, harvesting, or releasing ice. Use the sections below to narrow the cause quickly and apply the right fix without guessing.
Whirlpool Ice Maker Not Working: Causes and Step-by-Step Fixes
Start with the most common failure points: power, control settings, ice arm position, and basic reset checks. This first pass helps you identify whether the problem is an “ice maker is off” issue, a “not receiving power” issue, or a “mechanical position” issue. Once you rule these out, symptom-based troubleshooting becomes much faster.
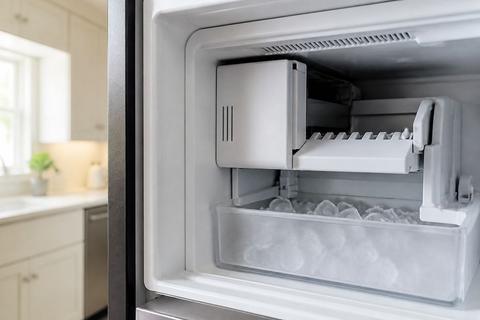
- Confirm the ice maker is turned ON (not shut off by the arm). On many Whirlpool models, the ice maker has a wire feeler/shutoff arm: lift it up to turn the ice maker OFF; lower it to turn it ON. Keep the arm fully down/engaged.
- Check freezer temperature. Make sure the freezer is at 0–5°F. If the freezer is warm, the ice maker will not reliably harvest.
- Verify power to the ice maker. Ensure the refrigerator is plugged in and the breaker has not tripped. If your model has a “Ice Maker” or “Ice On/Off” toggle, set it to ON.
- Perform a basic reset. Unplug the refrigerator for 60 seconds, then plug it back in. Give the unit time to wake up and start a fill/harvest cycle.
- Inspect the ice maker for an obvious jam. Look through the ice bucket opening if accessible; remove loose ice chunks that could block the mechanism.
Full Guide: Whirlpool Ice Maker Not Working: Causes and Step-by-Step Fixes
Whirlpool Ice Maker Not Dispensing Ice or Water: How to Fix
If the unit is making ice but nothing comes out of the dispenser, the ice maker is only part of the system. Dispensing relies on a chute path, a delivery mechanism, and switches that signal when the paddle door should open. Focus here on clearing blockages and checking the components that control release.
- Check for ice clumps that block the chute. Remove the ice bucket (if your model uses one) and look for jammed cubes near the outlet/chute area. Break up and remove compacted ice.
- Inspect the dispenser chute for blockage. Use a flashlight to look for ice packed in the chute or around the flapper/paddle area. Clear it gently so you don’t crack plastic parts.
- Check the dispenser switch/paddle. Press the dispenser paddle/lever and ensure it moves freely—no sticking from ice. If it sticks, remove ice around the paddle mechanism.
- Look for a failed auger/delivery mechanism symptom. If you hear the dispenser motor trying but ice doesn’t move, the delivery path may be jammed or the mechanism may be failing.
- Restore the bucket position correctly. If the bucket is not seated properly, the dispenser can stop feeding ice.
Whirlpool Ice Maker Not Getting Water: Filter, Valve, and Line
A lack of incoming water usually means the supply path is restricted or interrupted. Start with the most common points: the filter, the inlet valve, and the water line (including freezing). By isolating where water stops, you avoid unnecessary ice maker parts replacement.
- Check and replace the water filter if it’s overdue or restricted. Whirlpool recommends discarding the first 2–3 full batches after installing a new filter. If your filter is beyond about 6 months / 200 gallons, replace it.
- Examine the inlet valve area for water flow. If water never reaches the ice maker, the inlet valve may not open. Verify the valve has power (follow your model’s service access steps).
- Inspect the water line for kinks or damage. Look behind the refrigerator for any pinched or kinked section that would restrict flow.
- Thaw a frozen fill tube. A frozen fill tube (the thin tube feeding water into the ice mold) is a frequent cause of no or partial ice. Thaw it with a hair dryer or warm water applied to the tubing, then check the line and inlet valve for restored flow.
- Consider household water pressure. If flow is weak, the supply may be low. Whirlpool’s spec is roughly 35–120 psi; restrictors and long runs can reduce pressure.
How to Turn On a Whirlpool Ice Maker and Fix a Stuck Ice Arm
Many “ice maker not working” calls are simply an ice maker that’s been turned OFF by the shutoff arm position or a mechanical arm that is stuck in the wrong place. Your job is to confirm the ice maker is enabled and that the arm moves freely when it should.
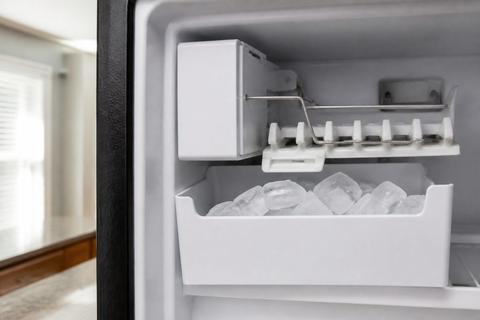
- Locate the ice maker shutoff arm/feeler inside the freezer. On many Whirlpool refrigerators, the arm is a wire feeler or a sliding paddle.
- Move the arm to the ON position. Lift to the OFF position only to test; for normal operation, set it down/engaged. If it was left up, the ice maker will not run.
- Check for physical binding. Ice buildup can prevent free movement. Remove any ice blocking the arm so it can pivot freely.
- Ensure the freezer temperature is correct. Set the freezer to 0–5°F so the unit can harvest and the arm can return properly.
- Allow a restart window. Once enabled, the ice maker needs time to fill and harvest—expect normal production after the next cycle.
Full Guide: How to Turn On a Whirlpool Ice Maker and Fix a Stuck Ice Arm
How to Manually Cycle a Whirlpool Ice Maker That Won't Harvest
When ice forms but does not release, the harvest cycle is the problem—not the initial freezing. A manual cycle helps you verify that the ice maker’s mechanism advances through harvest and releases ice as intended.
- Power down safely. Unplug the refrigerator or turn off power to the ice maker circuit before disassembling or accessing internal test points.
- Access the ice maker module controls (model-dependent). Some Whirlpool modular ice makers have a small fill/test port or test holes on the front module.
- Use the manual harvest test method on modular units. With power OFF, use a paperclip to jump the T and H test holes on the front module to force a harvest cycle when power is restored.
- Watch what happens during the cycle. During harvest, the mechanism should advance and release ice. If it fills but never releases, the harvest component (or sensor/control) is failing.
- If you cleared a jam, remove blockages again. Ice stuck in the mold or around the release area can stop harvest from functioning.
Full Guide: How to Manually Cycle a Whirlpool Ice Maker That Won't Harvest
Whirlpool K40 and K20 Ice Maker: No Ice Causes and Fixes
Older Whirlpool K40 and K20 ice maker designs require a different diagnostic approach because their control and mechanical layout differ from newer modular icemakers. Before troubleshooting, identify which model you have and focus on the design-specific reasons those units fail to produce or harvest ice. This prevents wasting time on steps meant for other ice maker types.
- Identify the exact ice maker model (K40 vs. K20). Use the label inside the freezer or on the ice maker housing.
- Check for power and control readiness. Older units can be disabled by mechanical positioning or control settings unique to that series.
- Inspect mechanical components for binding. Look for ice that prevents the eject cycle, including compacted ice around the ice path.
- Verify water delivery to the mold. If the unit never fills, trace toward the water path rather than repeatedly forcing harvest.
- Use the model-appropriate service approach. K40/K20 systems are more sensitive to correct parts placement and alignment; if you replace components, reinstall per the specific ice maker layout.
Full Guide: Whirlpool K40 and K20 Ice Maker: No Ice Causes and Fixes
Whirlpool Refrigerator Error Codes for Ice Maker Problems
Error codes change the diagnosis because they point to specific control, sensor, or communication faults that symptoms alone can’t distinguish. If you see a code related to ice making, freezing, harvest, fill, or thermistor/sensor issues, follow the code’s meaning to narrow what to inspect next. If the code repeatedly returns after basic checks, professional service is the fastest safe route.
- Locate the refrigerator’s error display. Some models show codes on the dispenser screen; others display them on the control panel or via blinking indicators.
- Match the code to ice maker functions. Codes tied to fill/harvest point toward water supply, inlet valve, or harvest components; codes tied to sensors point toward thermistor/control board inputs.
- Do the basic checks that match the code. If the code suggests a fill problem, focus on filter/valve/line; if it suggests harvest/sensor issues, focus on the harvest mechanism and sensor path.
- Clear-only resets when needed. If your model supports a “clear” or reset sequence, use it only after you address the suspected cause—error codes help verify what changed.
- Escalate when the code persists. If the same code returns after clearing the likely blockage and verifying water supply, the control or sensor may be failing.
Full Guide: Whirlpool Refrigerator Error Codes for Ice Maker Problems
Frequently Asked Questions
What should I check first if my Whirlpool ice maker stops working?
Start with the basics: confirm the ice maker is turned on, the ice arm is not stuck, the freezer is cold enough, and the water supply is connected. Many no-ice issues are caused by the ice maker being disabled by the shutoff arm (arm left up = OFF), or by the freezer running too warm to freeze and harvest properly. Next, do a basic reset by unplugging the refrigerator for 60 seconds and plugging it back in. If ice production still doesn’t start, move to symptom-based checks like water flow, dispenser blockage, or harvest behavior.
Why is my Whirlpool ice maker making ice but not dispensing it?
That usually points to a dispenser issue rather than an ice-making issue. Common causes include jammed ice in the chute, a stuck dispenser paddle/flapper, or a blocked delivery path caused by compacted cubes. The ice maker can complete freezing and harvest, while the dispenser mechanism fails to release ice to the front. Focus on clearing the chute and verifying the dispenser switch/paddle moves freely without resistance from ice buildup.
Can a clogged filter stop my Whirlpool ice maker from making ice?
Yes. A restricted filter can reduce or block water flow, which prevents the ice maker from filling the mold properly. If cubes are small, slow to produce, or the unit never fills, check the filter first—especially if it’s overdue. Replace the filter, then discard the first 2–3 full batches after installation because initial cubes can be small, hollow, or off-tasting. After filter replacement, inspect the rest of the water path if the problem continues.