How to Turn On a Whirlpool Ice Maker and Fix a Stuck Arm
If you’re searching how to turn on whirlpool ice maker because your fridge isn’t producing ice, the fix is usually simpler than you think. Most Whirlpool ice makers are controlled by a wire arm/feelers or a dedicated on/off switch you can flip right at the unit. If the arm is frozen in place, turning it on won’t help until you clear the jam safely.
For more help, see our Whirlpool Ice Maker Not Working: Fixes and Diagnosis guide.
Identify the Whirlpool Ice Maker Controls
Find the on/off arm, switch, or lever
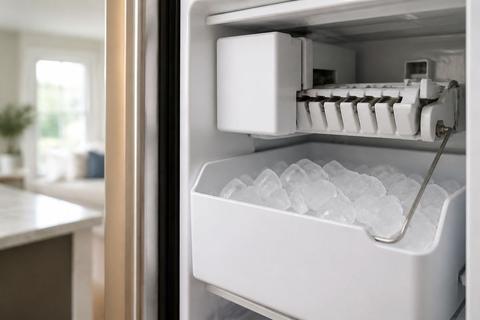
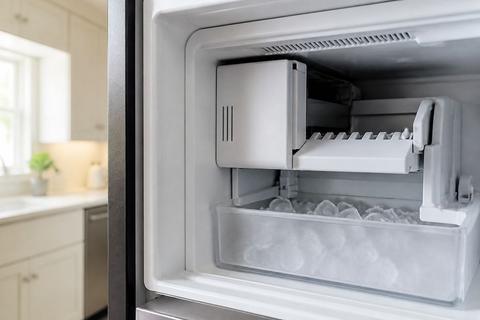
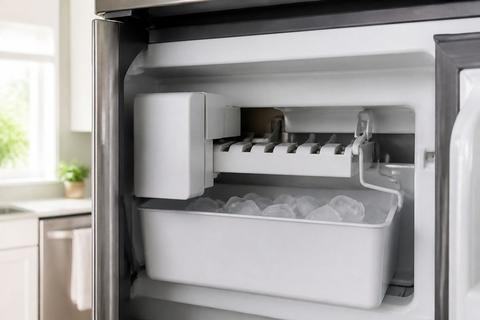
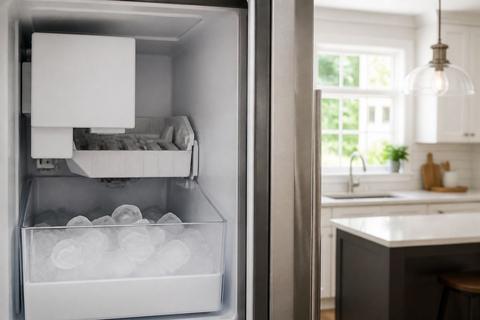
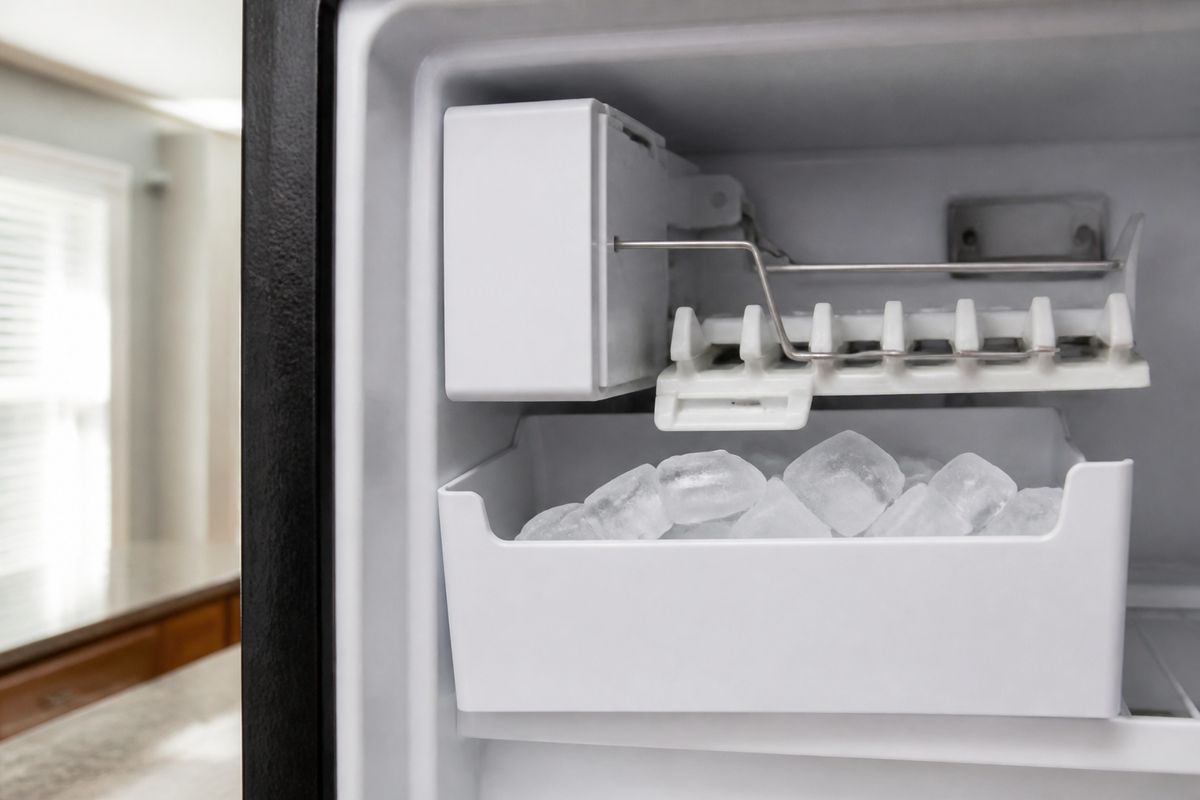
Start by locating the ice maker’s control in the freezer. On many Whirlpool side-by-sides and French doors, you’ll see a wire feeler arm (shutoff arm) at the ice maker. Lowering the arm starts ice production; raising it stops it. Some models use a small sliding lever/paddle instead of a wire arm, and others include an on/off switch on or near the ice maker housing.
- Open the freezer door and look for the ice maker at the back or inside the upper interior.
- Identify whether you have a wire arm, sliding feeler, or on/off switch.
- If you see an arm with a visible pivot point, treat it as the main shutoff control.
Check the arm position before you start
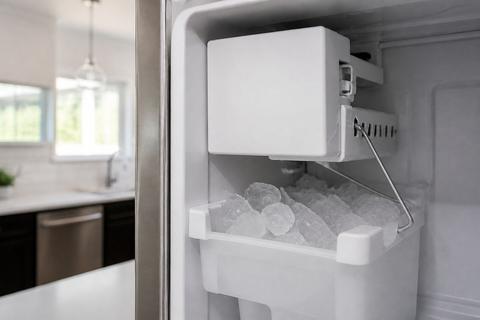
Before you change anything, look at where the ice maker arm currently sits. If the arm is up, the ice maker is shut off and will not harvest or make ice. If the arm is down, the unit is allowed to cycle and fill.
- Inspect the arm and note whether it is raised or lowered.
- If the freezer is warm or recently went through a power loss, the arm can be left in a safe stop position.
- If you see ice around the arm, treat it as a potential jam that will need clearing first.
Understand what the up and down positions mean
On Whirlpool ice makers with a wire arm or feeler, the positions are straightforward: up = OFF, down = ON. When the arm is raised, it tells the ice maker to stop harvesting and filling. When lowered, the ice maker resumes its normal cycle: it harvests, dispenses ice, then refills the mold.
- Set the arm down to turn the ice maker on.
- Set the arm up to pause ice production.
- Avoid moving the arm aggressively—ice can cause the mechanism to bind.
Turn the Ice Maker On the Right Way
Use the correct switch or lever for your model
Use the actual control for your specific Whirlpool model rather than trying to force anything. If your unit has a wire shutoff arm, lower it gently to the down position. If there is a dedicated ice maker on/off switch, set it to ON.
- Locate the control (arm, lever, or switch).
- Move the control to the ON position (typically arm down or switch on).
- Close the freezer door and let the ice maker start its cycle.
Confirm the water supply is open
Turning the ice maker on won’t produce ice if the water line is closed or restricted. Check the water shutoff valve behind the fridge (or in the adjacent cabinet area) and ensure it is fully open. Also note if you recently replaced the water filter—some filters require a purge before consistent flow returns.
- Find the manual shutoff valve for the refrigerator water supply.
- Make sure the valve handle is turned fully open.
- If your filter was replaced, allow time for the water system to prime and stabilize.
Wait for the ice maker to cycle and refill
After you turn the ice maker on, it does not always make ice immediately. The first batch can take several hours depending on freezer temperature and water fill timing. Once producing normally, many Whirlpool ice makers harvest and refill in a cycle roughly every 90 minutes to 2 hours after the system is up to temperature.
- Set expectations: allow at least a few hours for the first ice.
- Confirm the freezer is cold (target about 0–5°F for best ice production).
- If you cleared a jam or changed parts, give it about 24 hours to return to normal output.
Why the Ice Arm Gets Stuck
Look for ice buildup around the arm
A stuck arm usually comes from frozen water in the mechanism area. Inspect around the shutoff arm/feeler for visible frost or ice bridging parts. Even a thin ridge of ice can prevent the arm from moving freely, leaving the ice maker effectively OFF even when you try to lower it.
- Look for clumps or a solid crust around the arm pivot.
- Check the nearby housing for ice that could restrict motion.
- If you see buildup, plan to clear it safely before forcing the control.
Inspect the bin for overflow or jammed cubes
Overflow and jammed cubes can block the arm movement during harvest. If the bin is overfilled, cubes can shift and create a physical obstruction that keeps the feeler from returning to the ON position.
- Remove the ice bin and check for packed ice near the opening.
- Look for cubes wedged in the ice maker throat or near the arm pathway.
- Clear any loose or jammed cubes you can reach safely.
Check for a misaligned sensor or bracket
Some Whirlpool ice makers use a sensor/bracket that must align with the arm travel. If the bracket is bent or a mounting screw loosened, the arm may bind or fail to trigger a normal harvest. After transport, door strikes, or freezer vibration, misalignment is possible.
- Inspect the ice maker bracket area for gaps or crooked alignment.
- Look for cracks or bending near the arm mount.
- If alignment is off, avoid repeated force and focus on clearing ice first, then evaluate for repair.
Safely Free a Jammed Ice Arm
Power off the refrigerator before touching the arm
Safety matters because ice maker mechanisms can move unexpectedly, and you may need time for meltwater to drain. Unplug the refrigerator or switch off power at the breaker before working near the ice maker arm.
- Unplug the refrigerator (or turn off the breaker feeding it).
- Wait a moment so the ice maker stops attempting to cycle.
- Keep fingers clear of any moving parts and ice ejection areas.
Remove loose ice and clear obstructions
Once powered off, clear away the cause of the jam—loose cubes, frost, or debris around the arm path. Use a plastic utensil or your hands with protection to remove only what comes loose without prying.
- Remove the ice bin if your model allows easy bin access.
- Scoop out loose ice clumps that sit against the shutoff arm pathway.
- Use a soft cloth to wipe away accessible frost; do not chip aggressively with metal tools.
Move the arm gently to avoid breaking the mechanism
After the visible ice is cleared, move the arm slowly and gently to see whether it frees up. If it resists, stop—forcing can break the shutoff linkage, ejector arm, or sensor mechanism.
- Try moving the arm a small amount and watch how it responds.
- If it doesn’t move easily, re-clear more ice before trying again.
- When it moves freely, set it to the ON position (typically arm down).
Troubleshoot When the Arm Will Not Move
Test whether the shutoff mechanism is being blocked
If the arm still will not move, the obstruction may be deeper inside the ice maker throat or trapped in a component that isn’t visible. Re-check for ice packed around the bin connection area and along the feeler arm’s travel path.
- Remove the bin and inspect the opening where ice ejects.
- Check for cubes lodged under or beside the arm linkage.
- Remove obstructions with minimal force, then attempt arm movement again.
Reset the ice maker after a jam
After clearing a jam, you may need to reset the ice maker so it recognizes the restored arm position. Many Whirlpool units resume automatically after the jam is cleared, but if your ice maker has a manual reset option, use it right away.
- After the arm moves freely, set it to ON (arm down).
- If your model includes a reset button or control, follow the on-unit reset method.
- Leave power on so the ice maker can complete a harvest/refill cycle.
Check for water, temperature, or filter issues
A frozen or non-moving system can also be affected by poor water flow or freezer temperature that’s too high, leading to abnormal ice formation patterns. Check the water filter for clogs and confirm freezer temp is correct.
- Ensure the freezer is cold enough (about 0–5°F).
- Inspect the water filter—if it’s overdue, replace it (Whirlpool EveryDrop filters are rated about 6 months / 200 gallons).
- Confirm household water pressure is adequate (roughly 35–120 psi at the supply line).
When Repair or Replacement Is the Best Fix
Know the signs of a worn control arm or ejector arm
If the arm moves with difficulty even after clearing ice, the control linkage may be worn, bent, or failing internally. Symptoms include repeated jams, abnormal arm travel, visible cracking or looseness at the pivot point, or the arm snapping back incorrectly after power is restored.
- Look for looseness at the arm pivot or uneven movement.
- Check for cracks, bent metal, or a binding ejector feel.
- If jams return quickly after clearing, internal wear is likely.
Decide between a simple adjustment and a full replacement
Some problems respond to cleaning and realignment, while others require component replacement. If only the bin alignment or external bracket is off, adjustment can restore motion. If the arm linkage, ejector assembly, or a sensor component is failing, replacement is usually the lasting solution.
- If the mechanism binds due to ice only, cleaning and correct thawing may be enough.
- If the control arm mechanism is damaged or misaligned after cleaning, replacement may be required.
- Avoid repeated clearing attempts—frequent jams point to a part-level issue.
When to call for Whirlpool service or a technician
Call for service when you’ve cleared a jam, ensured water and freezer temperature are correct, and the arm still won’t move or the ice maker keeps failing the cycle. A technician can diagnose internal components safely and confirm whether the ice maker assembly needs repair.
- The arm won’t move even with power off and ice cleared.
- The ice maker cycles incorrectly or produces no ice repeatedly after reset.
- You suspect a failed ejector, sensor, or fill system component.
Frequently Asked Questions
How do I know if my Whirlpool ice maker is on or off?
Most Whirlpool models use a wire arm, switch, or lever. If the arm is down or the switch is set to on, the ice maker is usually active; if it is raised or set to off, ice production is typically paused. Check the freezer ice maker area for the shutoff control: a raised feeler means the unit is intentionally stopping harvest. If the arm is frozen in place, the position may look “on” or “off” but still be physically stuck—freeing the arm is required for operation.
Why is my Whirlpool ice maker arm stuck up?
A stuck-up arm is often caused by ice buildup, an overfilled bin, a jammed cube, or a bent mechanism. Unplug the refrigerator first, clear the obstruction around the arm pivot and ice path, and move the arm gently only after loose ice is removed. Inspect the bin opening for packed cubes that could be blocking harvest. If the arm stays immobile after clearing, inspect for misalignment and internal wear, since forcing can damage the ejector or shutoff linkage.
Can I force the ice maker arm down?
No. Forcing it can break the shutoff mechanism or ejector assembly. If it does not move easily, power off the refrigerator, clear any ice buildup and jammed cubes around the arm pathway, and then try again gently. Forcing the arm turns a manageable jam into a mechanical failure that usually requires replacement parts. If the arm still won’t move after the jam is cleared, switch to troubleshooting for deeper blockages or a failing mechanism.
Will the ice maker start immediately after I turn it on?
Not always. After turning it on, it may take several hours before the first batch of ice is made, depending on freezer temperature and water supply. If the freezer was warm or the unit was recently turned off, the ice maker needs time to reach the correct operating conditions before it can freeze properly. Once producing normally, many models make a batch roughly every 90 minutes to 2 hours as water fills the mold and ice harvest repeats.
What should I check if the ice maker is on but still not making ice?
Make sure the freezer is cold enough, the water supply is open, the filter is not clogged, and the arm is not stuck in the shutoff position. A closed water valve, an overdue or clogged filter, or insufficient water pressure can stop ice production even when the control indicates ON. Also check for a partial jam: ice packed near the eject area can prevent full harvest and keep the arm from returning to the correct cycle position.