How to Force Whirlpool Ice Maker to Cycle: Manual Fix Guide
If you’re staring at an empty ice bin, you’re probably asking how to force whirlpool ice maker to cycle so it will finally harvest and make a fresh batch. Many Whirlpool models include a built-in test or harvest function, and using it is the safest way to get the mechanism moving again. Before you try any manual cycle, make sure the freezer can actually freeze ice and that the ice maker has water and power.
For more help, see our Whirlpool Ice Maker Not Working: Fixes and Diagnosis guide.
Before You Manually Cycle the Ice Maker
Confirm the freezer is cold enough to make ice
If the freezer isn’t cold enough, the ice maker can run its cycle and still fail to dump cubes. Check your freezer temperature display (or thermometer) and target 0–5°F (-18 to -15°C). If the freezer has been recently stocked, the door has been opened a lot, or you just turned cooling back on after a power outage, wait for the cabinet to recover—then try the manual cycle again. Also look for obvious signs of poor cooling (excess frost buildup, warm air, or long run times on the compressor), because no amount of cycling will compensate for incorrect temperature.
Check that the ice maker has water and power
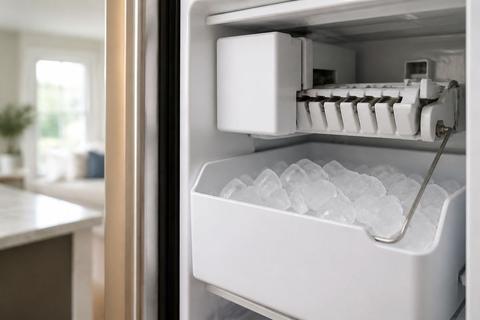
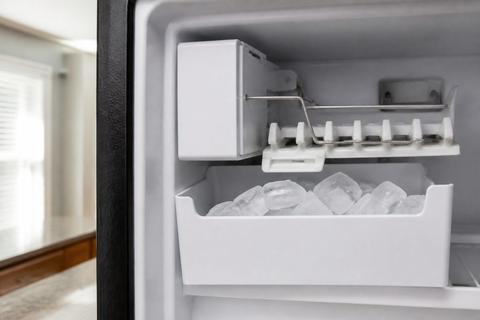
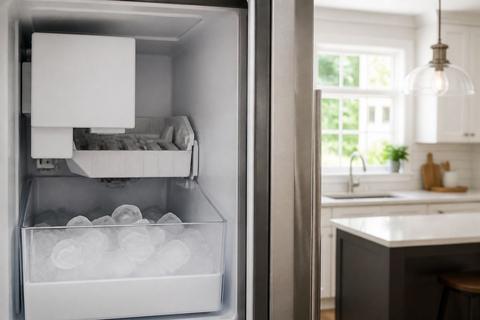
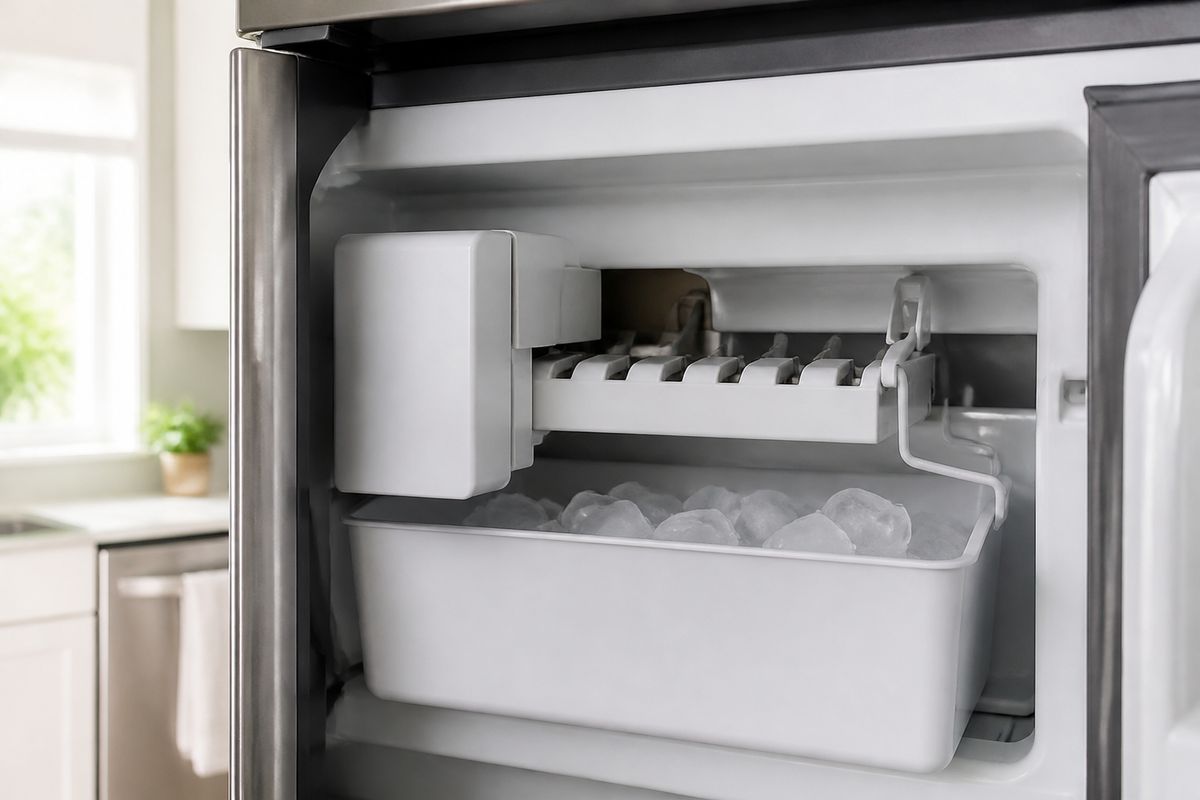
The ice maker needs both electrical power and a steady water supply to complete harvest. Confirm power at the refrigerator (lights and panel control should respond) and check the ice maker’s status controls. On many Whirlpool refrigerators with a bin-mounted ice maker, the ice maker has a wire feeler/shutoff arm (or sliding feeler paddle): raise it to turn ice OFF, lower it to turn ice ON. Also ensure the water line isn’t kinked behind the fridge. If you recently replaced the water filter, note that Whirlpool recommends discarding the first 2–3 full batches after filter changes or long shutoffs.
Look for common blockages and obvious damage
Before cycling, remove anything that physically prevents ice movement. Check the ice bin and dispenser chute area for large clumps of frozen cubes or melted ice that refroze. If you see ice bridging inside the bin or a jam in the chute, clear it so the tray can harvest normally. Inspect the fill area for signs of a frozen line (no water entering the mold), and look for damaged wiring or a loose connector near the ice maker module. If you find broken plastic components or melted, scorched insulation, stop and repair those issues before forcing another cycle.
How to Manually Cycle a Whirlpool Ice Maker
Find the test or eject points on the ice maker
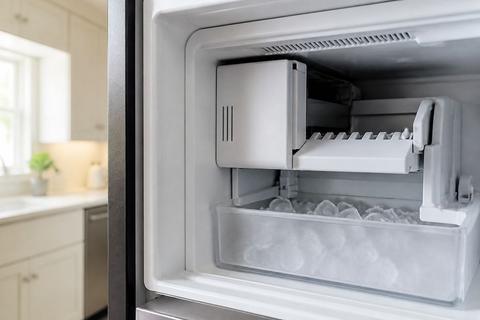
The exact method depends on the ice maker style, but the goal is always the same: trigger a controlled harvest/test cycle rather than prying the mechanism by hand. Start by identifying your model’s ice maker type (some are in-door/dispenser-integrated, some are mounted in the freezer). Look for a test button on the front of the ice maker or a documented service/test mode for your specific model number. If your ice maker has a service access area, follow the manufacturer’s labeled test points if present—don’t short random terminals.
Use the correct method for the model style
Use the procedure that matches your Whirlpool ice maker design:
- Feeler-arm inline/bin style: make sure the arm/paddle is in the ON position, then initiate harvest using the model’s test button/menu (if equipped).
- Modular Whirlpool ice makers (service module): with power OFF at the refrigerator, access the front module test interface and run the manual harvest by jumping the marked T and H test holes on the module (commonly done with a paperclip across the labeled holes). Power back on after the jumper is in place to trigger the cycle, watching for fill and harvest.
- If your model has only a control-panel test option: use the ice maker test mode from the refrigerator interface (model-specific wording varies, so use your exact model’s label/service instructions).
Watch for the tray movement and harvest sequence
A successful forced cycle shows clear movement and progression. During the cycle you should see:
- Water fill into the ice mold (you may hear a short water inlet sound).
- Mold heating/freezing transition that ends with ice loosening.
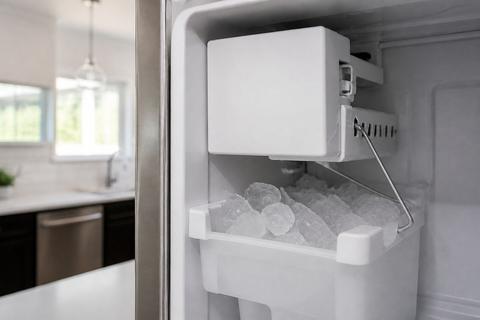
- Tray/ice movement and eject into the bin (you should see cubes drop or the paddle advance toward harvest).
If the tray moves but no ice drops, the issue can be a failed heater, weak motor/gear action, or a thermostat/mold temperature problem. If there’s no fill, focus on the water path and water inlet instead of repeatedly cycling.
If the Ice Maker Still Will Not Harvest
Inspect the thermostat, mold heater, and motor
When power and water are present but harvest still fails, the core components that complete the cycle are the mold temperature control (thermostat), the mold heater, and the harvesting motor/mechanism. If the mold never warms enough to release ice, the heater circuit or heater itself can be bad. If the motor doesn’t drive the eject/harvest motion, you may hear no movement or see incomplete tray travel. Access the ice maker module and check for obvious wiring issues, burned contacts, or disconnected connectors. For parts replacement, confirm the failing component by diagnosis—testing the heater/motor output is far more reliable than guessing.
Reset the ice maker after a failed cycle
After a harvest failure, reset helps the ice maker clear a stuck state and re-home its cycle logic. Do it the correct way for your refrigerator:
- Power-cycle the ice maker by turning the ice maker OFF (feeler arm up or ice maker switch to OFF), wait briefly, then turn it back ON.
- If your model uses a control-panel reset, use the refrigerator’s ice maker reset option (follow the model’s labeled button/menu).
- If the ice maker is in a modular service state, remove the jumper method you used and then restore normal power so the unit can resume its internal timing.
Give the reset a chance to start the fill stage rather than immediately forcing another manual harvest.
Know when the issue points to the control module
If the ice maker doesn’t respond properly to a manual test/harvest input—no fill command triggers, no tray action occurs, or the cycle behaves inconsistently—the problem can be the control module or related control electronics. Also suspect a control issue if you see correct power and water delivery confirmed, but the heater/motor signals never actuate during the forced test. At that point, further “cycling attempts” waste time and can worsen jams. Have the module tested (or replaced if confirmed defective) rather than swapping multiple components.
Troubleshooting Related Dispenser Problems
Check whether the dispenser, auger, or bin is involved
Sometimes the ice maker is producing ice, but the dispenser system prevents the customer from realizing it. Check whether ice actually drops into the bin during harvest and whether the dispenser area is clear. If ice never reaches the dispenser chute, the auger/feed mechanism or ice bin outlet path could be blocked or faulty. If ice appears in the bin but dispense is slow or broken, you may have a dispenser-side clog or a feed/auger issue rather than an ice maker harvest failure.
Clear ice clogs in the bin chute and dispenser area
A clog can stop ice movement and make it seem like harvest failed. Clear blockages carefully:
- Remove the ice bin (freezer models) and break up any large frozen clumps.
- Check the bin chute and dispenser channel for ice bridges.
- Remove loose ice pieces so the auger can move freely.
Avoid forcing tools into plastic gears or electrical sensors. If ice is tightly frozen, thaw it enough to release safely rather than prying aggressively.
Replace parts only after confirming the failing component
Don’t replace an ice maker motor, heater, thermostat, or dispenser auger based on symptoms alone. Confirm what’s failing by observing the cycle: fill into the mold, heater release behavior, harvest eject/tray movement, and whether ice then reaches the chute. If your manual cycle shows no harvest motion, focus on ice maker actuation components first. If ice harvest works but dispensing doesn’t, focus on the dispenser/auger pathway. Replacing parts without narrowing the cause increases cost and can lead to repeated failures.
Safety and When to Call a Technician
Unplug the refrigerator before testing or removing parts
Before removing the ice maker or working near electrical connectors, unplug the refrigerator. If you’re doing a service test on a modular ice maker that involves test points, ensure the refrigerator is powered off before accessing the module area. This prevents accidental shorts, protects wiring, and reduces shock risk when handling connectors behind the freezer panel or ice maker bracket.
Avoid forcing plastic or electrical components
Never pry the ice maker mechanism with tools, and don’t force ice out of the tray by breaking parts. Frozen ice can damage the mold surfaces, eject components, or plastic gears. If ice is blocking movement, thaw and clear it deliberately. Likewise, do not apply pressure to wiring harnesses or attempt to “adjust” thermostats or heater leads—misalignment can cause permanent damage.
Get professional help for repeated harvest failures
If you’ve confirmed freezer temperature, water supply, and cleared jams, yet the ice maker still fails to harvest repeatedly—especially after successful manual cycle attempts—schedule a technician. Repeated failures usually indicate a failing heater circuit, motor/gear assembly, or control module that needs proper testing. Professional diagnosis prevents unnecessary part swaps and ensures safe, correct repairs.
Frequently Asked Questions
Can I manually force a Whirlpool ice maker to cycle?
Yes, many Whirlpool ice makers have a built-in test or harvest function, but the exact method depends on the model. The goal is to trigger a controlled cycle, not to pry the mechanism by hand. Start with basic readiness checks (freezer temp, water, and ice maker ON position), then use the model’s test button/menu or the manufacturer’s labeled service/test points if applicable. If the ice maker still won’t harvest after that, the problem is likely a component failure (heater, thermostat, motor) or a control issue rather than a simple “stuck” cycle.
Why would a Whirlpool ice maker not harvest?
Common causes include low freezer temperature, a bad thermostat, a failed motor or heater, frozen water lines, or a control issue. A stuck bin or dispenser problem can also make it seem like the ice maker failed—ice may be produced but not delivered. Other practical culprits include a clogged chute, an ice bridge in the bin area, or an overdue water filter that leads to weak or inconsistent water fill. When harvest fails, observe whether you get fill, then whether ice loosens and ejects, so you can target the right part.
How do I know if the ice maker itself is bad?
If the unit has power and water, the mold is cold, and a manual cycle still does not advance or dump ice, the internal mechanism or control module is likely failing. Look at the sequence: if water won’t enter the mold, focus on the water path (line/fill) rather than immediately condemning the ice maker motor. If fill happens but ice never releases or never ejects, heater/thermostat and harvest motor/actuation are prime suspects. Modular service tests and careful observation during a controlled cycle help isolate the failing component.
Is this the same as fixing the ice dispenser?
No. The ice maker makes the cubes, while the dispenser moves ice to the glass. Some symptoms overlap—like “no ice comes out”—but the repair steps are different. If cubes never reach the bin during harvest, the ice maker system is the priority. If cubes collect in the bin yet dispensing is slow or stops, the dispenser auger/feed mechanism and chute area are more likely to be at fault.