Whirlpool Ice Maker Overfilling: Fix Water Flow Problems
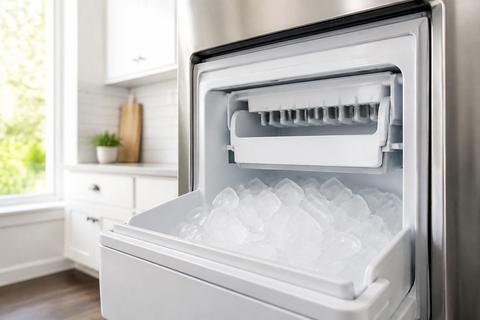
If you’re dealing with whirlpool ice maker overfilling, you may be finding water pooled in the ice bin, ice fused into a block, or a constant drip that won’t stop. These symptoms usually point to a fill-control problem—most often the water inlet valve, the fill tube, or water pressure that throws off the ice maker’s shutoff timing. The good news: you can narrow it down quickly and fix most overfilling issues without replacing the whole ice maker.
For more help, see our Whirlpool Ice Maker Cleaning and Maintenance guide.
How to tell whether the ice maker is overfilling
Signs the water level is too high
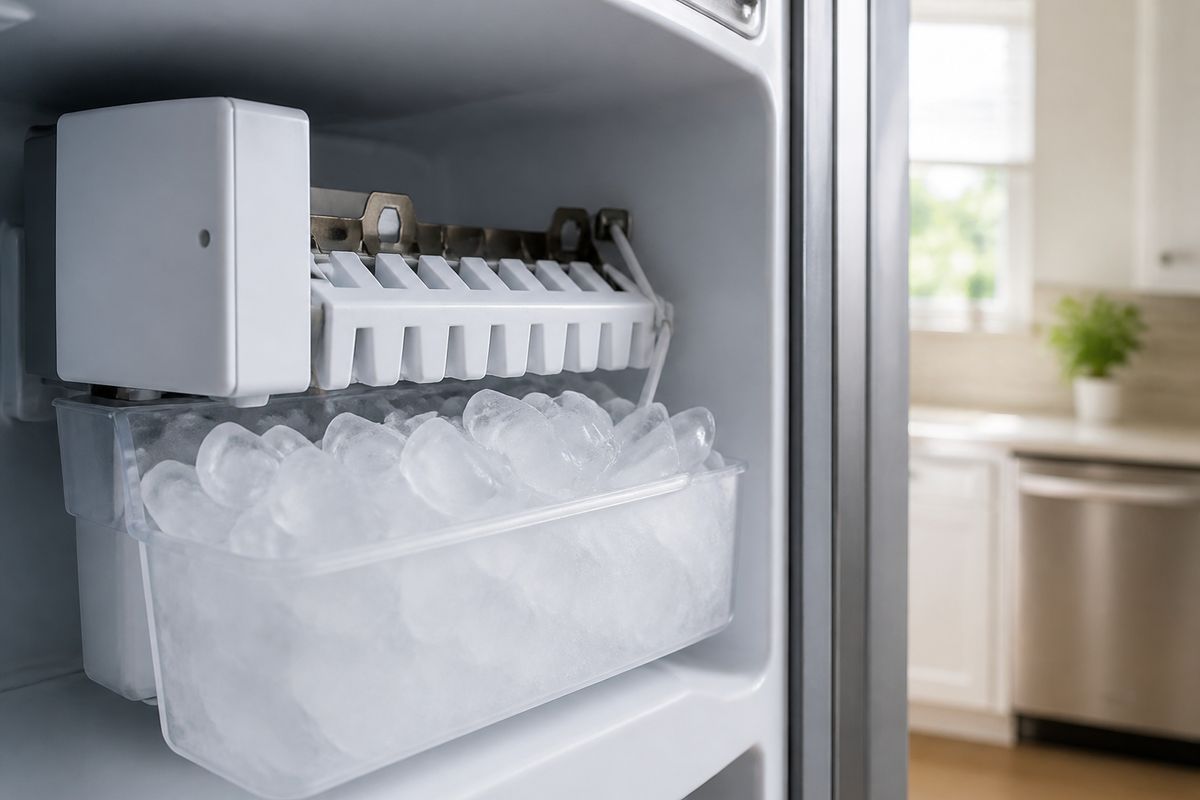
The clearest sign of overfilling is a water level in the ice mold that’s higher than normal before the freeze cycle completes. Look for ice that appears “wet” or slushy at the edges, cubes with larger-than-usual gaps, or a thin layer of water that spreads beyond the normal mold boundaries. If your Whirlpool model has an ice bin, check for water running toward the front lip or accumulating at the bottom corners after ice production. Also pay attention to timing: if the ice maker runs longer fill cycles than it did before, that points to a shutoff issue in the inlet valve or fill tube.
Overflow, freezing, and stuck ice cubes
When the ice maker keeps adding water after it should stop, the excess can freeze around the ice mold and create a solid mass. The result is frequently stuck cubes that are hard to separate or an “ice brick” in the mold or bin. You may also see frost on the interior walls near the mold area where water repeatedly contacts surfaces. If overflow is happening, the freeze cycle locks the water in place, so the problem worsens over days—one overflow leads to more sticking, which can further prevent normal ice release and production.
When low water pressure causes weak fill cycles
Low household water pressure can look different from classic overfilling, but it can still cause control problems. With weak fill cycles, the ice maker may not reach proper mold level each time, then continue running to compensate—depending on your model’s sensing and timing. Symptoms include slow ice production, incomplete cubes, or inconsistent fill heights across batches. A second clue is weak water flow at the refrigerator dispenser (thin stream, sputtering, or long delays), which often indicates restricted pressure at the supply line or a partially blocked filter.
Common causes of a Whirlpool ice maker overfilling
Faulty inlet valve that won’t close fully
A failing water inlet valve is the most common reason for water that keeps flowing past the correct fill point. If the valve sticks open or doesn’t seal tightly, water continues entering the ice mold after the cycle ends. You’ll typically see repeated overflow or a persistent drip that freezes in place. On some Whirlpool models, you can also notice water on or behind the ice maker after the batch should complete. Address this by checking electrical control and valve operation during maintenance, because replacing only the ice maker without fixing the valve logic usually doesn’t solve the root cause.
Misaligned or damaged fill tube
The fill tube directs water into the ice mold. If it’s misaligned, cracked, or not seated correctly, water can spill, drip, or strike the wrong area and freeze into buildup. Misalignment often happens after cleaning, moving the unit, or replacing the ice maker assembly. A damaged tube can also leak at joints and create repeated wet spots even when the fill cycle stops. Inspect the tube path from the inlet area to the mold inlet—if it looks shifted, kinked, or separated, correcting the placement can stop ongoing overfilling and frozen leaks.
Improper water pressure or a partially blocked line
Water pressure outside the ice maker’s designed range can disrupt normal fill timing and shutoff behavior. Too high pressure increases the volume delivered per second, raising the risk of overflow. Too low pressure can cause erratic cycles and inconsistent shutoff responses across batches. A partially blocked line—commonly from mineral deposits—can also create uneven flow: bursts during fill followed by a drip afterward. If you’re seeing dispenser issues, use that as a strong signal that the supply line, filter, or restrictor is the underlying problem.
Control arm, float, or thermostat problems
Many Whirlpool ice makers use a mechanical control (wire feeler arm or sliding feeler paddle) or a sensor/thermostat to manage when ice should be harvested and when filling should begin. If that control doesn’t move freely—due to ice buildup—or if the sensor reading is off, the ice maker can keep filling when it should stop. Check for an arm left in the OFF position: lifting the feeler arm turns the ice maker OFF; lowering it turns it ON. On models with a sliding paddle, it should sit at the correct position for ice production without binding.
Inspect the water supply before replacing parts
Check the shutoff valve and supply line
Start with the simplest failures: the shutoff valve setting and the supply line condition. Make sure the water shutoff valve feeding the refrigerator is fully open—an only-partially opened valve can change flow behavior and cause inconsistent ice maker cycles. Then inspect the supply line for obvious damage, loosened connections, or blockage near the back of the fridge. If there’s a kink, straighten it. If you’ve recently moved the refrigerator, confirm the line wasn’t pinched during installation, which can create delayed drips that freeze and look like overfilling.
Look for kinks, mineral buildup, or leaks
Mineral buildup restricts flow and can cause pressure swings that affect fill timing. Examine the visible length of the water line and connections for crusty deposits, especially near fittings. Look for leaks around the inlet connection or behind panels—water dripping into the freezer area can freeze and then contribute to stuck ice and apparent “overfill” symptoms. Addressing leaks at fittings prevents repeat water pooling even after you clean the ice mold. If you see corrosion or persistent moisture, fix the connection and clean any affected surfaces before running the next batch.
Confirm household water pressure is in range
Whirlpool’s ice maker performance depends on adequate household pressure, and many setups run best around 35–120 psi at the supply line. If you suspect pressure issues, measure using a water pressure gauge at the supply connection (or consult your plumbing records if you’ve recently changed filters or water systems). High pressure can raise delivered volume per fill cycle, while low pressure can cause inconsistent operation that leads to incomplete shutoff. Pressure problems also explain why cleaning alone doesn’t stop the recurrence—water conditions keep driving the overfill behavior.
Fix the fill system step by step
Clean the fill tube and ice mold
A frozen or partially blocked fill tube is a top cause of abnormal fill and drips. Cleaning starts with thawing any suspected restriction.
- Unplug the refrigerator or switch power to the refrigerator OFF.
- Locate the ice maker and remove access panels as needed to reach the ice mold and fill tube.
- If you see frost on the thin fill tube, thaw it using a hair dryer on low heat from a safe distance, or pour warm (not boiling) water over the area until flow is clear.
- Wipe out any mineral scale around the mold inlet so water can enter cleanly and freeze uniformly.
Test the water inlet valve for sticking
Once the tube and mold are clear, focus on whether the inlet valve seals properly. A valve that doesn’t close fully can keep feeding water into the mold after the cycle.
- Restore power temporarily only if your model requires it for a cycle test; otherwise follow your unit’s service procedure.
- Start an ice-making cycle (many models harvest automatically; for some you can initiate a test by switching the ice maker control ON).
- Observe for continued water after the fill should stop; a persistent trickle strongly indicates a sticking valve.
- If you can safely access the valve wiring, check that the valve is receiving correct operation during fill and that water stops when the cycle ends.
Verify the ice maker is level and seated correctly
If the ice maker is slightly out of position, water can miss the mold inlet and contribute to uneven freezing and overflow-like symptoms. Seating issues also cause misalignment between the fill tube and mold.
- Remove the ice maker access or ice maker assembly according to your model’s instructions.
- Check the mounting points and confirm no hardware or harness is pinched.
- Reinstall the ice maker so the fill tube seats properly at the mold inlet without gaps or shifting.
- Ensure the unit sits level in the housing—tighten mounting screws evenly to prevent a tilt that redirects water.
Reset the ice maker after maintenance
After clearing blockages, cleaning, or adjusting parts, the ice maker needs to return to a normal production cycle.
- Turn the ice maker OFF and then back ON (on many Whirlpool units, lift the feeler arm to OFF, then lower it to ON).
- Wipe away any meltwater or residual frost from around the mold area.
- Allow the ice maker to run and complete a full batch cycle.
- Discard the first 2–3 full batches after maintenance or filter-related work so you don’t end up with small, hollow, off-tasting ice.
What to do if the ice maker underfills or stops working
Troubleshoot a no-water or low-water fill
If your Whirlpool ice maker isn’t filling, the fix starts with the water path and the fill tube—because a stuck tube or failed valve will prevent normal mold level.
- Check that the shutoff valve is fully open.
- Inspect the fill tube for freezing; if it’s blocked with frost, thaw it with a hair dryer on low heat or warm water.
- Confirm the ice maker control is in the ON position (lower the feeler arm/paddle).
- If water still won’t enter, test the water inlet valve operation and inspect for obstructions in the inlet plumbing before replacing components.
Check the filter and water dispenser path
A clogged filter often shows up first at the dispenser, then affects ice production. Slow dispenser flow or sputtering can match the ice maker’s low-fill symptoms.
- Inspect the water filter status and replace it if it’s overdue.
- Run water at the dispenser for a short period to clear air and evaluate flow strength.
- Check for clogs or restrictions in the water dispenser path and tubing that feed the ice maker.
- After filter replacement, expect initial batches to be lower quality; discard the first 2–3 full batches.
Decide whether the ice maker module has failed
If the supply is correct and the fill tube is clear but the ice maker still won’t produce or repeatedly misbehaves, the issue may be internal to the ice maker module or its control system. Look for patterns: no water entering during fill attempts, repeated failure to harvest, or inconsistent operation even after a thorough cleaning. If electrical diagnostics point to the module, replacement can be the practical solution. If you’re seeing electrical faults, burnt wiring, or control errors, stop DIY troubleshooting and move to professional diagnosis.
Prevent overflow and frozen ice buildup
Replace worn valves and brittle tubing early
Overfilling often repeats when a worn inlet valve can’t seal reliably or when brittle tubing develops micro-cracks that drip into the mold. Replace the inlet valve and any questionable tubing components when you find sticking, leakage, or hardened/frosted areas that won’t clear quickly. Keeping parts in good shape reduces the cycle-to-cycle variability that leads to overflow and ice fusion. Address small leaks immediately—frozen drips look like “overflow” over time because they build ice around the mold and control areas.
Flush the water line after repairs
After you thaw a tube, replace a filter, or do plumbing work, trapped air and debris can disturb ice maker performance. Flushing helps restore stable flow and reduces nuisance problems like uneven fill levels.
- After reconnecting the water line or changing the filter, run water at the dispenser until flow is steady.
- Do not rely on the first ice batches to do the flushing—discard the first 2–3 full batches after filter replacement or any repair that introduces air.
- Check for any signs of backflow, sputtering, or leaks during the flush period.
Maintain proper freezer temperature
Freezer temperature strongly affects ice formation and whether water freezes as intended. If the freezer is too warm, water can remain liquid longer, contributing to pooling and stuck ice; if it’s too cold but airflow is restricted, moisture can freeze in abnormal places.
- Set the freezer to about 0–5 degrees F.
- Ensure vents aren’t blocked by food near the ice maker area.
- Allow temperature changes time to stabilize before judging results.
- If the ice maker is repeatedly freezing water in the wrong places, temperature plus water flow issues usually both need attention.
When to call a technician
Signs of electrical or control-board failure
If you suspect electrical problems, don’t keep cycling the unit. Call a qualified technician if you notice tripped breakers, repeated control errors, intermittent operation that doesn’t correlate with cleaning, or a valve that never receives proper actuation signals. Burn marks, melted connectors, or exposed wiring near the ice maker also indicate a safety risk. Control-board issues can cause the ice maker to fill at the wrong times, run continuously, or stop mid-cycle while water remains in the mold area.
Leaks inside the freezer or behind the refrigerator
Overfilling can sometimes be a symptom of a bigger water leak. Contact a technician if you find persistent water pooling inside the freezer, damp insulation, or water dripping behind the refrigerator cabinet. Internal leaks can damage components and create recurring ice buildup even when you clean the ice mold and tube. If water is running along electrical parts or soaking through panels, stop DIY troubleshooting and prioritize safe diagnosis.
When repeated overfilling returns after cleaning
If you clear the tube, clean the mold, and correct tube seating, but the overfilling comes back quickly, the underlying cause is likely not just debris—it may be a valve/control fault, pressure regulation issue, or a misbehaving internal sensor. Repeated overflow after maintenance usually means the root component still isn’t performing correctly. At that point, professional service saves time and prevents repeated freezing damage that can worsen ice jam behavior.
Frequently Asked Questions
Why is my Whirlpool ice maker overfilling with water?
The most common causes are a failing water inlet valve, a blocked or misaligned fill tube, or water pressure that is too high or too low for the system to shut off correctly. If the inlet valve doesn’t fully close, water keeps entering the mold past the intended fill point. If the fill tube is misseated or partially frozen, water can drip or spill in the wrong place and freeze into buildup. If water pressure is off—especially too high—each fill can deliver more water than the ice maker can manage.
Why does the ice maker overflow and freeze into a block of ice?
When the valve lets in too much water or the fill tube drips after the cycle ends, the extra water can freeze around the mold and create a solid ice mass. Overflows don’t just make wet ice—they trap water where it can’t release properly. Once the block forms, it can interfere with normal harvest and cube separation, which can lead to even more water pooling and a worsening cycle of stuck ice. Cleaning alone may not fix it unless you correct the valve closure or fill tube issue causing the excess water.
Can a clogged water filter cause ice maker overfilling?
Yes, indirectly. A restricted filter can change water flow and pressure, which may interfere with normal fill timing and cause inconsistent ice production. If the filter creates unstable flow, the ice maker can deliver abnormal amounts during a fill cycle. It can also contribute to partial freezing and drips at the fill tube if flow fluctuates. Replacing the filter and checking flow at the dispenser helps determine whether the filter is contributing to overfill behavior.
How do I know if the inlet valve is bad?
A bad inlet valve may leak slowly, stick open, or fail to stop water after the fill cycle. Repeated overflow or drips into the mold are common clues. If you observe water continuing to enter the mold after the cycle should be complete—especially after you’ve cleared the fill tube—then the valve is a strong suspect. Properly functioning shutoff should stop water flow cleanly; when it doesn’t, ice makers will freeze excess water into buildup.
What if my ice maker is not filling with water at all?
Check the water supply valve, filter, fill tube, and inlet valve first. If the shutoff valve is off, the fill tube is frozen, or the filter is restricted, the ice maker can’t reach normal mold level. If those paths are clear and water still does not enter during a fill attempt, the ice maker’s inlet valve may need replacement or the ice maker module may not be sending the correct control signal. Start at the simplest supply checks before replacing the ice maker assembly.