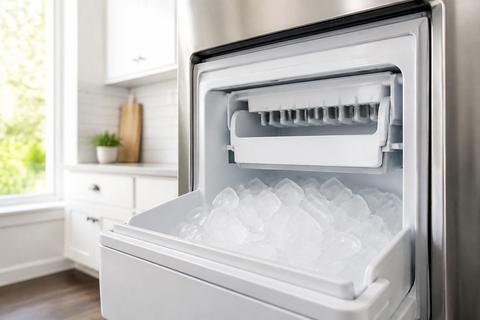
Whirlpool Ice Maker Making Too Much Ice, Slow, or Icing Up
If your whirlpool ice maker making too much ice has turned your freezer into an overflowing mess, the fix usually starts with one simple mistake: the ice maker isn’t properly shutting off. If it’s making ice too slowly, producing small/hollow cubes, or icing up at the fill tube, the cause is typically water flow, freezer temperature/airflow, or a failed sensor/valve. Use the steps below to identify the exact problem and correct it without jumping straight to expensive parts.
For more help, see our Whirlpool Ice Maker Cleaning and Maintenance guide.
Start With the Most Likely Causes
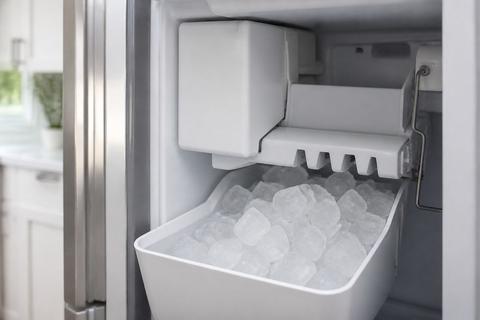
Start by checking the components that control when the ice maker runs and when it stops. In Whirlpool refrigerators, the ice level sensor and shutoff arm/paddle are common culprits for both overproduction and no/slow production.
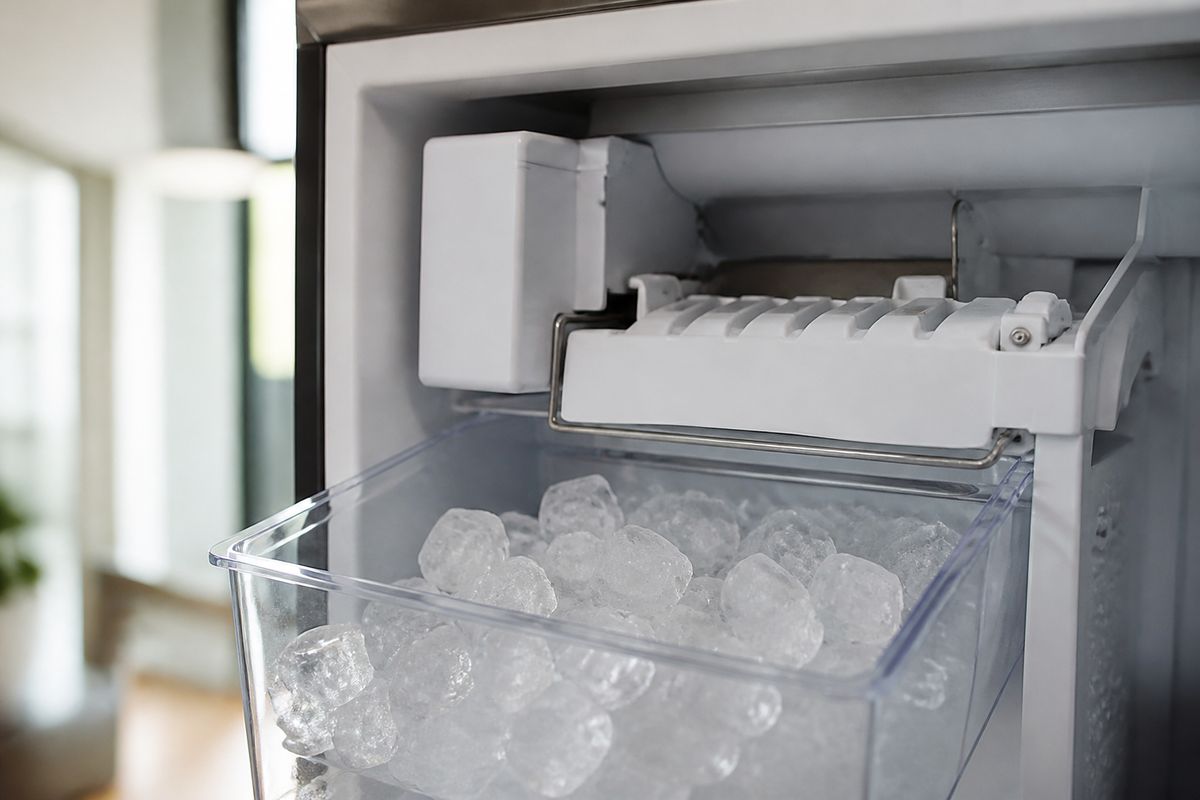
Check the ice level sensor and shutoff arm
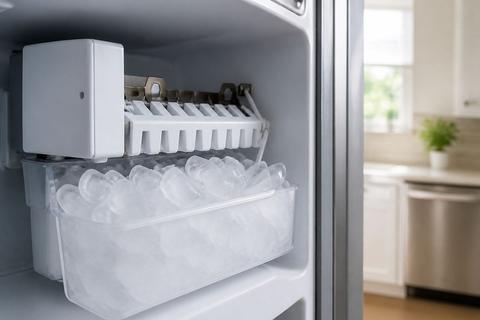
- Locate the ice maker’s shutoff arm (often a wire feeler arm on older Whirlpool designs, or a sliding feeler paddle on some inline ice makers).
- Move the arm to the UP position to turn the ice maker OFF, then move it back down to turn it ON.
- Check whether the arm/paddle is blocked by ice chunks—press any loose ice away so the mechanism can move freely.
- After correcting the position, wait about 24 hours for a normal production cycle to return.
A shutoff arm stuck in the OFF position is one of the most common reasons for no ice or erratic harvest timing.
Confirm the freezer temperature is set correctly
- Press the Freezer temperature button (or open the display menu) and set it to 0–5°F.
- Allow the freezer to stabilize for at least 6–12 hours.
- If you use an external thermometer, place it in the middle of the freezer (not touching a wall or ice maker) and confirm it holds steady.
If the freezer is too warm, the ice maker keeps running, delays freezing, and can create abnormal cube sizes and buildup. If it’s too cold, you can also contribute to freezing in the fill tube that causes icing.
Look for blocked airflow around the ice maker
- Pull the bin forward and look for ice buildup or packed frost around vents near the ice maker area.
- Remove any food items blocking vents—especially large items placed directly in front of air channels.
- Wipe away frost flakes you can reach; do not chip ice aggressively on sealed components.
Whirlpool ice makers need consistent airflow to keep the ice mold freezing and to prevent wet meltwater from refreezing in the wrong places.
Rule out a recently changed water filter
- Check the filter change date or housing label.
- If the filter was changed recently, verify it’s fully seated and the cap is turned until it clicks.
- Replace the filter if it’s installed incorrectly, older than about 6 months / ~200 gallons (typical EveryDrop interval), or if water flow seems reduced.
A bad or restricted filter can lead to slow filling, small/hollow cubes, and uneven cycling that can look like “too much ice” when the ice maker repeats harvest attempts.
Fix Overproduction and Ice Bin Overflow
When your Whirlpool ice maker continues producing despite a full bin, the shutdown system is failing—most often due to a control issue, a jammed mechanism, or a valve that keeps filling. Address those mechanical and water-control points first.
Inspect the ice maker switch or control board
- Unplug the refrigerator (or switch power off at the breaker).
- Remove the ice maker cover or access panel for your model.
- Look for signs of burn marks, corrosion, or loose wiring connectors.
- If your ice maker has an inline module, ensure the control harness is fully connected.
If the shutoff logic or module isn’t responding, the unit may keep harvesting until the freezer is flooded with ice.
Make sure the bin isn't jamming the shutoff
- Remove the ice bin and empty it completely.
- Check the bin’s underside and side track areas for ice that prevents smooth movement.
- Reinstall the bin so it seats firmly and moves freely on its track.
A bin that doesn’t sit correctly can prevent the shutoff arm/paddle from stopping production.
Test for a stuck fill valve
- Power off the refrigerator, then locate the water inlet valve behind the refrigerator (or at the water connection point).
- Restore power and watch for water flow into the ice maker during a harvest cycle.
- If water keeps running when it should stop, the fill valve is stuck.
A stuck fill valve can cause continuous water delivery, producing excess ice and overflow even when the bin is full.
Reset the ice maker after corrections
- Turn the ice maker OFF using the shutoff arm/paddle.
- Wait about 1–2 minutes with power still on.
- Turn the ice maker back ON (arm down / paddle engaged).
- Give it 24 hours to return to normal batch timing.
Resetting clears some stuck cycle states after you fix the arm, jam, or water behavior.
Solve Slow Ice Production and Small Cubes
Slow production and small or hollow cubes are driven by one of two things: insufficient freezing time (temperature/airflow) or insufficient/irregular water delivery (pressure, filter restriction, or a frozen line). Start with water flow before chasing ice mold issues.
Verify water supply pressure and saddle valve issues
- Measure water pressure at the supply line if possible; Whirlpool’s spec is roughly 35–120 psi.
- Inspect the saddle valve (if installed) for a partially closed or pinched condition.
- Check other water outlets (sink/RO) for low flow—weak household flow often means low pressure to the refrigerator.
- If you recently adjusted the valve or did plumbing work, correct it to open fully.
Low pressure reduces how much water reaches the ice mold, resulting in small/hollow cubes and slow harvesting.
Replace a clogged water filter
- Replace the water filter if it’s overdue (about 6 months / ~200 gallons) or if ice production slowed at the same time as reduced dispenser flow.
- After installing the new filter, discard the first 2–3 full batches of ice.
- Run water to purge air if your model has a filter change prompt.
A clogged filter restricts flow so the cubes don’t fill and freeze properly.
Check for kinks, frozen lines, or low water flow
- Pull the refrigerator out carefully and inspect the water supply line for kinks or sharp bends.
- Look for sections of tubing that look frosted or iced.
- If you suspect freezing, thaw the frozen section using a hair dryer on a low/medium setting (keep heat controlled—do not melt plastic connectors).
- Ensure the line isn’t rubbing against the cabinet and has slack for door movement.
A partially frozen fill line causes intermittent filling, which creates small cubes, hollow cubes, and inconsistent harvest timing.
Adjust freezer settings for faster freezing
- Set the freezer to 0°F (within the 0–5°F target range).
- Keep the ice maker area clear so air can circulate.
- Avoid frequent door openings for the first several hours after adjustment.
If the freezer runs too warm, the ice mold won’t freeze fast enough, and harvest cycles end up producing less ice.
Stop the Ice Maker from Icing Up
When an ice maker “ices up,” the goal is to restore proper fill, drainage, and defrost behavior. Most icing problems come from a frozen fill tube, poor seals allowing warm air in, or a drainage/defrost failure.
Defrost built-up ice safely
- Unplug the refrigerator and remove the ice bin.
- Let built-up ice thaw naturally for short periods, then gently remove loosened ice with a plastic tool.
- If you must speed it up, use a hair dryer directed at the ice maker area from a safe distance.
Do not puncture the mold or forcefully chip sealed parts—damage can lead to permanent leakage or poor freezing.
Check the fill tube for freeze blockages
- Locate the thin fill tube feeding water into the ice mold.
- If you see frost/ice around the tube, thaw it until clear water can move through.
- After thawing, reassemble and let the ice maker go through a fresh cycle.
A frozen fill tube directly causes partial ice production, repeated cycling, and heavy icing around the mold.
Inspect the door seal and warm air leaks
- Close the refrigerator door on a thin piece of paper.
- Try pulling the paper out—if it slides out easily, the seal likely leaks.
- Inspect for gaps, warped hinges, or damage on the gasket edges.
Warm air intrusion melts ice and refreezes where it shouldn’t, accelerating icing in the ice maker compartment.
Clean the ice maker and surrounding compartment
- Remove the bin and wipe the interior surfaces of the ice maker area with warm water and a soft cloth.
- Clear any ice dust or water residue from where the shutoff arm/paddle moves.
- Dry the area thoroughly before restarting.
Clean surfaces prevent water from pooling and freezing into blocks that jam mechanisms and interfere with harvest.
When the Problem Is the Refrigerator, Not the Ice Maker
Sometimes the ice maker is working, but the refrigerator can’t maintain the conditions the ice maker needs—stable freezing temperatures, correct fan circulation, and proper defrost operation. If multiple symptoms started together (slow ice plus abnormal freezer temperatures), look at the refrigerator systems first.
Watch for freezer temperature fluctuations
- Monitor the freezer display for bouncing temperatures.
- Use an internal thermometer to track stability for several hours.
- Check whether the door is being left slightly open or whether the gasket is compromised.
Temperature swings lead to inconsistent ice mold performance and can cause icing, overflow, or slow production depending on the direction of the fluctuation.
Listen for evaporator fan or defrost system problems
- During operation cycles, listen for the evaporator fan running.
- If the fan never runs or runs constantly without normal cycling, investigate airflow control.
- If you notice heavy frost on the evaporator area, the defrost system may be failing.
Fan and defrost failures reduce airflow and increase frost buildup that disrupts ice production and drainage.
Check for control board or thermostat failures
- If temperature is unstable and ice outcomes remain abnormal after correcting water flow, inspect electronic controls.
- Look for error codes on the display (record them exactly).
- Check wiring harnesses for looseness and confirm sensors are seated.
A failed thermostat or control board can prevent proper freezing cycles and defrost behavior—meaning the ice maker will never perform normally even if the ice mechanism itself is okay.
When to Repair or Replace Parts
If the simpler checks don’t resolve the issue, the fix is usually part-level: a water inlet valve, the ice maker module, or a decision between repair and full replacement. Use the signs below to determine what’s failing.
Signs the water inlet valve needs replacement
- Water continues running into the ice maker when it should stop, or fills repeatedly without a normal harvest.
- Ice production is erratic with partially formed cubes and inconsistent fill times.
- The dispenser water pressure is stable, but the ice maker filling behavior is abnormal—pointing to the inlet valve path.
A failing inlet valve often creates “wrong timing” rather than a complete shutdown.
When the ice maker module has failed
- The shutoff arm moves, but production pattern never changes.
- After resetting and correcting bin/jam issues, the ice maker still won’t harvest or still overproduces.
- You see internal wiring/connector issues or the module shows no response during a harvest attempt.
Modular Whirlpool ice makers can fail in ways that mimic sensor or valve issues, so module replacement is considered when external factors are ruled out.
Deciding between a repair and a full replacement
- If multiple parts are failing (valve plus module, or ongoing defrost/airflow issues), replacement can be more cost-effective.
- If the unit is older and water/ice problems recur after repairs, factor in the remaining lifespan.
- If a single component is clearly responsible (stuck valve behavior or confirmed module failure), repair that component first.
Pick the option that restores correct fill timing, correct shutoff behavior, and stable freezing conditions with the least repeat work.
Frequently Asked Questions
Why is my Whirlpool ice maker making too much ice?
The most common causes are a faulty shutoff arm or sensor, a stuck water inlet valve, a bad ice maker module, or a bin that is not stopping production when full. Start by moving the shutoff arm/paddle (or ensuring the feeler is not jammed) and check the bin seating. Then inspect for a fill valve that keeps delivering water when it should stop.
Why are my Whirlpool ice cubes small or hollow?
Small or hollow cubes usually point to restricted water flow from a clogged filter, low water pressure, a partially frozen fill tube, or a kinked supply line. Replace an overdue filter, check household water pressure, and inspect the thin fill tube and water line for ice or bends that reduce flow.
Why is my Whirlpool ice maker slow to make ice?
Slow production is often caused by warm freezer temperatures, poor airflow, low water pressure, a dirty filter, or a defrost or fan problem in the refrigerator. Set the freezer to 0–5°F, clear any airflow obstructions, and prioritize water flow checks before focusing on the ice maker itself.
Why does my Whirlpool ice maker ice up?
Icing up often happens when the fill tube freezes, warm air enters through a bad door seal, or the ice maker area is not defrosting or draining properly. Thaw the frozen fill tube carefully, inspect the gasket for leaks, and clear ice buildup from the ice maker compartment.
Should I reset my Whirlpool ice maker after fixing it?
Yes. After correcting the cause, a reset can help clear stuck cycles and confirm whether the ice maker is operating normally again. Turn the ice maker OFF using the shutoff arm/paddle, wait briefly, then turn it back ON and allow about 24 hours for normal production.