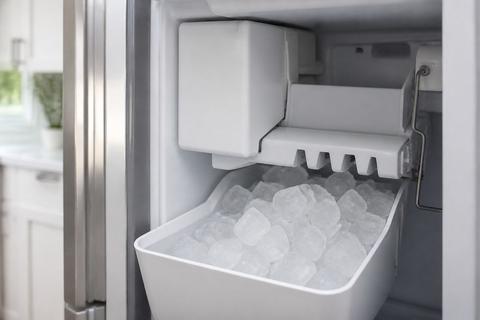
Whirlpool Ice Maker Cleaning and Maintenance
If your Whirlpool ice maker is producing cloudy ice, smells funky, or slows down unexpectedly, the problem is often maintenance-related. Whirlpool Ice Maker Cleaning and Maintenance helps prevent mineral buildup that clogs the fill path and keeps cubes forming at the right rate. With the right cleaning and upkeep, you can restore fresh-tasting ice and avoid performance issues that turn into bigger repairs.
How to Clean and Descale a Whirlpool Ice Maker
Regular cleaning prevents mineral buildup, odors, and slow ice production. Descaling removes scale from the water path so the ice mold fills correctly and cubes release cleanly.
1) Gather what you need (and power down safely)
- Unplug the refrigerator or switch off the ice maker using the control arm/paddle (move it to the OFF/up position on models with a feeler arm).
- Remove ice storage bin (if applicable) and discard remaining ice.
2) Clean removable parts the safe way
- Wash the ice bin and any removable plastic components with warm water and mild dish soap.
- Rinse thoroughly, then air-dry completely.
3) Clean the ice maker surfaces and mold area
- Wipe the interior ice maker surfaces with a soft cloth dampened with warm, soapy water.
- Use a second cloth with clean water to remove soap residue.
- Avoid abrasive pads that can scratch plastic.
4) Descale the water path (mineral buildup removal)
- Prepare a descaling solution per the product label (use only Whirlpool-approved guidance if your manual specifies a specific cleaner).
- Apply the solution to affected mold/water-contact areas as directed by the cleaner instructions.
- Let it sit for the labeled dwell time, then wipe/spray with clean water.
5) Flush after descaling
- Run a few harvest cycles to clear the system.
- Discard the first 2–3 full batches of ice after cleaning/descaling to ensure taste and clarity are back to normal.
6) Check the production pattern
- After reassembly, allow about 24 hours for normal production rate.
- Confirm ice is forming and harvesting on schedule once the freezer is at about 0–5°F.
How to Replace Whirlpool Ice & Water Filter 1 and Reset It
A clogged or overdue filter reduces water flow, changes ice taste, and can lead to inconsistent fill. If you notice reduced ice production, cloudy cubes, or weaker water flow to the dispenser, the filter is a prime suspect.
1) Locate the Ice & Water Filter 1
- Find the filter housing inside the refrigerator compartment (or grille area, depending on model).
- Confirm the filter label/spec matches Whirlpool’s Ice & Water Filter 1 replacement.
2) Reset the filter indicator (if equipped)
- If your model has a filter reset button, press and hold it until the status light changes (follow your panel instructions).
- If your model uses a menu path, use the dispenser control display to select Filter Reset.
3) Replace the filter
- Remove the old filter by twisting counterclockwise (or pulling/releasing depending on the housing).
- Remove protective caps from the new filter.
- Insert the new filter and lock it in place (twist clockwise until it stops).
4) Purge trapped air and discard initial cubes
- Run water through the dispenser for the amount of time your manual recommends (commonly 1–2 minutes).
- Whirlpool recommends discarding the first 2–3 full batches of ice after replacing the water filter.
5) Confirm normal operation
- Watch for improved ice production and consistent cube fill over the next several hours.
- If cubes remain small after the filter change, also check water pressure (roughly 35–120 psi) at the supply line.
Full Guide: How to Replace Whirlpool Ice & Water Filter 1 and Reset It
How to Adjust Whirlpool Ice Maker Water Level and Cube Size
Water level settings directly affect how full the ice mold gets, which changes cube size and whether cubes form correctly. If you’re seeing small cubes, underfilled molds, or inconsistent batch sizes, adjust the water level using your model’s controls.
1) Access the ice maker adjustment controls
- Locate the ice maker’s adjustment mechanism inside the freezer behind the front cover (or the control panel area, depending on model).
- Remove any obstruction like the ice bin to reach the assembly.
2) Adjust the water level in small increments
- Use the labeled adjustment lever/slider if your model has one.
- Move the setting one increment at a time (for example, raise water level to increase cube fill, lower it to reduce overfilling).
- Avoid large jumps; you’ll overshoot and may need another adjustment.
3) Adjust cube size only after water level changes
- Cube size is usually tied to the amount of water in the mold and the fill cycle duration.
- Change one setting at a time so you can attribute improvements correctly to the adjustment.
4) Allow the next batch to show results
- Give the ice maker about 90 minutes to 2 hours to produce the next batch under stable conditions.
- Let it run for around 24 hours after adjustments for a full production pattern to settle.
5) Re-check freezer temperature and cube release
- Ensure the freezer stays about 0–5°F.
- If cubes still look wrong after water adjustment, check for filter issues, frozen fill tube, or water flow restrictions.
Full Guide: How to Adjust Whirlpool Ice Maker Water Level and Cube Size
Whirlpool Ice Maker Makes Small Cubes or Won't Dump: Fixes
Small cubes or a failure to dump often points to water delivery, temperature, or a mechanical cycle problem inside the ice maker. Use the fixes below to eliminate the most common causes quickly.
1) Confirm the ice maker is actually ON
- Find the wire feeler/shutoff arm (or sliding feeler paddle on inline icemakers).
- Move it to the DOWN/ON position if it’s stuck in the UP/OFF position.
2) Inspect and clear the frozen fill tube
- Locate the thin water feed line/tube leading into the ice mold.
- If it feels frozen, thaw it using a hair dryer on a low-to-medium warm setting or warm water (keep water controlled to avoid soaking electrical parts).
- Once thawed, watch for normal water filling during the next harvest cycle.
3) Check the water filter and water flow
- Replace an overdue filter (commonly every ~6 months / ~200 gallons on many Whirlpool EveryDrop filters).
- Verify household water pressure is within spec (about 35–120 psi).
- If the dispenser runs weakly too, prioritize the supply line and shutoff valve rather than the ice maker itself.
4) Improve freezer temperature stability
- Set the freezer to maintain roughly 0–5°F.
- Avoid frequent open-door use that keeps the freezer from staying cold enough for proper freeze and harvest timing.
5) Allow time for the harvest cycle after fixes
- After clearing a jam or thawing a frozen component, allow about 24 hours for normal production to return.
- Watch for full harvest and proper cube release during multiple cycles.
Full Guide: Whirlpool Ice Maker Makes Small Cubes or Won't Dump: Fixes
Whirlpool Ice Maker Overfilling: Fixing Water Flow Problems
Overfilling usually means the ice maker isn’t stopping the fill at the right time or is receiving too much water. Start by correcting water flow issues and then confirm settings.
1) Confirm water level adjustment isn’t set too high
- Locate the water level adjustment mechanism on your ice maker.
- Lower the water level by one increment if cubes are consistently overfilled or spilling.
2) Inspect for a fill tube flow restriction or misfeed
- Check the thin fill tube feeding the ice mold for ice buildup or improper seating.
- If you find blockage or partial freezing, thaw and reposition so it feeds water smoothly into the mold.
3) Check the inlet valve behavior
- Listen for abnormal valve cycling (rapid clicking can indicate control issues).
- If the valve continues filling when it should stop, the inlet valve may be faulty and require service.
4) Look for a shutoff/harvest control issue
- Ensure the ice maker harvest mechanism is moving freely and not jammed.
- A jam can disrupt the cycle timing and lead to incorrect fill and overflow.
5) Address water pressure problems
- If water pressure is high beyond spec, the ice maker may overfill due to excessive flow rate.
- If you share a line with other devices or have a fluctuating supply, correct it at the source before further adjustments.
Full Guide: Whirlpool Ice Maker Overfilling: Fixing Water Flow Problems
Whirlpool Ice Maker Makes Too Much, Too Slow, or Ices Up: Fixes
When an ice maker cycles incorrectly—making too much, producing too slowly, or icing up—the cause is often related to temperature, water delivery, or internal component behavior. Work through the fixes below to restore normal cycling.
1) Fix icing-up causes by restoring proper airflow and temperature
- Verify the freezer temperature stays about 0–5°F.
- Ensure vents aren’t blocked by food items or ice packs.
- If frost repeatedly forms near the ice maker, let the unit run after correcting airflow before changing multiple parts.
2) Check water delivery speed (filter + supply)
- Replace a clogged or overdue filter to restore water flow consistency.
- Confirm supply pressure is roughly 35–120 psi at the inlet line.
- If the dispenser water flow is weak, address the water supply line first.
3) Reduce “too much” production triggers
- Check that the ice storage bin is correctly seated so the ice level sensor can signal “full.”
- Confirm the shutoff arm/paddle isn’t stuck in the ON position when the bin is full.
4) Resolve “too slow” production
- Ensure you discarded the first 2–3 batches after install or after replacing the filter.
- Allow 24 hours for production to stabilize after any maintenance or component change.
- If production remains slow, inspect the fill tube and water inlet valve operation.
5) Clear jams without damaging the mechanism
- If ice is stuck, remove ice bin and clear jammed cubes carefully.
- Reassemble fully and run harvest cycles to reestablish normal timing.
Full Guide: Whirlpool Ice Maker Makes Too Much, Too Slow, or Ices Up: Fixes
Frequently Asked Questions
How often should I clean a Whirlpool ice maker?
Clean a Whirlpool ice maker every 3 to 6 months to prevent mineral buildup, odors, and performance slowdown. If you notice cloudy ice, a persistent smell, or mineral residue, clean sooner. Homes with hard water require more frequent cleaning and descaling because scale forms faster and can restrict flow to the ice mold.
Why is my Whirlpool ice maker making small or misshapen cubes?
Small or misshapen cubes usually come from low water flow, a partially clogged filter, incorrect fill settings, or freezer temperature issues. Start by checking the water filter condition, then confirm freezer temperature stays around 0–5°F. Also inspect for a restricted or frozen fill tube if the ice maker isn’t filling consistently.
Can a dirty filter affect ice maker performance?
Yes. A dirty or expired filter reduces water flow and can impact ice quality, production speed, and fill consistency. Replacing and resetting the filter indicator can restore normal harvest performance, and you should discard the first 2–3 full batches after installing the new filter.
What should I check if my Whirlpool ice maker is overfilling?
Check water flow problems first: the inlet valve behavior, the fill tube condition, and any restricted or misfed water path. Overfilling can also be caused by the water level setting being too high or the ice maker not shutting off properly during the fill stage.