Whirlpool Ice Maker Drain Pump Not Working: Troubleshooting Guide
If your whirlpool ice maker drain pump not working, water can’t clear out of the ice maker, which leads to poor freezing, missed harvests, and buildup inside the unit. When the pump won’t move water, the system can also get stuck mid-cycle and stop making ice. The good news: most drain-pump failures come down to power, a clog/freeze in the drain path, or a specific failed component you can isolate.
For more help, see our Whirlpool Ice Maker Frozen, Leaking, and Clog Repairs guide.
Start with the Fastest Checks
Confirm the Ice Maker Has Power and Is Running
Start here because a “non-working drain pump” can actually be a no-power or stopped-icemaker condition.
- Open the freezer and make sure the ice maker is turned ON (inline models use a wire feeler/shutoff arm; raise it to turn OFF, lower it to turn ON).
- Ensure the freezer temperature is cold enough (aim for about 0–5°F / -18 to -15°C).
- Look for an ice-maker status light and any beeps or signals that indicate a cycle or fault.
- Confirm the refrigerator is powered, then start a harvest/drain cycle if your model has a manual option or by waiting for the next cycle.
Look for Simple Drain Blockages
A clogged drain path is the most common reason water won’t pump out. Clear the obvious physical restriction before testing parts.
- Unplug the refrigerator (or switch off power) to avoid water movement while you inspect.
- Check the ice maker’s drain area for ice chunks, slime, or stuck debris.
- Inspect the drain hose and any visible sections for blockage or kinks.
- If you see ice buildup, thaw it with gentle warm air (hair dryer on low, keep it off plastic edges as needed) until water can flow freely.
Check for Error Lights, Beeps, or Visible Leaks
Error indicators tell you when the control module is detecting a drainage/harvest problem.
- Note any displayed error code, flashing LED pattern, or beeps during what would be a drain/harvest cycle.
- Look under the ice maker for pooling water, crusted ice around the base, or water trails on the liner.
- If water is overflowing, stop further attempts and clear the drain path first to prevent additional damage.
- If there are no indicators and there’s no water movement, move to pump-specific checks.
Understand How the Drain Pump System Works
What the Drain Pump Does in a Whirlpool Ice Maker
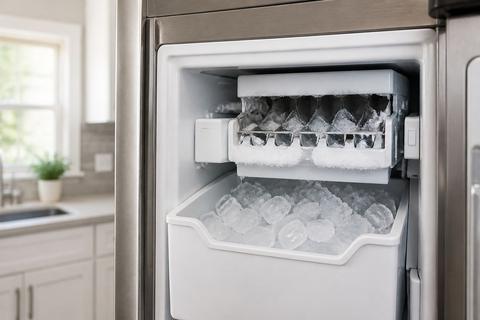
Whirlpool ice makers use a drain pump to remove meltwater from the ice-making process. During harvest and post-harvest operation, water collects in the ice maker’s sump/reservoir and is pumped out through a hose to the refrigerator’s drain system. If the pump can’t move water, meltwater and small ice fragments build up, which can block the reservoir, trigger fault behavior, or cause the unit to stop completing cycles.
Where the Pump, Hose, and Reservoir Are Located
The drain pump and reservoir are built into the ice maker assembly or mounted to it, depending on the Whirlpool design. The pump sits near the sump where meltwater collects, then pushes water through a short discharge hose into the main drain channel. The reservoir usually sits below the ice mold area; when it fills and can’t empty, you’ll see pooling, abnormal ice formation, or no harvest completion because the unit stays out of its intended cycle timing.
When a Drain Pump Kit Is the Right Fix
A drain pump kit is the right fix when the existing pump assembly fails to run, is seized, or has an electrical failure that prevents draining. It can also be the correct solution when the ice maker design requires a specific pump/reservoir configuration (some models don’t use gravity drainage). If the pump housing, hose connections, or mounting pieces are damaged during prior service, a compatible kit restores the correct fit and routing for proper water discharge.
Diagnose a Drain Pump That Will Not Move Water
Listen for the Pump and Test for Vibration
You can identify a lot by sound and feel during a drain cycle.
- Unplugging first: locate the ice maker’s access point, then restore power once you’re ready to observe safely.
- Start a harvest/drain cycle by triggering the next cycle (or wait for the unit to begin it).
- Put a hand gently on the pump housing or ice maker module and listen for a hum or clicking.
- If there’s no hum and no vibration while water should be draining, the motor, wiring, or control signal is the problem—not the drain hose alone.
Inspect the Float, Switches, and Water Level Sensors
Many Whirlpool ice makers control draining using a float/switch or water-level sensing logic. If the sensors don’t report the correct water level, the pump may never be commanded ON.
- Inspect the float or shutoff mechanism inside the ice maker reservoir area for ice binding or misalignment.
- Check for visible damage to the small switch contacts or sensor wiring harness.
- Remove light ice buildup that could stop the float from moving freely.
- If the float moves freely by hand but the pump never engages, continue to wiring/electrical checks in the next section.
Check for Kinks, Ice Buildup, or Frozen Drain Lines
Even a healthy pump can’t push water through a frozen or kinked path.
- Follow the drain hose from the pump to its discharge point and look for bends, kinks, or crushed sections.
- Inspect for partial blockages—small ice plugs can cause “tries but doesn’t clear.”
- Thaw frozen lines using gentle warm air and then allow meltwater to flow through.
- Clear any ice buildup at the reservoir intake so the pump has access to water instead of cycling on air.
Repair or Replace the Problem Part
Clean the Pump and Drain Path Safely
Cleaning is effective when the failure is caused by debris, slime, or minor ice buildup.
- Power off the refrigerator before removing any ice maker components.
- Remove the ice maker carefully and access the pump/reservoir area.
- Clean debris from the pump intake, reservoir sump, and visible drain passages using non-abrasive tools.
- Do not use sharp metal blades that can gouge plastic; wipe and rinse so water can flow freely once reassembled.
Test the Pump Motor and Electrical Connections
If cleaning doesn’t fix it, move to electrical fault isolation.
- Inspect the wiring harness connectors at the pump for looseness, corrosion, or bent pins.
- Verify the harness is routed so it cannot rub on ice maker edges.
- Use a multimeter to check for continuity/open circuits on the pump leads (only when power is disconnected).
- If the pump has power input but the motor shows no mechanical response (no hum/click and no vibration), replace the pump assembly.
Replace a Failed Drain Pump Assembly
Replace the failed assembly when the motor is electrically failed, seized, or the correct fit requires a dedicated kit.
- Order the exact Whirlpool part for your specific model number so the connector style and hose fittings match.
- Remove the old pump assembly, transferring any required gaskets/brackets if the new kit specifies them.
- Install the new pump with the hose routed without kinks and with secure, correct seating at each connection.
- Reassemble and restore power; give the unit enough time to complete a full harvest/drain cycle and stabilize output.
Installation Tips for a New Pump or Drain Line
Prepare the Ice Maker and Shut Off Water and Power
Proper preparation prevents leaks and protects electronics during installation.
- Unplug the refrigerator (or turn off power at the breaker if that’s how your service area requires).
- Shut off the water supply valve feeding the refrigerator ice/water system.
- Move any panels or ice maker cover parts that block access to the pump and hose routing.
- Keep the area dry and wipe pooling water before disconnecting hoses to prevent water from migrating into wiring.
Install the Drain Pump Kit Correctly
A correct install matters because drain hoses must route to the right elevation and connection points.
- Confirm the kit includes the correct pump, reservoir pieces, and hose/discharge fittings for your model.
- Install the pump so it sits squarely and the intake connects to the reservoir path without gaps.
- Route the discharge hose with no sharp bends and ensure it reaches the specified drain connection area.
- Tighten/seat all connections as the kit instructions indicate to prevent slow leaks that later freeze.
Avoid Common Installation Mistakes and Leaks
Most “new pump still not working” cases trace to routing and connection errors.
- Do not leave the discharge hose kinked—kinks can stop flow even if the pump runs.
- Avoid pinched wiring harnesses between the ice maker housing and freezer liner.
- Replace any damaged clamps or seals from the old setup if the kit doesn’t reuse them.
- After reassembly, check the pump area for any signs of drips before the next cycle.
Model-Specific and Related Error Guidance
Check the Whirlpool Model Number Before Ordering Parts
Whirlpool ice makers vary by design, connector style, and drainage method. Before buying anything, find your refrigerator model number (inside the door frame or on the cabinet label) and use it to confirm compatibility. Ordering the wrong pump assembly can result in a mismatch at the connector, hose outlet, or mounting points—leading to persistent drainage failure or leaks after installation.
Use the Manual and Parts Diagram for Your Exact Unit
A parts diagram helps you identify which components belong to the drain pump assembly versus the water inlet side or ice mold. Use your model’s service manual/parts list to locate the pump, float/sensor components, hose routing, and how the ice maker module comes apart. Follow the diagram to ensure you reinstall brackets, gaskets, and any specific orientation features the pump relies on.
Know When an Error Code Points to a Different Appliance
Some Whirlpool models share signals across the ice maker, water system, and refrigeration control. If you see an error code that indicates water fill failure, test-harvest failure, or inlet valve issues, the drain pump may not be the root cause. If you have slow ice, small cubes, or reduced dispense alongside drainage faults, check the water filter and inlet supply behavior because low flow can change ice maker cycle timing and meltwater patterns.
Prevent Future Drain Problems
Keep the Drain Path Clear and Dry
After repairs, keep the drain path clean so it won’t refreeze or clog again. Remove ice buildup if it forms around the reservoir intake, and keep the discharge hose route free of debris. Wipe away any residue around the ice maker base when you service it, because slime and minerals can build into a partial blockage that forces the pump to work harder every cycle.
Use Proper Water Quality and Maintenance Habits
Water quality directly affects slime, mineral scale, and how quickly drain passages clog. Replace the refrigerator water filter on schedule (Whirlpool EveryDrop filters are rated around 6 months / 200 gallons) and use the correct filter model. Also maintain adequate household water pressure (Whirlpool spec is roughly 35–120 psi) since low pressure can disrupt cycle performance and increase the chance of incomplete harvest/drain behavior.
When to Call a Technician
Call a technician when you’ve cleared clogs, confirmed the ice maker is ON and has correct freezer temps, and the pump still won’t run or move water. Also call if you find repeated error codes after a proper pump replacement, if wiring damage is present, or if multiple components appear failed (pump motor plus control/sensor faults). Professional service helps prevent repeated part swaps and ensures the correct diagnostic steps for your exact Whirlpool model.
Frequently Asked Questions
Why is my Whirlpool ice maker not draining water?
Common causes include a clogged drain line, frozen drain path, failed drain pump, bad float switch, or an electrical issue preventing the pump from starting.
How do I know if the drain pump is bad?
If the ice maker has power but the pump does not hum, vibrate, or move water during a drain cycle, the motor, wiring, or control signal may have failed.
Can I clean the drain pump instead of replacing it?
Yes, if the issue is caused by debris, slime, or minor ice buildup. If the motor is seized or electrically failed, replacement is usually the better option.
Do I need a drain pump kit for installation?
If your ice maker does not have gravity drainage or the existing pump has failed, a compatible drain pump kit may be required for proper installation or repair.
How do I find the right Whirlpool ice maker part?
Match the model number, part number, and physical configuration before buying. The exact fit matters because pump assemblies and connectors can vary.