How to Fix Ice Build-Up in a Whirlpool Bottom Freezer
If you’re dealing with a whirlpool bottom freezer ice build up, you’re not alone—most cases start as a small frost spot and then spread near vents, the drain area, or the door edge. The good news is that the fix is usually straightforward once you pinpoint whether the problem is airflow, moisture, the defrost system, or the ice maker’s water feed. Use the steps below in order to remove ice safely and stop it from coming back.
For more help, see our Whirlpool Ice Maker Frozen, Leaking, and Clog Repairs guide.
Understand Why Ice Is Forming
Check for warm air leaks around the door
Ice forms when moisture inside the freezer contacts cold surfaces and freezes. Start with the most common entry point: the door seal. Inspect the gasket all the way around for tears, hard spots, or debris (food crumbs and hair prevent a full seal). If the gasket looks dirty, wipe it with warm soapy water, then dry. Next, close the door on a thin strip of paper and pull it gently at several points; it should resist and tear the paper with effort. If the paper slides out easily at the bottom corner or hinge side, warm air is leaking in and creating ice near the gasket line.
Look for blocked vents or a frozen drain
Two places cause most “mystery” ice: the air vents and the meltwater drain. If airflow is restricted, humidity can condense and freeze on the wrong surfaces, often building up behind or under stored items. Pull the food away and check the freezer’s internal vents for ice or blockage. Then focus on the drain: if meltwater can’t exit, it backs up and refreezes into thick ice. Look for signs of water pooling, a frosty patch that keeps growing, or a drain area that stays cold/white while other areas cycle through frost and thaw.
Identify defrost system failures
A Whirlpool bottom freezer relies on a defrost system to melt frost off coils. When defrost fails, the frost keeps accumulating until it becomes solid ice. Watch for symptoms like a freezer that runs colder than expected while the compartment still has heavy buildup, or ice that returns quickly after you manually defrost. The defrost heater, defrost thermostat, and control/timer sequence work together; if any part stops cycling, frost won’t clear. If you see a pattern—ice builds within days—you’re not looking at condensation alone; you’re looking at defrost performance.
Separate normal frost from a real ice buildup problem
Not every frost pattern is a defect. Light, even frost on the back wall or occasional thin ice on interior surfaces can be normal from humidity cycling. A real problem shows clear evidence of growth and thickness: ice that spreads outward, forms a ridge near vents, blocks drawers, or causes the door area to freeze up. Another red flag is repeat buildup right after defrosting, especially within a week. When the buildup restricts airflow, it also forces the system to run harder, accelerating the issue.
Defrost and Unfreeze the Freezer Safely
Unplug the refrigerator and protect the food
Start by removing the power so you defrost safely and avoid damaging electrical components. Unplug the refrigerator from the wall outlet. Transfer frozen food to a cooler with ice packs, or move it to another freezer if you have one. Keep the freezer door closed as you work to limit warm air entry. Do not use boiling water or scrape aggressively—liner panels and refrigerant tubing can be damaged, and punctures can lead to leaks. Letting ice thaw at controlled heat keeps the compartment from warping and reduces mess.
Remove shelves, bins, and the ice maker if needed
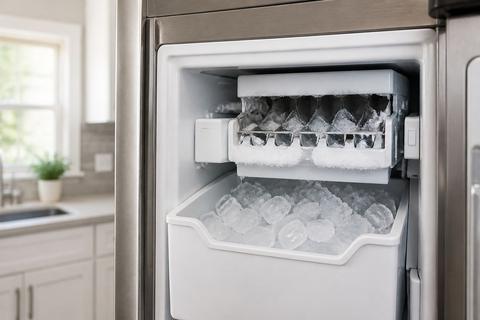
To melt ice without trapping water behind parts, clear the space. Remove shelves and drawers in the freezer compartment. If the bottom area has an ice maker, check whether the ice is around the ice maker housing; if needed, remove the ice maker to access the buildup and thaw around the mold area. Keep track of screws and clips, and avoid forcing plastic parts. If your model has an ice maker with an arm or feeler, move it to the OFF position before you start defrost work so it does not attempt to cycle while you’re thawing.
Melt ice with safe, controlled methods
Melt ice using methods that won’t damage the liner or coils. Use one of these safe approaches:
- Place towels around the base to catch meltwater, then let ice melt naturally with the door open for airflow.
- Use a hair dryer on a low/medium heat setting held at a safe distance (about 6–10 inches), moving it continuously over thick sections.
- Use warm (not hot) water placed in a shallow pan; set it inside briefly to increase melting without soaking electrical areas.
Avoid sharp tools (ice picks, screwdrivers, knives). If ice is tight, add time or controlled heat rather than prying.
Dry the compartment completely before restarting
Once ice is fully melted, wipe up meltwater and dry surfaces so you don’t refreeze the same moisture. Use clean towels to remove water from corners, along vents, and near the drain area. Then let the freezer air-dry with the door open for 10–20 minutes if possible. Make sure no water remains around the control area or behind panels. After everything is dry, plug the refrigerator back in and give it time to return to temperature before loading food again. If you’re troubleshooting the ice maker, restore its installation exactly as removed.
Inspect the Door, Gaskets, and Alignment
Test the door gasket for gaps, cracks, or debris
A failing seal is a direct cause of moisture freezing into ice. Inspect the gasket surface for cracks, folds, or sections that look shiny or compressed. Clean it thoroughly—soap and warm water work, but dry completely afterward. Perform the paper test: close the door on a strip of paper and pull at the top, middle, and bottom sections. Replace the gasket if the paper slides out easily at multiple points or if you find tears or missing gasket pieces. If the gasket is intact but dirty or warped, cleaning and correct seating often stop the recurring ice around the door edge.
Check whether the door is closing evenly
Even with a good gasket, a door that doesn’t close squarely creates a moisture path. Watch the door as you close it: the latch should engage evenly, and the gasket should compress uniformly along the perimeter. If you see a visible gap at the hinge side or near the bottom edge, something may be preventing full closure, such as overpacked containers or a warped shelf blocking the door. Reposition items to keep vents clear and prevent contact with the door. Also check that shelves are seated correctly and that nothing inside is pressing outward toward the seal.
Fix a bottom freezer door that is frozen shut
If the door is frozen shut, forced prying can crack the gasket or damage hinge components. First, unplug the refrigerator. Then use controlled heat: aim a hair dryer on low/medium at the gasket area from a short distance while gently pulling the door after the seal loosens. Do not insert metal tools between the gasket and liner. If the door doesn’t release quickly, stop and give more controlled heat time—rushing increases damage risk. After it opens, fully defrost and clean the gasket area so trapped moisture doesn’t refreeze the next day.
Make sure the unit is level and not tilting forward
If the refrigerator tilts, the door can fail to seal and the bottom gasket may not compress properly. Check level by looking at the freezer door position relative to the cabinet and using a bubble level on the top surface. If the unit leans forward, adjust the front leveling legs so the refrigerator stands level. A level unit also helps ice maker components operate correctly because proper alignment can improve water flow and reduce uneven freezing patterns. After leveling, re-run the gasket paper test; the seal should resist paper pulls more consistently along the bottom.
Check the Ice Maker and Water System
Confirm the ice maker is turned on and seated properly
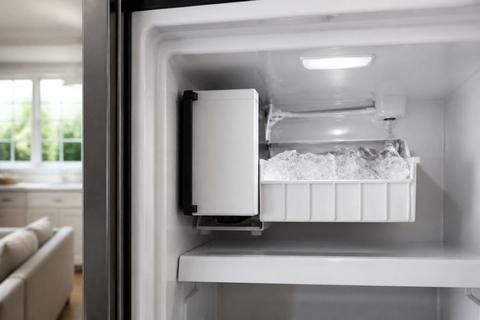
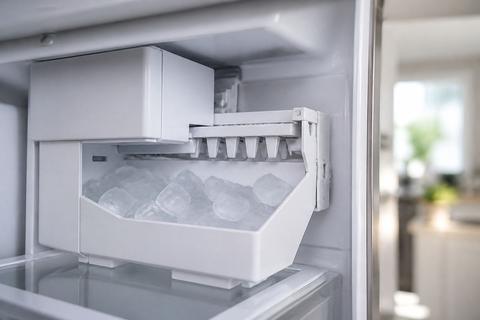
Ice buildup can happen when an ice maker’s operation is out of sync with the freezer environment, creating water/ice where it shouldn’t be. Many Whirlpool ice makers use a wire feeler or sliding feeler paddle: lift the arm to the OFF position, lower it to turn ON. Make sure it’s in the ON position. Also check that the ice maker is fully seated and secured—loose modules can leak water into areas that then freeze into unwanted ice. If the ice maker was recently serviced, confirm the electrical connector and water connection are properly engaged without kinks or gaps.
Look for a frozen fill tube or clogged water line
A frozen fill tube (the thin tube that feeds water into the ice mold) is a frequent cause of water problems that can lead to unusual ice behavior. If you see frost around the fill tube or ice near the ice maker area, thaw it. Use a hair dryer on low/medium directly on the frozen section, moving it along the tube so heat reaches the whole length. After thawing, inspect the line for kinks and confirm water can flow when the ice maker cycles. If the line remains blocked, the drain and defrost may also be implicated—ice maker issues often overlap with airflow and defrost timing.
Clean or replace a blocked water inlet valve
If water can’t reach the ice maker properly, the system can behave inconsistently, increasing frost and ice where moisture accumulates. Check the water inlet path: if you have an inline filter, verify it isn’t overdue and isn’t clogged. Whirlpool EveryDrop filters are rated around 6 months / 200 gallons (follow your specific filter label if different). If the filter is current but water fill is weak, the water inlet valve may be clogged or partially failed. Replace the valve if water flow is restricted despite a clear filter and good household pressure.
Know when to disconnect or remove the ice maker
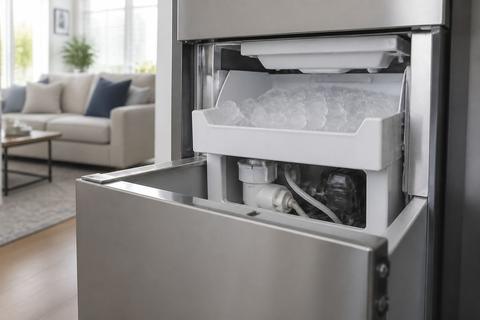
If the ice buildup is clearly tied to the ice maker housing area, disconnecting or removing the ice maker can speed safe troubleshooting. Power off/unplug before removal. If your goal is to stop ice-related meltwater events while you fix airflow or defrost, you can switch off the ice maker (OFF arm/feeler) instead of removing it. Remove the ice maker only when ice blocks access, when you must thaw a frozen fill tube, or when a technician-level inspection is required. When you reinstall, make sure the module is seated evenly so water doesn’t bypass the ice maker and refreeze.
Clear the Drain and Prevent Water Refreezing
Find the freezer drain opening and thaw any blockage
A blocked drain is one of the most direct causes of thick ice in bottom freezers. Locate the drain opening inside the freezer compartment—often at the back or near the bottom area behind a cover. If you see a capped or partially iced opening, thaw it so meltwater can flow. Use controlled heat (hair dryer on low/medium) directly over the drain area and surrounding ice until the opening becomes clear. Avoid drilling or poking with sharp tools that can damage the drain assembly. Once thawed, remove loosened ice and debris so water has a clear path out.
Flush the drain so meltwater can exit freely
After thawing the blockage, flush the drain to push out loosened ice particles. Use warm water carefully and slowly, pouring a small amount at a time into the drain channel. Watch for water to exit freely toward the drain pan area; if water backs up or doesn’t flow, there’s still a partial blockage. Keep adding small controlled pours until flow is clear. Excessive pouring can flood the compartment, so work gradually. Clearing the drain is a key step in stopping repeated refreezing because meltwater must leave the compartment every defrost cycle.
Inspect the drain pan and tubing for damage
If the drain pan or tubing is damaged, meltwater may not reach the collection area and can refreeze inside the freezer. Check for cracks, dislodged tubing, or signs that water trails are freezing along a specific route. If you see wet ice patterns that reappear in the same location, it often points to a drain path problem rather than door moisture alone. If the drain pan is cracked or the tubing is detached, replace the damaged parts. Do not simply thaw and ignore physical damage—meltwater will continue to refreeze in the same spot.
Prevent repeat buildup with better airflow and cleaning
Once the drain is clear, keep airflow and cleaning from bringing humidity back. Keep food from blocking vents and leave space for circulation around the back wall and near the drain area. Clean the freezer interior periodically so dust and grease don’t trap moisture. During defrost, remove ice completely so you’re not working over a partially melted shell. Also check the door seal and gasket compression so condensation doesn’t continuously feed the drain with water it can’t handle. Good airflow reduces condensation load and lowers the chance of future blockages.
When the Problem Is Mechanical
Spot signs of a failed defrost heater, timer, or thermostat
Mechanical defrost failures create persistent or rapidly returning ice. Common indicators include frost that doesn’t clear after a normal defrost window, heavy buildup on/near coil areas, and ice that comes back quickly after manual thawing. The defrost heater, defrost timer/control, and defrost thermostat work as a system: if the heater doesn’t warm the coil, frost keeps accumulating; if the thermostat/control doesn’t trigger properly, defrost may not run. If you notice a consistent pattern and the drain and gasket are already addressed, defrost components are the next likely cause.
Recognize fan problems that cause uneven freezing
The evaporator fan moves cold air through the freezer. If it’s weak, blocked, or failing, you can get uneven temperatures and localized condensation that turns into ice. Look for signs like poor airflow, warm spots near the freezer door area, or ice forming in unusual locations while other areas stay less frosted. Check for ice blocking the fan area and remove obstructions after defrost. If the fan doesn’t run, runs intermittently, or makes abnormal noise (grinding, clicking repeatedly), the fan motor or control circuit may be faulty. Fan issues often accompany defrost problems because airflow drives coil temperatures.
Decide when repair is better than replacement
If multiple components contribute—such as repeated defrost failures plus a failing fan or damaged drain assembly—repair may still be worthwhile if parts are inexpensive and access is straightforward. If the unit is older and other systems are failing, replacement can be more cost-effective. A strong repair candidate is when the issue is isolated: the drain clears permanently, door sealing is correct, and only defrost or fan performance remains. Mechanical diagnostics require safe handling of high-voltage components, so deciding on repair often depends on whether you can access and test the failed parts safely or at reasonable cost.
Know which symptoms point to professional service
Call a technician if ice returns quickly after a full defrost and the drain and gasket are confirmed clear, or if you suspect a failed defrost heater, control board, or fan motor. Also call for service if you detect electrical issues such as burning smells, repeated tripping, or visible damage to wiring or connectors inside the freezer compartment. If you hear the fan cycle strangely or the refrigerator keeps running without normal temperature stabilization, professional testing is the next step. Technicians can safely inspect temperatures, verify defrost cycles, and test components with proper meters.
Maintenance Tips to Stop Ice Build-Up From Returning
Clean the freezer and gasket regularly
Prevent recurrence by controlling the sources of moisture and improving sealing. Wipe the freezer interior regularly so spills and residue don’t trap humidity against cold metal. Clean the door gasket with warm soapy water and dry it completely; residue prevents full compression and encourages condensation. Also check for small food items that can fall behind shelves or into vent areas where they block airflow. If you keep the interior clean, you also make it easier to spot early frost patterns before they become thick ice. A consistent cleaning routine reduces the workload on defrost and helps the drain handle meltwater properly.
Keep food organized to avoid blocked vents
Airflow is essential in a bottom freezer. Arrange items so vents remain unobstructed—don’t pack containers tightly against the back wall or cover airflow grilles. Use bins and baskets that don’t sag or slide into vent openings when you open and close the door. Keep tall items from pressing outward against the gasket line when the door closes. When vents are blocked, cold air can’t circulate properly, and humidity condenses in the wrong places. That condensation quickly becomes frost and ice, especially near areas that stay colder due to poor air movement.
Avoid frequent long door openings
Every time the door stays open, warm humid air enters the freezer and then freezes when it contacts cold surfaces. Minimize “browse time,” and organize items so you can find what you need quickly. If you often stock up, keep the door open for the shortest time possible and avoid placing warm food directly into the freezer. Warm food increases the moisture load and forces the system to run longer, raising the chance of ice buildup around vents and drain areas. Consistent door habits reduce humidity spikes and make defrost cycles more effective.
Use the right temperature settings for your Whirlpool model
Use Whirlpool’s recommended freezer temperature range so the evaporator and coils cycle efficiently. Set the freezer to about 0–5 degrees F so it stays cold enough to freeze properly without overproducing frost. If the freezer is set too low, the system runs harder and can increase frost accumulation even when the door seal is good. If your Whirlpool has a “Power Cold” or similar fast-freeze mode, use it only when needed and return to standard settings when finished. The goal is stable temperatures that let defrost clear normal frost without letting it build into thick ice.
Frequently Asked Questions
Why is ice building up in my Whirlpool bottom freezer?
The most common causes are warm air leaks around the door, a blocked freezer drain, a frozen fill tube, or a defrost system problem. A poor door gasket seal lets moisture enter the compartment; once that moisture contacts cold surfaces, it freezes into ice. If the drain can’t carry away meltwater during defrost, the water refreezes and grows into a thicker ice layer. Defrost failures also trap frost on the evaporator area so it accumulates and spreads over time.
Can I unplug the ice maker to stop the ice buildup?
Yes. If the ice maker or its water line is contributing to the problem, unplugging or turning it off can help during troubleshooting. On many Whirlpool models, the ice maker has a shutoff arm or feeler: lifting it turns the ice maker OFF, lowering it turns the ice maker ON. If your ice maker runs while the freezer has a defrost or drainage problem, water can end up in the wrong places and refreeze. Make sure you determine whether the ice buildup is coming from the freezer compartment itself or from the ice maker area.
How do I defrost a Whirlpool bottom freezer safely?
Unplug the refrigerator first and move food to a cooler to protect it. Remove drawers and any items blocking access to ice-covered areas, and let ice melt naturally with towels placed to catch water. If you need faster melting, use gentle heat such as a hair dryer on low/medium held several inches away while you move it across thick ice sections. Avoid sharp tools that can scratch or puncture liner panels, coil covers, or refrigerant tubing. When the ice is fully melted, dry the compartment thoroughly before restarting.
Why is my Whirlpool bottom freezer door frozen shut?
This usually happens when moisture enters the freezer and freezes around the door edge or gasket area. Common causes include a dirty gasket, debris stuck in the seal, a cracked or warped gasket, or repeated condensation from warm air leaking in. If the refrigerator isn’t level, the door may not compress evenly along the bottom gasket, increasing the moisture pathway. When ice forms in the gasket region, the door can become sealed to the liner and feel “stuck.”
When should I call a technician?
Call for service if the ice comes back quickly after defrosting, if the drain is clear but water still refreezes, or if you suspect a failed defrost heater, control board, or thermostat. Also call if the fan isn’t running properly or if you hear abnormal fan noise after clearing obstructions. If the unit shows signs of electrical problems—burning smells, repeated shutdowns, or damaged wiring—use professional service rather than further DIY troubleshooting.