Samsung RF4287HARS Ice Maker Problems: Parts and Fixes
If you’re dealing with samsung rf4287hars ice maker problems, you’re not alone—many owners eventually see the ice stop, slow down, or start making strange cubes. The good news: most failures on this model trace back to a handful of predictable parts in the ice-making path or the dispenser system. Start with the symptom you see, then narrow it down to the component that controls water flow, freezing, and the harvest/dispense cycle.
For more help, see our Samsung Ice Maker Models: Manuals, Parts, and Fixes by Model guide.
Start with the likely causes
How the RF4287HARS ice system works
On the RF4287HARS, the ice maker feeds water into an ice mold, freezes it, then runs a harvest cycle that releases cubes into the ice bin. During dispensing, an auger and drive components move ice from the bin through the chute while a flap/door mechanism controls flow. Many “no ice” issues happen because water never reaches the mold (frozen fill tube, water inlet valve, or filter/supply restriction). Other failures happen after ice forms, such as a stuck auger, failed dispenser motor/flap, or ice bin clumping that blocks the chute.
- Confirm whether the unit is making ice (check for cubes in the bin).
- If ice exists but won’t dispense, focus on dispenser/auger parts.
- If there’s no ice at all, focus on fill-water path and harvest.
Quick checks before replacing parts
Before swapping components, rule out the two most common non-part causes: temperature and airflow blockages. First, verify the freezer is cold enough for consistent freezing; then remove any visible ice bridges in the bin/chute area. Also ensure the ice maker is enabled (Ice On, not Ice Off) and that the ice bucket is seated correctly—misalignment can stop harvest or prevent proper detection. Finally, inspect the water filter condition and make sure the water line is connected tightly with no kinks near the rear.
- Set the freezer to 0°F (-18°C) and wait for stabilization.
- Remove the ice bucket and clear any visible jam using warm water (not hot enough to damage plastic).
- Check Ice On in the dispenser panel settings.
- If used, inspect/replace the water filter per schedule and confirm no kink in the supply line.
When the problem is the dispenser, not the ice maker
A common trap is assuming “ice maker problems” when the ice maker is fine and only the dispensing path is failing. If you see fresh ice in the bin but the dispenser spits air, clumps, or stops mid-batch, the fault usually sits in the auger/drive components, dispenser flap/door mechanism, or an ice jam in the chute. On the other hand, if the bin stays empty and you don’t find cubes after a full cycle window, the water delivery and mold/harvest system is the primary suspect.
- Look in the ice bucket: ice present = dispenser-side diagnosis first.
- Feel for resistance: if the ice bin is packed tight, clumping can prevent auger movement.
- Inspect the chute area for a bridge/packed ice plug.
Diagnose the most common ice maker failures
No ice production at all
When the RF4287HARS makes no ice but the refrigerator runs normally, the likely culprits are water delivery to the mold and the harvest sequence stopping early. Start by confirming freezer temperature and checking whether the ice maker is turned on. Then check whether water is reaching the fill tube; a frozen fill tube or restricted inlet path prevents freezing. A failing water inlet valve or clogged water filter can also starve the ice mold, resulting in zero production.
- Verify freezer temperature is 0°F (-18°C).
- Turn the ice maker Ice On and reseat the ice bucket fully.
- Look for frost/ice buildup along the fill tube and chute area; clear blockages with thawing (no chipping of plastic).
- If the water filter is due or suspected restricted, replace it and retest after the refill time window.
Small, misshapen, or hollow cubes
Small or hollow cubes point to incomplete filling or interrupted freezing. The two leading causes are low water flow (clogged filter, weak inlet valve performance) and a frost buildup that interferes with the mold fill/harvest timing. If the ice is inconsistent across batches, treat this as a water delivery/valve-flow problem first, not a dispenser jam. Freezer temperature also matters: if the freezer runs warm, cubes can freeze unevenly and break apart.
- Ensure the freezer is stable at 0°F (-18°C).
- Replace the water filter if it’s overdue or suspected restricted.
- Test water flow to the ice maker fill path (see the “Test water flow and inlet valve performance” section).
- Inspect the ice mold area for recurring frost patterns that repeat after thawing.
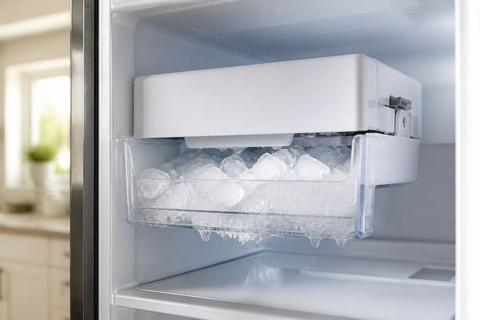
Ice maker freezes up or overfills
An overfill or freeze-up is a strong sign the ice maker’s water control or harvest timing is off. If the fill keeps running or the system cannot harvest properly, ice can bridge inside the mold and fill tube, trapping water and stopping future cycles. If you see heavy frost near the ice maker components or water pooled in places it shouldn’t be, prioritize a thaw/reset approach and then evaluate the inlet valve and ice maker assembly behavior.
- Empty the bin and clear any visible ice bridges using warm water.
- Run a full defrost cycle (Forced Defrost) rather than only thawing the chute.
- After thaw, observe whether new ice fills normally or repeats the same overfill/freezing symptom.
- If the pattern returns quickly, replace the faulty component that controls fill/harvest rather than continuing repeated thaw cycles.
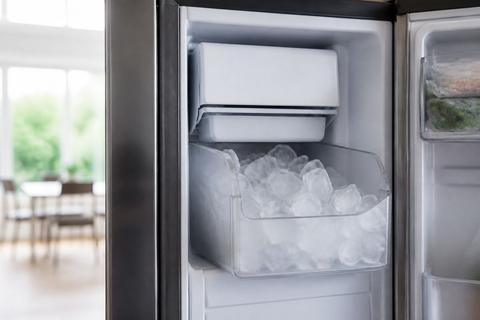
Ice bin clumps, jams, or stops dispensing
Clumping often happens when ice warms slightly, refreezes into larger masses, or gets moisture/condensation near the bin and chute area. A jam can stop the auger from turning, which prevents dispensing even if the ice maker keeps producing. The fastest diagnosis is to compare what’s happening in the bin vs. the chute: if cubes are present but stuck in a compact mass, the auger/dispenser path is the likely failure point.
- Remove the ice bucket and break up clumps with warm water to melt the bridge.
- Clear ice stuck at the chute inlet so the auger can move cubes freely.
- Inspect the auger area for broken ice chunks that block travel.
- If clumping repeats immediately, address freezer temperature and the ice bin/dispenser area cleanliness.
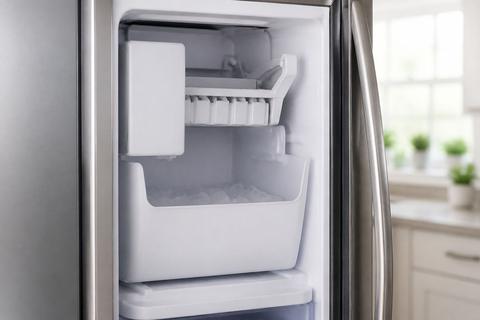
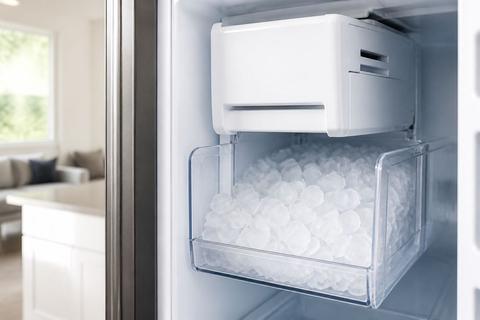
Parts that commonly fail on the RF4287HARS
Ice maker assembly and fill tube
The ice maker assembly is the central control for freezing and harvest. If water can’t reach the mold, or the harvest cycle doesn’t release cubes into the bin, you’ll see no ice or repeated freezing faults. The fill tube is a frequent trouble spot because frost buildup blocks water delivery; once it freezes or cracks, water flow becomes inconsistent or stops entirely. When symptoms match “no ice,” inspect the assembly and fill tube path before blaming unrelated parts like the dispenser motor.
- Check for frost patterns on the fill tube that correlate with no-ice or freeze-up conditions.
- Look for signs of mechanical damage around the ice maker module.
- If the assembly’s fill/harvest behavior fails after thawing, replace the ice maker assembly using the correct RF4287HARS part number.
Water inlet valve and water filter
The water inlet valve controls how water enters the ice maker. If the valve leaks, the ice can overfill; if it weakens or sticks closed, you’ll get no ice or hollow cubes. The water filter can also restrict flow, creating small or underfilled cubes. Because the dispenser water may still run, it’s important to treat the ice maker water path as its own problem when ice production fails while the dispenser appears active.
- Replace an overdue water filter and retest ice output timing.
- If ice maker cubes are small/hollow, focus on flow rate and valve performance.
- If there’s no ice at all, test the inlet valve and the water supply line pressure/flow to the ice maker.
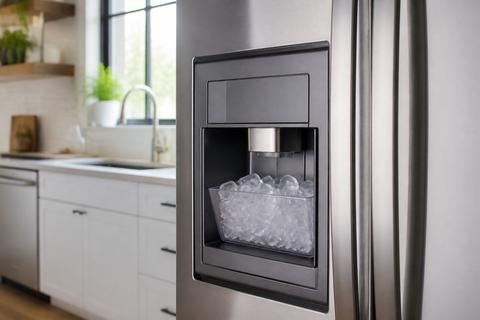
Auger motor, dispenser flap, and drive components
If the bin has ice but dispensing doesn’t work, the auger motor, drive components, and dispenser flap/door mechanism become the primary suspects. A jammed flap can block the chute even while the motor tries to move ice. Worn gears or failed drive parts can cause grinding noises or intermittent dispensing, which matches “clumps/jams” and “stops dispensing” symptoms. In these cases, start with clearing the chute and bin, then proceed to mechanical and motor checks.
- Clear the chute and any packed ice mass before testing motor operation.
- Inspect the flap/door for sticking or damage.
- If the auger won’t move with ice present, test the drive system before replacing the ice maker assembly.
Freezer handle and door-related parts that affect access
The freezer handle itself usually doesn’t create a direct ice-making failure, but door-related access can affect your ability to reach the ice bin and clear jams properly. If a broken or loose handle causes misalignment, you can also get airflow/door-seal issues that contribute to temperature problems—leading to clumping or inconsistent cube quality. Treat handle/door parts as an indirect contributor: fix access problems first so you can diagnose the actual ice-making/dispenser path.
- If the handle is loose or the freezer door doesn’t sit flush, inspect for misalignment.
- Ensure the door seals properly so the freezer stays at 0°F (-18°C).
- Don’t skip ice bin/chute jam checks just because you repaired access hardware.
How to replace or test key parts
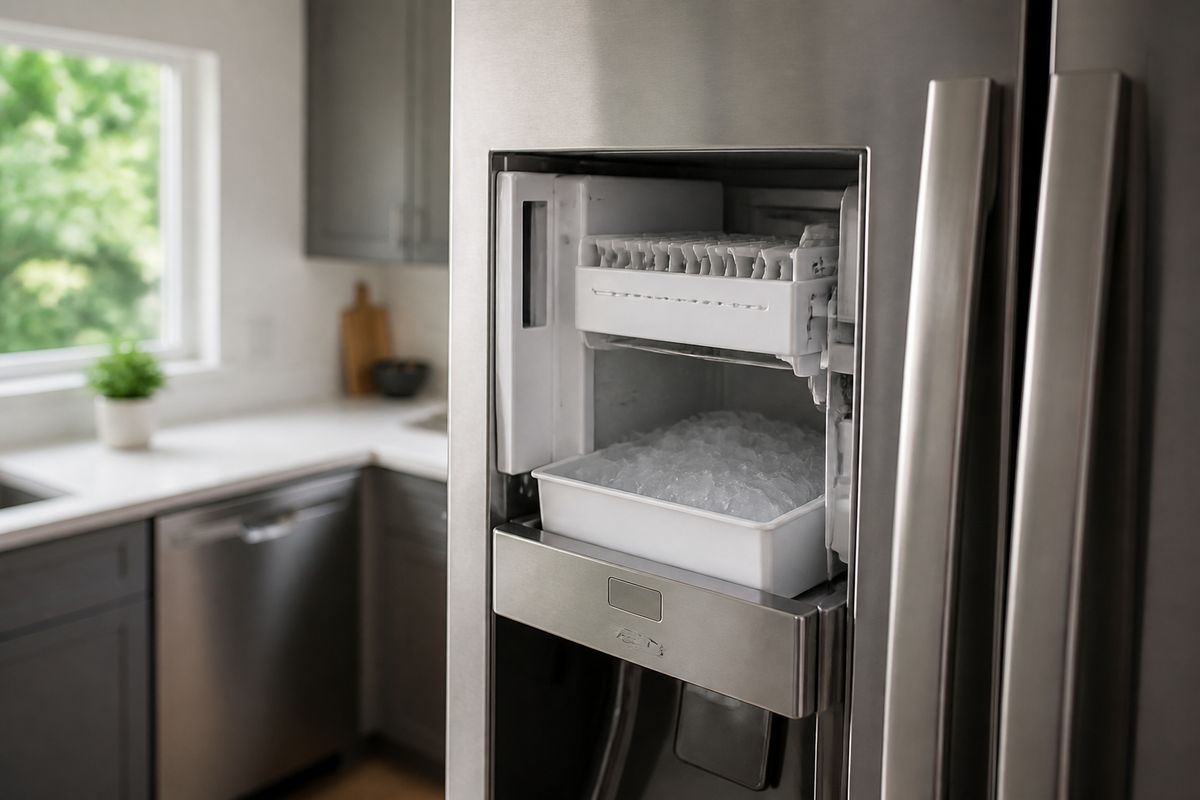
Test water flow and inlet valve performance
Start here when you see no ice, hollow cubes, or inconsistent batches. Water restriction is commonly caused by an overdue filter or a valve that isn’t delivering enough flow. You can also check whether water reaches the fill tube after a test cycle. On many Samsung French-door refrigerator models, the ice maker has an underside or right-side blue Test button on the ice bucket/ice maker assembly.
- Set the refrigerator up so the freezer is cold enough (target 0°F / -18°C).
- Press and hold the blue Test button for about 10 seconds until you hear a chime.
- Watch for water entering the fill tube and listen for the harvest cycle behavior.
- If no water reaches the mold during the test, check the water inlet valve path and replace the water filter if needed.
Inspect the ice maker for mechanical damage
Mechanical damage stops harvest or traps ice in the wrong location, leading to freeze-up and no-cube outcomes. Inspect for cracks, broken plastic components, ice buildup at the mold area, and anything that prevents the unit from completing harvest. After clearing jams, observe whether the same failure repeats—persistent freeze patterns often indicate the assembly or associated parts aren’t performing normally.
- Unplug the refrigerator before removing the ice maker assembly (avoid electrical hazards).
- Remove the ice bucket and inspect the ice maker seating and fill tube opening for blockage.
- Look for frost accumulation that forms quickly after thawing.
- If you find broken gears/drive elements or physical damage, replace the affected assembly/part, not just the filter.
Replace the ice maker assembly safely
When the ice maker assembly fails its test behavior (no fill, no harvest, recurring freeze-up), replacement is the most direct fix. Use the exact part number for RF4287HARS to ensure correct mounting and connector compatibility. After installing the new assembly, power and cycle behavior matter: the first batch is often incomplete because the system needs time to refill the ice path.
- Power down the unit and remove the ice bucket.
- Disconnect wiring and water connections from the ice maker assembly carefully.
- Install the replacement assembly using the exact RF4287HARS-compatible part and reconnect all connectors firmly.
- Start production and allow about 24 hours for the ice maker to refill and begin normal output; discard the first one or two batches.
Know when a DIY fix is not enough
Some RF4287HARS ice maker failures point to deeper electrical or control issues. If troubleshooting and component replacement restores ice briefly but it fails again immediately, the fault may be a control board issue, sensor fault, or damaged wiring/connector. Fault codes like 5E or SE (ice maker sensor) combined with a flashing ice-maker light usually indicate a frost-clogged sensor or a stuck harvest; in those cases, a full defrost plus sensor-focused diagnosis is required, and repeated failures after defrost can justify professional repair.
- Stop DIY if you see electrical damage, melted connectors, or broken gears that you cannot safely replace.
- If you clear clogs and the system still reports 5E/SE repeatedly, prioritize sensor/control diagnostics.
- If the ice maker repeatedly fails after inlet valve and water line checks, professional repair is the safer next step.
Use the manual and model-specific repair info
Where to find the RF4287HARS manual
The RF4287HARS manual is the fastest way to confirm the ice maker’s exact settings, test procedure, and model-specific reset steps. Use it to verify whether your unit has an ice maker Test button, a particular “Ice Off” option on the panel, or a specific forced defrost sequence. When the symptom is ambiguous (no ice vs. no dispense), the manual prevents you from chasing the wrong sub-system.
- Search for the exact RF4287HARS manual version (not a close cousin model).
- Locate the sections for “Ice Maker,” “Dispenser,” and “Troubleshooting/Error Codes.”
- Follow the manual’s recommended thaw/defrost procedure for frost-related faults.
What the manual can confirm about settings and troubleshooting
The manual clarifies which controls actually affect ice production and how long to wait after changes. It also often specifies the correct reset approach, including the recommended way to stop ice production, remove the ice bucket, and clear ice bridges before restarting. It can also explain error codes—such as sensor-related faults—so you don’t replace the wrong part for the observed symptom.
- Check the ice maker mode (Ice On vs Ice Off) and any panel options tied to dispensing.
- Review the error code meanings and the exact troubleshooting steps for each code.
- Follow the stated wait time after reset/filter changes to avoid false conclusions.
Why RF4287HARS repair steps may differ from newer Samsung models
Samsung’s ice systems evolve across years, so steps that work on newer models can be different on the RF4287HARS—especially around test buttons, defrost commands, and how assemblies remove. Model differences can include wiring harness layout, control logic, and sensor placement. To avoid damaging parts or triggering the wrong cycle, always align procedures with RF4287HARS documentation before removing modules or running defrost.
- Use RF4287HARS-specific button sequences and reset steps from the manual.
- Match wiring and mounting instructions to the exact assembly design on your model.
- Don’t apply forced defrost or sensor-reset steps from unrelated Samsung refrigerators.
Prevent repeat ice maker problems
Set the right freezer temperature
Temperature stability is the foundation for consistent ice cube size and fewer jams. If the freezer runs above spec, ice freezes unevenly, melts slightly, and then refreezes into larger clumps that block the dispenser path. Keep the freezer at 0°F (-18°C) and allow it to stabilize after any door-open period, moving the unit, or changes to settings.
- Set the freezer to 0°F (-18°C) and avoid frequent large temperature swings.
- After a setting change, give the unit time to stabilize before judging ice quality.
- Ensure the freezer door seals properly to maintain consistent cold air.
Keep the water filter and supply line in good shape
Restricted water flow creates small, hollow, or inconsistent cubes, which increases the chance of partial harvests and irregular ice bin fill. Maintain the water filter on schedule and inspect the supply line for kinks or loose connections. A kink can mimic a failing inlet valve by starving the ice maker even when the dispenser water seems usable.
- Replace the water filter at the recommended interval.
- Inspect the water line for kinks near the rear or behind the refrigerator.
- Ensure the shutoff valve is fully open if your installation includes one.
Clean the ice bin and dispenser area regularly
Regular cleaning prevents the two biggest causes of repeat failures: ice clumping and dispenser chute jams. If you remove the bucket for cleaning, clear any buildup where cubes bridge and where the chute/auger meet. Use warm water to thaw ice bridges; avoid sharp tools that can crack plastic parts or damage the auger travel path.
- Remove the ice bucket periodically and melt/remove clumps with warm water.
- Wipe out the bin and clear the chute inlet of packed ice.
- Keep the area around the dispenser opening free of accumulated frost and debris.
Frequently Asked Questions
Why is my Samsung RF4287HARS not making ice but the water dispenser still works?
That often points to a failed ice maker assembly, a frozen fill tube, or a problem with the inlet valve section that serves the ice maker. Since the water dispenser still works, the issue is usually in the ice-making path rather than the home water supply.
How do I tell whether the ice maker or the dispenser is the real problem?
If ice is made but won’t come out, focus on the auger, dispenser motor, flap, or ice bin. If no ice is produced at all, check the ice maker, fill tube, water supply, and inlet valve.
Can I use parts from other Samsung refrigerator models?
Sometimes, but not always. Samsung parts can look similar across models while differing in wiring, mounting, or control logic. Match the exact part number to the RF4287HARS whenever possible.
Is the freezer handle related to ice maker problems?
Usually not directly, but a loose or broken handle can make access to the freezer and ice bin harder. If door alignment is affected, it can sometimes contribute to airflow or seal issues.
When should I stop troubleshooting and call for repair?
If the ice maker repeatedly fails after cleaning, the water line and valve test fine, or you see electrical damage, broken gears, or control board issues, professional repair is the safer next step.