Samsung Ice Maker How It Works: Diagram, Parts, Settings
If you’re dealing with a Samsung refrigerator that won’t make ice—or makes tiny, hollow, or irregular cubes—you’re not alone. Learning samsung ice maker how it works makes the symptoms easier to diagnose because you’ll know what has to happen (freeze, harvest, refill) and which component controls each step. The good news: most ice-maker issues come down to a stuck mechanical cycle, a frozen water path, or a sensor/thermostat reading that never satisfies the control board.
For more help, see our Samsung Ice Maker Models: Manuals, Parts, and Fixes by Model guide.
How the Samsung auto ice maker makes ice
The full freeze-to-release cycle
A Samsung auto ice maker runs a repeating loop: it fills the ice mold with water, freezes it, then releases the cubes by harvesting the mold. The refrigerator control board coordinates this based on temperature and time, so the ice maker doesn’t run continuously. When the sensor or thermostat indicates the mold has reached the required freeze condition, the ejector/heating action sequence starts and the cubes drop into the bin.
- Water fills the mold through the fill tube.
- The mold cools until the mold temperature satisfies the thermostat/sensor logic.
- The ejector/harvest mechanism moves to release cubes.
- The mold refills and the cycle repeats.
- The ice maker shuts off when the bin is full or the shutoff arm/sensor is satisfied.
What each stage does inside the refrigerator
During the fill stage, water enters the mold and freezes evenly across the mold cavities. During freeze, the freezer temperature is the “engine” that removes heat so the mold reaches the correct thermal threshold; colder freezer settings speed up ice production. During harvest, the ejector action pushes or rotates the harvest fingers to break the ice free and move cubes into the bin.
- Fill tube delivers water to the mold inlet.
- Thermostat/sensor monitors mold freeze progress.
- Control board triggers harvest when freeze criteria are met.
- Harvest fingers eject cubes into the bin.
- Shutoff arm or sensor stops the motor when the bin is full.
Why the ice maker stops and starts automatically
Samsung ice makers are designed to stop once the ice bin reaches a “full” condition and to restart when ice is removed. That full condition is usually detected by a shutoff arm (mechanical) or a bin sensor (model-dependent). Automatic cycling protects the freezer from unnecessary motor activity and prevents overflow—especially when the ice scoop or auger movement changes airflow around the ice compartment.
- The shutoff arm/Sensor detects ice level.
- When ice fills to the stop point, production pauses.
- When the ice level drops, production resumes.
- If the freezer warms, the freeze stage may never complete, so harvesting won’t start.
- After power interruptions, the system may require a cycle or two before stabilizing output.
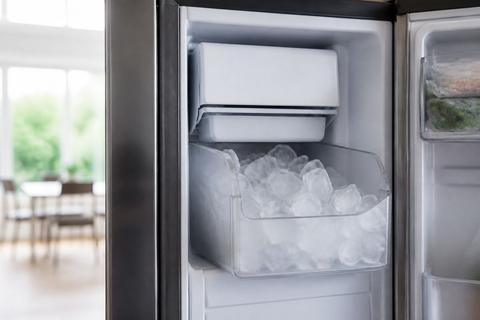
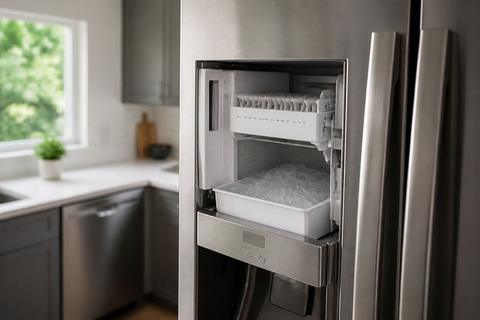
Main parts in the ice maker assembly
Ice mold and fill tube
The ice mold is the refrigerated “tray” where water freezes into cubes, and the fill tube is the conduit that routes water into the mold. If the fill tube is frozen, blocked with mineral scale, or improperly seated, the mold won’t receive water and you’ll get no ice or irregular cube sizes. If the mold surface is coated with frost, cubes can stick and the ejector cycle can jam.
- Inspect the fill tube opening for ice bridges or blockage.
- Check that the fill tube directs water fully into the mold.
- Look for abnormal frost patterns around the mold area.
- Confirm the mold eject path is clear of stacked ice.
- Ensure the mold is seated correctly so it contacts the cold space.
Thermostat, sensor, and control board
The thermostat/sensor tells the control board when the mold is cold enough to harvest. When this sensing step fails—by reading too warm, too cold, or staying stuck on frost—the ice maker can repeatedly fill without harvesting, or it can skip cycles entirely. The control board is the decision center: it starts fill and harvest based on inputs like sensor state, time windows, and bin-full status.
- Identify whether your model uses a thermostat or an ice-maker sensor (often error-coded).
- Check for sensor frost buildup around the sensor tip.
- Confirm the control board powers the ice maker motor and valve.
- Look for control-panel error codes such as 5E or SE related to ice-maker sensing.
- After clearing frost and restoring power, allow the next cycle to complete.
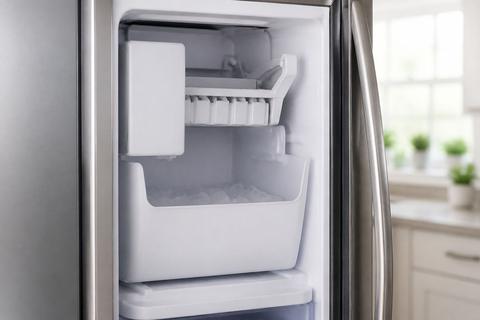
Ejector motor, harvest fingers, and shutoff arm
The ejector motor and harvest fingers physically release the cubes from the mold and move them into the bin. If the harvest fingers are jammed by oversized ice, a frozen bridge in the mold, or misalignment, you’ll see small/hollow cubes, incomplete harvest, or water dripping followed by stoppage. The shutoff arm prevents overfilling and stops the motor once enough ice collects.
- If cubes don’t fall, check harvest movement and finger alignment.
- If harvest starts but jams, clear ice bridges around the mold and chute.
- Ensure the shutoff arm moves freely and isn’t blocked by clumped ice.
- Listen for motor activity during the harvest stage.
- If the motor runs but doesn’t harvest, a mechanical bind is more likely than a water issue.
Read the diagram and schematic like a technician
Identify the water path and electrical path
A good Samsung ice maker diagram separates the water circuit (valves, fill tube, mold) from the electrical circuit (power, ice maker motor/ejector, thermostat/sensor, control board). Your job is to trace what could fail at each stage: water can’t freeze without water flow, and cubes can’t release without correct sensor input and motor action. Start by following the water line to the inlet valve and then the fill tube into the mold, then follow wires from the control board to the motor and sensor.
- Locate the water inlet valve in the diagram and follow it to the fill tube.
- Locate the sensor/thermostat symbol and trace its wires back to the control board.
- Trace power to the ejector motor and harvest mechanism.
- Note any connectors labeled for the ice maker harness.
- Use the separation to decide whether your symptom is water-side or control/mechanical-side.
Match labels to visible refrigerator components
Diagrams only help when the labeled parts correspond to what you can actually see in your fridge. Before you remove anything, identify the ice maker assembly area, the ice bucket/bin, and the mold compartment. Then correlate the labeled components: thermostat/sensor location near the mold, the fill tube routing, the motor connection to the ejector, and the shutoff arm near the bin.
- Remove the ice bucket carefully and look for the fill tube and mold area.
- Match the sensor/thermostat label to the actual sensor location on your assembly.
- Identify where the ejector motor connects to the harvest fingers.
- Find the shutoff arm position relative to the ice bin.
- Use the diagram to confirm you’re working with the correct model variant.
Use the diagram to trace common failure points
Once you’ve mapped water and electrical paths, failures become predictable. The most common “no ice” causes are on the water side (no fill into the mold) or on the sensing/harvest side (the mold never reaches the threshold to harvest, or harvest jams). The diagram helps you avoid guessing by linking symptoms to stage failure: no fill means water path trouble; no harvest means sensor/thermostat/control or mechanical bind; small/hollow cubes frequently point to incomplete freezing or partial harvest.
- For no ice, prioritize water inlet/valve → fill tube → mold fill.
- For ice maker runs but won’t harvest, prioritize sensor/thermostat → control logic → ejector jam.
- For frozen fill tube, target heat/frost clearance and correct water flow afterward.
- For error codes (like 5E/SE), prioritize sensor-related sections in the schematic.
- For recurring jams, follow the diagram to check harvest linkage and the chute path.
Settings, controls, and normal operation
How to turn the ice maker on or off
Most Samsung refrigerators provide an ice-maker control on the display or inside the ice compartment. If your ice maker won’t start, confirm it isn’t turned off via the panel or a switch inside the compartment. After turning it back on, the unit may need time to complete a full freeze-to-harvest cycle before ice becomes available.
- On the control panel, look for Ice Maker or Ice Off.
- If Ice Off is enabled, switch it to Ice On.
- If your model uses a compartment switch, flip it to On.
- Remove the ice bucket and ensure the shutoff arm moves freely.
- After switching on, wait for the next fill/harvest cycle to complete.
What the ice maker button and control panel mean
Samsung ice controls often include quick modes that alter production timing. The most important controls tell the ice maker whether it’s allowed to run, and for how long it should prioritize freezing. If you see options like Power Ice (or similar), that setting increases production for faster recovery after maintenance, heavy use, or long periods without ice.
- Ice On/Ice Off controls whether the ice maker is permitted to cycle.
- Power Ice increases production priority for faster ice output.
- Freeze or freezer temperature settings indirectly govern how quickly the mold reaches harvest conditions.
- Some models include an ice-maker-specific indicator light to show operational state.
- If the ice light flashes with an ice error code, stop using guesswork and follow the sensor/defrost troubleshooting steps.
When temperature settings affect ice production
Ice maker speed depends on freezer temperature because the mold must reach a cold threshold for harvesting. If the freezer is too warm, the unit may fill the mold but never reach the freeze criteria, leading to no cubes or watery/partial ice release. If the freezer is cold enough (target 0°F / -18°C), ice formation completes reliably and harvest cycles complete.
- Set the freezer to 0°F (-18°C) for proper ice formation.
- Avoid frequent door openings that cause freezer temperature spikes.
- Ensure vents aren’t blocked near the ice maker compartment.
- After changing settings, allow the temperature to stabilize before judging output.
- After any reset or filter change, discard the first one or two batches and allow up to about 24 hours for stable production.
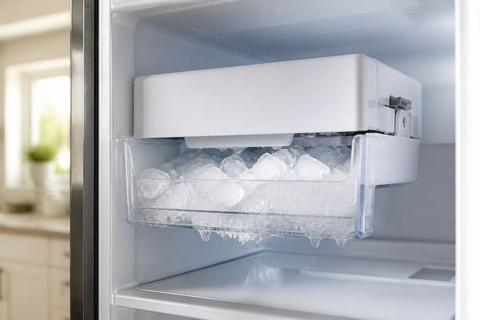
Movable and refrigerator-specific ice maker designs
Built-in ice makers versus movable trays or bins
Samsung refrigerators generally use built-in ice maker assemblies with molds inside the freezer, but some designs include movable components like ice buckets or regionally different harvest mechanisms. In built-in systems, the mold freezes and harvests directly into a storage bin, and shutoff control is tied to that bin. If your unit uses movable trays or a bin-based system, water delivery and ejection still matter—but access and reset steps differ based on how the assembly is mounted.
- Built-in units depend on a fixed fill tube and mold freeze threshold.
- Movable bins rely on free movement for shutoff and harvest clearance.
- Jams can occur when ice clumps in the bin area or around the harvest chute.
- Access to the fill tube and sensor is the key difference between designs.
- Always follow your model’s control layout when turning the ice maker on/off.
How ice makers differ by Samsung refrigerator style
Samsung builds ice makers across multiple refrigerator styles (French door, side-by-side, and top-freezer layouts), and the internal routing of components can vary. That means the location of the shutoff arm, sensor/thermostat, and harvest linkage can change even though the freeze-to-release concept stays the same. In practice, two refrigerators with similar symptoms may require different access points to clear a jam or to reach the sensor.
- French-door models often have a compartment accessible by removing the ice bin.
- Side-by-side models may require different panel removal to reach hoses and wiring.
- Top-freezer designs can have more direct access to the ice maker assembly.
- Built-in ice systems share core stages but differ in connector and bracket placement.
- Treat the diagram as model-specific mapping, not a universal picture.
Why some models have separate thermostat or sensor layouts
Some Samsung models use separate sensing components for control, while others combine sensing logic into an integrated sensor assembly. That affects troubleshooting: if your diagram shows a dedicated thermostat near the mold, you must clear frost around that exact area; if the design uses an ice-maker sensor with specific error codes, sensor frost or a stuck harvest can trigger the same fault repeatedly. Layout differences also change how you run diagnostic cycles and what parts are easiest to access.
- Dedicated thermostat layouts usually require careful frost clearance near the mold.
- Sensor-based layouts respond strongly to frost on the sensor tip.
- Different connectors mean you should match your exact schematic labels.
- Error codes like 5E/SE can point directly to ice-maker sensing faults.
- If you replace parts, replace the one tied to your model’s control diagram and symptoms.
Troubleshooting common ice maker problems
No ice, small ice, or hollow cubes
No ice means the cycle isn’t completing from fill to harvest. Small ice or hollow cubes usually points to incomplete freezing (freezer warm, partial harvest) or disturbed cube release (mold frost or harvest jam). Start by confirming freezer temperature and then check the fill path and the harvest movement.
- Set freezer to 0°F (-18°C) and let it stabilize.
- Remove the ice bucket and check for a jammed shutoff arm or clumped ice.
- Inspect the fill tube area for ice bridges or blockage.
- Run an ice maker test cycle if your model supports it (see manual/controls section).
- If cubes form but are hollow, focus on freeze time/temperature and harvest completeness.
Ice maker not cycling or not filling with water
If the ice maker never cycles, the control may be blocked by bin-full status, an ice maker turned off, or a sensing fault that prevents harvest. If it cycles but doesn’t fill, your issue is on the water side: inlet valve restriction, supply line problem, kinked tubing, or a frozen fill tube. Use the symptom stage to narrow down which circuit is failing first.
- Confirm Ice On on the display/panel.
- Ensure the shutoff arm moves freely without sticking.
- Look for frost around the fill tube—clear it before testing again.
- Check water supply connection and ensure there’s no kinked line.
- After fixing, allow the unit time to complete a full freeze/harvest cycle.
Frozen fill tube, jammed tray, or bad thermostat
Frozen fill tubes are one of the fastest ways an ice maker fails: water can’t reach the mold, so ice never forms. Jams occur when harvested cubes can’t fall into the bin or when the mold release mechanism is blocked by solid ice. A bad thermostat/sensor can stop harvest even when water is filling, because the control board never sees the correct freeze condition.
- Clear a frozen fill tube using gentle thaw (warm water applied to accessible areas and time).
- If you see a jam, remove the ice bucket and clear the mold/release path of ice bridges.
- Avoid forcing the harvest mechanism if it feels seized—freeing the ice first prevents motor strain.
- If you get 5E/SE with flashing ice light, treat it as a sensor/harvest sensing problem and clear frost, then run production again.
- If the thermostat/sensor is confirmed faulty per your model’s diagnostics, replace the part tied to your diagram.
When to use the manual or replace a part
Find the right manual for your Samsung model
Samsung ice maker designs vary, so the correct manual is the fastest way to avoid ordering the wrong part or running the wrong test sequence. Use your refrigerator’s full model number (inside the door frame or behind the crisper area) to find the exact service instructions. The manual also identifies whether your model uses a thermostat or sensor and where test/reset controls are located.
- Locate your full model number and write it down exactly.
- Find the service/owner documentation for that exact model.
- Use the manual’s parts list to match the ice maker assembly and sensors.
- Use the manual’s diagnostics section to interpret error codes.
- Follow the manual’s recommended reset and thaw procedures before replacement.
Which parts are easiest to replace yourself
Some ice maker failures come from accessible components like the ice bucket assembly, removable fill-path elements, or sensors that sit on the ice maker housing. The safest DIY replacements are parts you can reach without major disassembly, and only after you’ve confirmed the symptom matches the part in your model’s diagram. If the issue is mechanical jamming, clearing and thawing is usually the best first action before replacing any component.
- Start with clearance: remove ice, clear jammed pathways, and thaw frozen parts.
- Replace accessible sensors/thermostats only if your model’s manual ties them to your error code.
- Replace the ice maker assembly only when multiple tests confirm a non-recoverable failure.
- Avoid replacing motors if the harvest is jammed—clear first, then retest.
- After any replacement, allow a full cycle and discard the first batches as instructed.
When a technician is the safer choice
If you suspect electrical faults, water valve issues that require sealed water-line work, or repeated faults that don’t resolve after thawing, a technician is the safer path. Technicians also have the tools to safely access wiring harnesses and verify voltages at the control board and ice maker components. Choose professional service when the freezer requires significant disassembly or when error codes persist after manual-guided resets.
- Call a technician if water work requires opening sealed plumbing inside the cabinet.
- Call if the control board repeatedly triggers sensor faults after frost clearance.
- Call if the ice maker motor tries to run against a jam despite clearing attempts.
- Call if you find damaged wiring, burnt connectors, or corrosion at harness points.
- Call if the manual requires specialized calibration or part pairing.
Frequently Asked Questions
How does a Samsung auto ice maker know when to make ice?
It uses a combination of temperature sensing and control timing to decide when the water in the mold is frozen enough to harvest. Once the set conditions are met, the ejector cycle starts and the mold refills.
What temperature should a Samsung refrigerator ice maker be set to?
Ice makers generally perform best when the freezer is cold enough for fast freezing, typically around 0°F (-18°C). If the freezer is too warm, ice production slows or stops.
What parts are most likely to fail in a Samsung ice maker?
Common failure points include the thermostat or sensor, fill tube, water inlet issue, ejector motor, or a frozen mold. The control board can also fail on some models.
How do I turn the Samsung ice maker on?
Most models have an Ice Maker or Power Ice button, or a switch inside the compartment. The exact control location depends on the refrigerator model.
Can I use the diagram to diagnose my Samsung ice maker problem?
Yes. A diagram helps you trace the water supply, sensor, and harvest components so you can narrow down whether the issue is electrical, mechanical, or related to freezing conditions.