How to Remove a Samsung Ice Maker for Service
If you’re dealing with a jam, a leak, or a failed harvest cycle, learning how to remove samsung ice maker parts safely can save you time and prevent damage. Before you start prying at plastic covers or pulling wiring loose, you need the power and water steps done correctly. Then you can remove the ice maker assembly for inspection or replacement.
For more help, see our Replace a Samsung Ice Maker: Removal and Installation Steps guide.
Before You Start: Safety, Power, and Water Control
Unplug the refrigerator and protect the work area
Unplugging the refrigerator is the first step that prevents shock and reduces the chance of damaging control boards while you disconnect wiring. Pull the fridge away from the wall enough to access the power cord, then unplug it from the outlet.
Protect the work area so melting ice and water don’t reach electronics or flooring. Lay towels around the freezer opening, remove anything you don’t want wet, and place a shallow tray under the ice maker area to catch drips when you disconnect components.
- Unplug the refrigerator.
- Pull towels and a shallow tray into position.
- Keep hands dry when working near the ice chute or water lines.
Shut off the ice maker and water supply
Shut off ice production and the incoming water supply so the unit doesn’t refill while the assembly is removed. Use the refrigerator’s control to select Ice Off first, then turn off the household water valve feeding the refrigerator.
With power unplugged, this step is still important because some valves retain water pressure briefly. If you skip it, you can end up with water spilling when you open the ice maker cover or disconnect the fill/dispense line.
- Set the ice maker to Ice Off on the control panel.
- Turn off the water shutoff valve behind or near the refrigerator.
- Let the refrigerator sit 2–5 minutes to reduce residual water drips.
Gather the basic tools and replacement parts
You’ll remove panels, screws, and the ice maker assembly with wiring still connected until the moment you carefully disconnect it. Have the right tools ready so you don’t pause with an exposed harness hanging loose.
Gather basic hand tools plus a couple of service supplies: a Torx or Phillips screwdriver (depending on your model), a flat plastic pry tool (not metal), and a flashlight. Keep a microfiber cloth and small zip bags for screws. If you’re doing a service replacement, stage any new gasket, mounting bracket, or ice maker assembly you’ll install.
- Get Phillips/Torx screwdrivers and a flashlight.
- Use a plastic pry tool for covers (avoid metal prying).
- Prepare zip bags for screws and mounting hardware.
Identify Your Samsung Ice Maker Type
Check whether the ice maker is in the freezer or bottom section
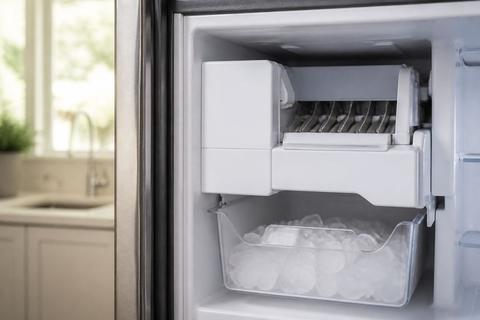
Samsung refrigerators place ice makers in different locations depending on the model—some are in the freezer, while others are in the lower/bottom compartment. Your removal method depends on where the unit mounts and how you access the wiring and screws.
Look at the interior layout: if you see an ice bucket in the freezer compartment, the corresponding ice maker assembly is often behind a rear panel or side cover. If your unit has a bottom ice system, you’ll access the service area from the lower compartment with different trim and harness routing.
- Locate the ice bucket and follow the housing path into the freezer or bottom compartment.
- Identify the compartment with the ice maker cover and mounting screws.
- Note whether the assembly appears to be a self-contained module or part of a larger unit.
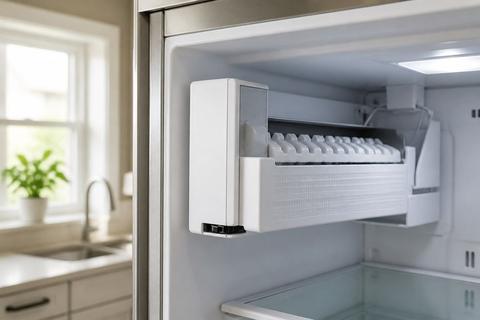
Find the cover, mounting tabs, and release points
Before removing anything, visually inspect for the exact cover edges, tabs, and screw locations. Many Samsung ice maker covers are retained with a mix of hidden screws and plastic locking tabs that must be released in the correct order.
Use a flashlight and check the perimeter seams, especially around corners where plastic tends to lock. Look for small screw heads at the top edge or near hinge-like points. If the cover doesn’t move at one spot, do not force it—there’s usually a latch on the other side.
- Check the entire cover perimeter for screw heads.
- Identify plastic tabs along the top or side edges.
- Locate the release points before loosening any fasteners.
Understand the differences between serviceable and sealed assemblies
Some Samsung ice maker designs are serviceable assemblies, meaning the ice maker module can be removed with a harness disconnect and standard mounting fasteners. Others are integrated into a sealed system where removal is limited or requires replacing a larger module.
If you see a single ice maker unit with clear mounting screws and a wiring harness plug, it’s likely serviceable. If the ice maker is part of a larger sealed assembly or has welded/press-fit components you can’t access, your service path may be replacement of the entire module rather than individual parts.
- If the harness disconnect and mounting screws are visible, plan a removable module.
- If the unit is integrated with no straightforward cover removal, plan for module-level service.
- Use model-specific documentation for any sealed assembly restrictions.
How to Remove the Ice Maker Assembly
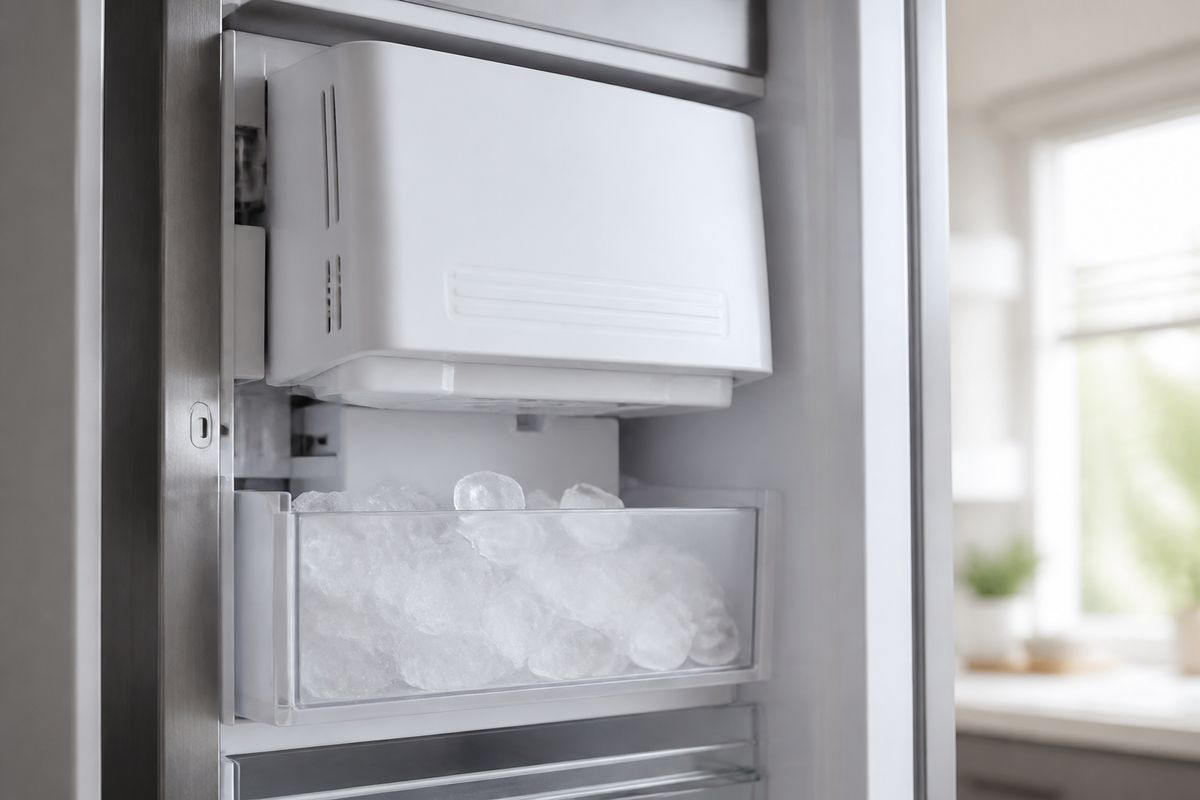
Remove bins, shelves, and nearby obstructions
Clear access first so you don’t stress the plastic trim or yank on wiring. Remove ice buckets (if present), then remove nearby shelves, bins, or door racks that block the service cover.
Keep track of which parts slide out and which lift or release from hooks. When shelves are removed, you can see the mounting area and reach fasteners without bending the harness or twisting the ice maker housing.
- Remove ice bins/buckets from the compartment.
- Take out obstructing shelves or racks to access the rear/side cover.
- Set parts aside so you can reinstall them in the same orientation.
Disconnect the wiring harness carefully
Once you expose the ice maker housing, locate the ice maker wiring harness connector. You want to disconnect it by pulling the plug body, not tugging the wires. If there’s a locking tab on the connector, press or release it before pulling.
Because the harness is keyed, forcing it can damage pins. Use a flashlight and ensure you’re working on the connector itself, with your other hand stabilizing the harness so it doesn’t hang by the wires.
- Locate the wiring connector on the ice maker assembly.
- Release the connector’s latch if present.
- Pull the plug body straight out—no wire tugging.
Release screws, clips, or retaining tabs
With power disconnected and water shut off, remove the mounting fasteners that retain the ice maker. Many Samsung assemblies use Torx/Phillips screws plus one or more plastic retaining tabs.
Keep pressure even while removing so you don’t crack the housing. If a screw won’t move, double-check you’re using the correct driver size—stripping screw heads makes reassembly much harder.
- Remove all visible screws securing the ice maker housing.
- If retaining tabs exist, press them with a gloved finger or plastic tool.
- Keep one hand supporting the assembly so it doesn’t drop onto wiring.
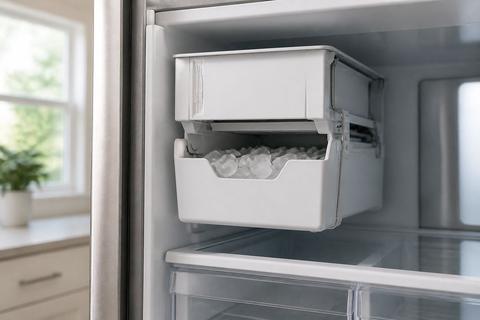
Lift out the ice maker without damaging the housing
After fasteners and tabs are released and the harness is disconnected, lift the ice maker straight out. Avoid twisting because molded plastic tabs can snap if the assembly binds.
If it feels stuck, stop and re-check for missed screws or tabs rather than pulling harder. Common bind points are at the corners where the ice chute aligns with the housing opening.
- Lift the ice maker straight upward/forward (as mounted) without twisting.
- Guide the assembly past the ice chute opening carefully.
- Place it on a towel or tray to prevent scratches or moisture damage.
If the Ice Maker Cover Is Stuck
Look for hidden screws or locking tabs
A stuck cover is almost always retained by a hidden fastener or a locking tab. Check the cover seam for small screw heads, especially near corners, and inspect for tabs that catch on the housing lip.
Use a flashlight and move from the outer edge inward. If the cover lifts on one side but not the other, the missing release point is on the side that won’t move.
- Inspect the entire perimeter for small screw heads.
- Look for tab gaps along the seam where plastic locks.
- Release the tab(s) before applying more leverage.
Warm the cover slightly instead of forcing it
Frozen plastic or ice buildup can make the cover hard to release. Instead of forcing, warm the affected area slightly so the plastic relaxes and any frost melts at the seam.
Use gentle heat like a hair dryer on low, held at a distance, moving continuously. Avoid high heat or direct hot air on wiring; you’re loosening the seam, not melting components.
- Use a hair dryer on low heat and warm the cover seam.
- Keep the dryer moving and avoid overheating one spot.
- Try releasing tabs again with gentle pressure after warming.
Use gentle prying techniques to avoid cracking the plastic
When prying is necessary, use a plastic pry tool and insert it at the thinnest seam where tabs are usually located. Apply controlled, even pressure and move slowly along the edge to release locks without cracking.
Do not use a metal screwdriver to force the seam—Samsung plastic covers can fracture and then won’t stay aligned during reassembly.
- Insert a plastic pry tool into the seam at the release side.
- Apply light pressure until the lock releases, then move to the next point.
- Avoid flexing the cover—keep it supported as locks disengage.
How to Turn Off the Bottom Ice Maker First
Use the control panel or settings menu
For bottom ice makers, turning off ice production reduces water fill and cycling during removal. Use the refrigerator’s control panel to select Ice Off or disable ice production in the settings.
The label and menu wording vary by model, but the goal is the same: stop harvest cycles and prevent refill. If your model supports it, you can also disable ice through the dispenser/ice settings screen.
- On the control panel, find the ice settings option.
- Select Ice Off or the equivalent disable ice production option.
- Confirm the status indicator shows ice is disabled.
Disable ice production from the dispenser or home screen
Some Samsung models allow ice disable directly from the home screen or dispenser interface. If you can reach the ice/ice type controls, set it to Off so the unit stops feeding water to the ice maker.
If your model has both Cubed and Crushed options, set it to Off rather than switching types. This prevents the unit from attempting to harvest ice while you’re working.
- Use the dispenser/home screen to locate ice mode controls.
- Change the ice mode to Off (not just crushed/cubed).
- Leave the screen set until the unit stops cycling.
Confirm the ice maker has stopped cycling
After switching ice off, give the unit a moment to stop ongoing harvest. You can confirm by listening for the motor/harvest movement and watching for continued water sounds behind the interior panel.
If the ice maker continues cycling, wait longer after turning off, then revisit the settings to make sure Ice Off is truly active. Once cycling stops, proceed with removal.
- Wait a few minutes after ice off is selected.
- Listen for stopping harvest sounds and avoid manipulating the assembly yet.
- Proceed only when the ice maker is no longer actively running.
Inspect, Clean, and Prep for Service
Check for frozen fill tubes, leaks, or damaged wiring
Before you replace parts, inspect common failure points around the ice maker inlet and harness path. Look for frost patterns on supply lines, ice bridges near the fill area, moisture trails suggesting leaks, and any wiring insulation damage.
Frozen fill tubes can prevent proper ice production even when the ice maker motor runs. Leaks can damage nearby insulation and cause recurring failures after reassembly.
- Inspect the fill tube area for frost or ice blockage.
- Look for water pooling, wet insulation, or dried water marks.
- Check the wiring harness for pinched spots, cracks, or loose connectors.
Clean mineral buildup and loose debris
Mineral deposits can restrict water flow, causing slow fill or incomplete harvest. Remove loose ice shavings and debris from the chute area and around the ice maker opening before reinstalling.
Use warm water and a soft cloth to clear residue. Avoid soaking electrical components—focus cleaning on non-electrical plastic parts and the chute path.
- Remove loose ice fragments from the chute and housing.
- Wipe away mineral buildup with a damp cloth (warm water works best).
- Dry the area fully before reassembly.
Photograph connector locations for reassembly
Reassembly goes faster and with fewer errors when you document connector placement before disconnecting anything. Take clear photos showing harness routing, connector orientation, and mounting screw locations.
This is especially helpful when multiple connectors or brackets are involved in the same service zone. Keep your photos on your phone so you can refer to them immediately during reinstall.
- Take photos of each connector before removal.
- Capture harness routing paths and any clips holding the wire.
- Photograph screw positions so reassembly matches the original placement.
Reinstalling the Ice Maker After Service
Reconnect the harness and secure the assembly
Start reinstallation by reconnecting the ice maker harness. Align the connector correctly and press it in until it fully seats—do not force or angle it.
Then position the assembly into its mounting opening without twisting, and reinstall screws or re-engage retaining tabs. Make sure the housing sits flush so the ice chute alignment remains correct.
- Insert the ice maker back into the housing opening straight.
- Reconnect the harness plug until it fully seats.
- Secure with mounting screws and/or press in retaining tabs.
Restore water and power
Restore water first by turning on the household shutoff valve feeding the refrigerator. Then restore power by plugging the refrigerator back in.
After power is restored, watch for immediate leaks or unusual water sounds around the ice maker area. If you used a tray and towels, quickly check whether moisture appears at the seam before proceeding to any tests.
- Turn the water shutoff valve back to the ON position.
- Plug the refrigerator into the outlet.
- Turn ice production back on from the control panel once the unit powers up.
Run a test cycle and verify ice production
Run a test cycle so the ice maker fills and harvests using the correct sequence. On many Samsung models with a test feature, there is a small blue Test button on the underside or right side of the ice bucket assembly; press and hold it about 10 seconds until you hear a chime, then the unit runs a test fill/harvest cycle.
If your model does not have that button, use the service or ice test option in the control menu if available. After the test cycle, discard the first one or two batches because the system may pull air or residual water.
- Start a test cycle using the model’s ice maker test option.
- Press and hold the blue Test button ~10 seconds if your model includes it.
- Run a cycle and discard the first one or two batches.
Frequently Asked Questions
Can I remove a Samsung ice maker without turning off the fridge?
You should not. You must unplug the refrigerator and shut off the water supply first to reduce the risk of shock, leaks, and damage to the assembly. With power connected, you can also trigger a harvest or fill cycle while parts are loose, which increases mess and can stress connectors.
What should I do if the ice maker cover is stuck?
Check for hidden screws or locking tabs along the cover seam, especially at the corners. Apply gentle, even pressure and use a plastic pry tool rather than forcing it with metal. If frost is holding the seam, warm the cover area slightly with a hair dryer on low before releasing the locks.
Do I need to shut off the bottom ice maker before removal?
Yes. Turn off ice production first so the unit stops cycling and the water system is less likely to spill or refill during removal. Then proceed with unplugging and shutting off the water supply before you disconnect the assembly.
How do I know whether my Samsung ice maker is removable?
Most ice makers are serviceable, but the exact removal method depends on the model. Check the mounting style (screws/tabs), confirm you can access the harness connector, and determine whether the ice maker is part of a sealed module that requires module-level service instead of simple removal.