How to Replace Samsung Ice Maker: Install, Remove & Fix
When your Samsung ice maker stops producing ice, the fridge suddenly feels unusable—especially if the ice maker light is flashing or the bucket stays empty. If you’ve narrowed it down to a failed ice maker assembly, this is the exact moment to act. This guide walks you through how to replace samsung ice maker with safe removal, correct installation, and the right checks so the new unit actually makes ice.
For more help, see our Replace a Samsung Ice Maker: Removal and Installation Steps guide.
Before You Replace the Ice Maker
Check the symptoms and confirm the ice maker is the problem
Start by confirming the issue is in the ice maker assembly, not the water supply or freezer temperature. Look for: an ice maker light that flashes, no ice after 24 hours, repeated freeze-ups that block the ice chute, or ice that forms small, hollow pieces and then stops. Next, check that the ice bucket can move freely and that the freezer is cold enough for ice production. If the freezer is above 0°F (-18°C), the unit will not freeze properly. Then rule out basic causes: water in the line, an unclogged fill tube, and correct ice maker mode.
- Empty the ice bucket and check the chute for visible ice bridges.
- Verify freezer temperature is 0°F (-18°C) or lower.
- Check for an ice maker fault code on the panel (if present) and note it for later troubleshooting.
Identify your Samsung model and correct ice maker kit
Samsung uses different ice maker designs by refrigerator model and series, so an “almost right” kit will not mount, seal, or plug in correctly. Use your refrigerator’s model number from the inside door frame or back panel (a mix of letters and numbers). Match both the ice maker assembly part number and any related harness or fill components included in the kit.
- Find the model number tag and write it down exactly.
- Purchase the Samsung ice maker kit specifically listed for that model.
- Confirm the kit includes the ice maker unit, mounting hardware (if required), and any gaskets/seals called out by the manufacturer.
Gather tools, parts, and safety supplies
You’ll work around water and electrical connections, so prep prevents leaks and broken plastic housings. Use insulated gloves and keep towels handy for spills. For tools, plan on basic refrigeration access (to reach the ice maker) plus screwdriving and fastener removal.
- Get a Phillips and flat-head screwdriver, a nut driver if your kit uses it, and a flashlight.
- Prepare towels, a small bucket, and disposable gloves.
- Have 70% isopropyl alcohol and a lint-free cloth available for cleaning old seal residue.
- Keep the replacement ice maker kit unopened until you’re ready to install to avoid mix-ups.
Turn Off, Disconnect, and Access the Ice Maker
Shut off power and water safely
Before you remove the old ice maker, power down the refrigerator and stop the water supply. This prevents electric hazards, accidental dispensing, and flooding when you disconnect the water line.
- Switch the refrigerator off at the control panel using the Ice Off option (if available).
- Unplug the refrigerator power cord from the outlet.
- Shut off the household water valve feeding the refrigerator (turn clockwise to close).
- Dispense any remaining water pressure by using the dispenser or by briefly running the ice maker control until the line stops dripping.
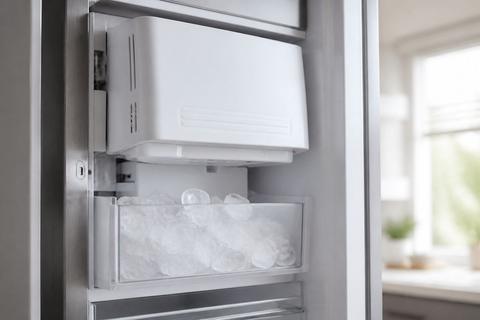
Remove shelves, bins, and the ice bucket assembly
Clear the work area so you can remove the ice maker without stressing the housing or tubing. Take out bins and shelves that block access to the underside of the ice maker area and the bucket slides.
- Lift out ice bucket/bin contents and set the bucket aside on a towel.
- Remove freezer shelves and any covering panels that block the ice maker assembly.
- Pull the ice bucket forward to access mounting points near the ice chute and housing.
Disconnect the wiring harness and water line
The ice maker connects with a wiring harness (usually a plug connector) and a small water feed line. Disconnect them carefully so you don’t damage clips, grommets, or pins.
- Locate the ice maker wiring harness on the side or underside of the assembly.
- Press the connector release tab and unplug the harness—do not pull by the wires.
- Disconnect the water line fitting by hand or with light wrench pressure if required by the kit.
- Wipe any water with a towel immediately so you can spot leaks later during testing.
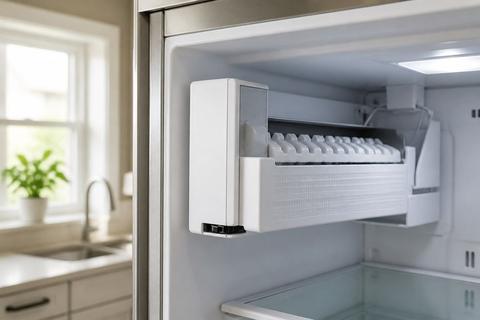
Remove the Old Ice Maker
Release mounting screws and clips without breaking the housing
Old ice maker housings are plastic and brittle, especially near cold sensors and fill components. Remove fasteners evenly and release any clips gently. If a screw resists, stop and reposition the tool—stripping plastic makes installation harder.
- Remove all visible mounting screws securing the ice maker to the bracket.
- Release any side or rear retaining clips using firm, controlled pressure.
- Support the ice maker with one hand while removing the last fastener to prevent the fill tube from bending.
Inspect the gasket, fill tube, and silicone seal areas
Before discarding the old unit, inspect the sealing surfaces. A damaged gasket or torn silicone seal can cause future leaks or prevent proper ice flow.
- Check the gasket around the ice maker opening for tears, flattening, or missing sections.
- Look at the fill tube path for cracks, kinks, or ice buildup that fused parts together.
- Inspect silicone seal areas for gaps or peeling; clean off loose residue on the refrigerator surfaces so the new unit seals correctly.
Look for freeze-up damage or internal cracks
Freeze-ups and thermal cycling can crack the ice maker housing or trap ice inside the assembly. Internal cracks can cause intermittent operation even if the unit runs briefly.
- Examine the ice maker body and chute for internal cracks or signs of melted-and-re-frozen residue.
- Check for frost patterns around the sensor area or heater contact points.
- If the old unit shows shattered plastic or persistent ice bridging marks, replacement is the correct action.
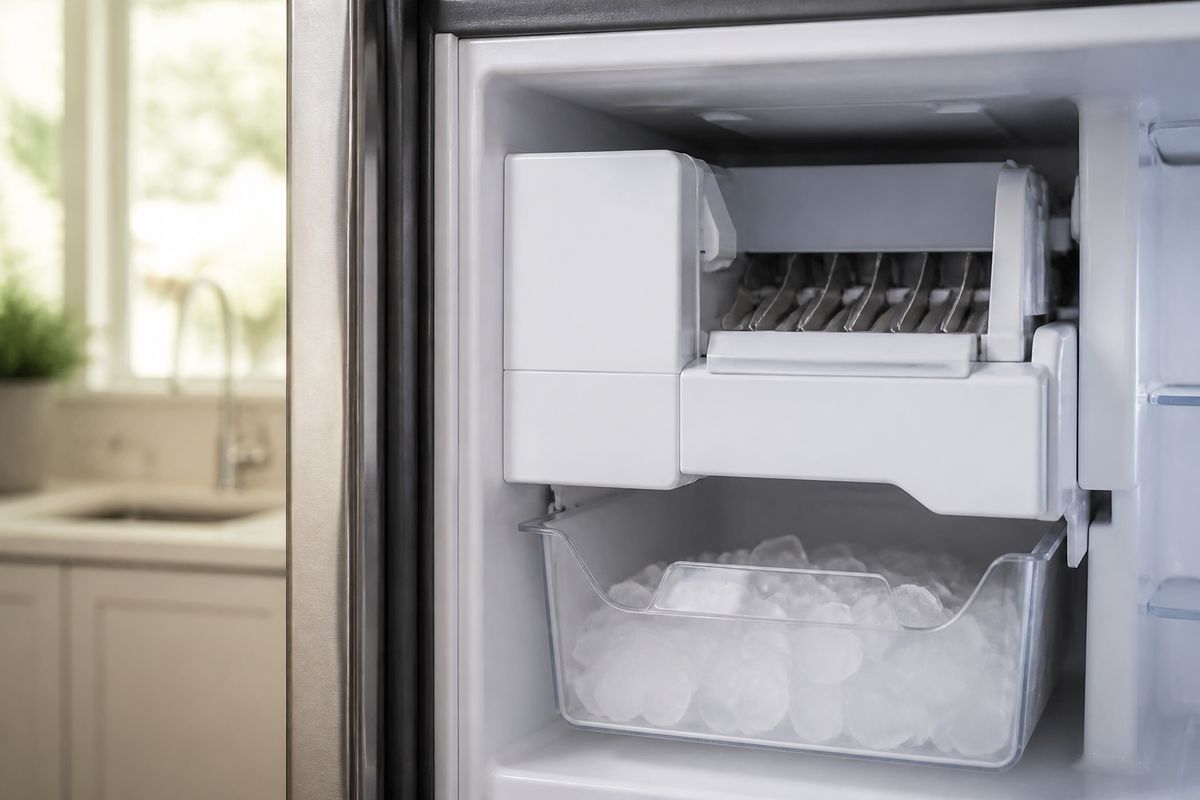
Install the New Samsung Ice Maker
Position the replacement unit and secure it in place
With the refrigerator surfaces clean, install the new assembly so it sits squarely and the seals compress evenly. Misalignment can create leaks or gaps that prevent proper freezing.
- Place the new ice maker into the opening, aligning the fill tube and mounting tabs.
- Press gently so the gasket seats without forcing.
- Install mounting screws/fasteners and tighten until snug—do not overtighten plastic.
- Confirm the ice maker sits flush against the mounting bracket.
Reconnect wiring, water line, and ice maker components
Correct reconnection ensures the control board can run the harvest cycle and that the unit fills at the right time. Route the harness the same way as the old one so it won’t rub moving parts.
- Plug the wiring harness into the ice maker connector until it clicks or seats fully.
- Reconnect the water line fitting securely, using the same orientation as the old line.
- Reattach any included clips or guards that route the fill tube or protect the harness.
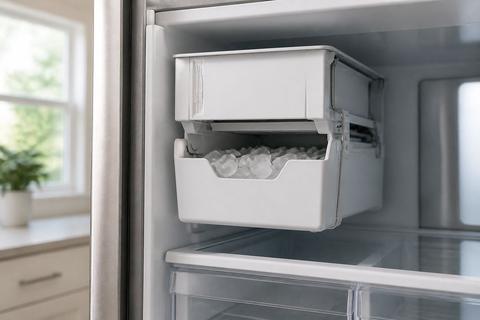
Reinstall the bucket and verify clear movement
The ice bucket sensor and chute alignment depend on smooth movement and correct placement. A mis-seated bucket can block harvest ice or keep the sensor from detecting the bucket position.
- Slide the ice bucket assembly back into the rails.
- Ensure the bucket can move inward and outward without scraping the ice chute area.
- Remove any ice pieces or debris that could prevent full bucket seating.
- Replace any shelf or cover panels you removed so access is restored.
Set Up, Test, and Reset the Refrigerator
Restore power and run an ice maker test cycle
After replacement, the unit must power up and complete a cycle to start producing usable ice. Many Samsung models include a built-in test cycle for the ice maker.
- Plug the refrigerator back in and restore power.
- Use the control panel to turn Ice On (or disable Ice Off).
- Start an ice maker test cycle if your model supports it. On many Samsung French-door units, there is a small Test button on the underside or right side of the ice bucket assembly—press and hold about 10 seconds until you hear a chime, then let the cycle run.
Prime the water supply and check for leaks
The new unit needs water flow to the fill valve and ice maker. Prime the system and check joints for leaks before expecting ice to appear.
- Wait for water to reach the fill area (after filter changes or major disconnections, allow time for flow to stabilize).
- Inspect the water line connection and any fitting around the ice maker for drips or wetness.
- If you see moisture, shut off the water valve and reseat the fitting, then retest for leakage after re-powering.
Use the control panel or reset method if needed
If the ice maker doesn’t start, reset procedures can clear a stuck state. Follow your model’s control logic first, then use a forced defrost approach only when needed.
- If your panel provides Ice Off/Ice On, toggle Ice Off, then back to Ice On.
- If the ice maker remains unresponsive and the freezer is cold, use the control panel reset steps for your model (refer to your manual’s ice maker reset instructions).
- If you have a frost-clogging symptom (chute not clearing, no fill after replacement), run Forced Defrost on many Samsung models by pressing and holding the Freezer (or Power Freeze) and Fridge (or Lighting) buttons together for 8–12 seconds until the panel goes blank and beeps, then press repeatedly until the display reads
Fdto start the defrost cycle.
Fix Common Samsung Ice Maker Problems
Solve freezing, jamming, and no-ice issues
When ice doesn’t dispense or the maker freezes up, you need to clear restrictions and correct the operating conditions. Start with the simplest physical blockages and then move to component causes.
- Remove the bucket and check the ice chute for bridges; melt or dislodge ice using warm water.
- If ice is stuck on the auger path, clear it carefully so you don’t damage internal blades.
- Run a thaw cycle (Forced Defrost) if freeze-up repeats and the freezer is already at 0°F (-18°C).
- After clearing, let the unit complete a fresh cycle.
Check water pressure, inlet valve, and supply line
No-ice issues often come from inadequate or interrupted water delivery. A weak flow or restricted filter prevents proper filling, which then leads to no harvest.
- Verify the water line isn’t kinked behind the refrigerator.
- Confirm the water shutoff valve is fully open.
- Check the water filter condition and replace if it’s overdue.
- If your model uses a water inlet valve, verify it receives water and is not stuck—inspect for correct operation when the ice maker initiates a fill.
Know when a repair is worth it and when replacement makes more sense
Repairing individual parts can work, but replacement is the more reliable path when damage is structural or recurring. Choose replacement when you see cracked housings, sensor/heater faults that keep returning, or internal freeze-up damage that won’t hold a normal harvest cycle.
- Replacement makes sense if the ice maker has cracked parts, repeated freeze-ups, or won’t produce after resets and water-supply checks.
- Replacement is also the practical choice if the ice maker sensor/heater area shows repeated frost patterns or physical cracking.
- If the problem is water-related (filter, inlet valve, supply line) the correct “repair” is usually fixing that upstream cause instead of swapping the ice maker.
Prevent Future Ice Maker Failures
Keep the freezer temperature in the right range
Ice makers rely on consistent freezing conditions. If the freezer runs warm, ice won’t form fully, and partial freezes lead to bridging and harvest failures.
- Set the freezer to 0°F (-18°C) and avoid frequent long door-open periods.
- Ensure vents are not blocked by food packages or containers.
- After replacement or any reset, allow about 24 hours for production to ramp up and discard the first one or two batches for best quality.
Reduce frost buildup and airflow blockages
Excess frost blocks airflow and insulates sensors and moving components, leading to repeated freeze-ups. Prevent buildup by keeping airflow paths clear.
- Don’t pack items tightly around freezer vents.
- If frost forms frequently around the ice chute area, clear it promptly and check that forced defrost cycles complete correctly.
- If allowed by your model, keep the ice chute area free of scattered ice and debris that can seed frost.
Maintain the water filter and clean the ice bucket regularly
Dirty or restricted filtration changes flow rate and can create irregular ice formation. Cleaning also prevents stale particles and prevents sensor issues in the bucket assembly.
- Replace the water filter on schedule based on your refrigerator’s filter indicator or recommended time.
- Clean the ice bucket with warm water and mild soap; rinse and dry fully before reinstalling.
- Periodically remove ice debris that falls into the bucket rails or around the chute so the bucket seats correctly.
- Keep the supply line connection dry and check around the ice maker periodically for any moisture after filter changes.
Frequently Asked Questions
How do I know whether to replace or repair my Samsung ice maker?
If the ice maker has cracked parts, repeated freeze-ups, wiring damage, or it still fails after basic resets and water-supply checks, replacement is usually the more reliable fix. If the freezer temperature is correct and the water supply is flowing properly, then the fault is most likely inside the ice maker assembly or its integrated components.
Do I need to turn off the water before replacing the ice maker?
Yes. Shut off the refrigerator power and the water supply before removing the old unit to avoid leaks, electrical issues, and accidental dispensing. Cutting power prevents shorts when the wiring harness is disconnected, and shutting the valve prevents water from spraying when the water line is loosened.
Why is my Samsung ice maker freezing up?
Common causes include temperature settings that are too low, a clogged fill tube, airflow problems, or a faulty heater, sensor, or ice maker assembly. Freeze-ups can also happen when ice bridges form in the chute area, preventing harvest from fully clearing the ice path.
Will a new ice maker fit every Samsung refrigerator model?
No. Samsung uses different ice maker designs by model and series, so you should match the replacement part to the exact refrigerator model number. Always confirm the kit matches your model tag so the mounting points, harness plug, and seals line up correctly.
What should I check if the new ice maker still does not make ice?
Check the water line, water filter, inlet valve, freezer temperature, and control settings. If those are fine, the problem may be elsewhere in the refrigerator system, such as a sensor/control issue or an obstruction that prevents ice from harvesting and dropping into the bucket.