Install, Replace, and Maintain a GE Ice Maker
If your GE ice maker is leaking, throwing error signs, or simply stopped making ice, you don’t need to guess what to do next. Install, Replace, and Maintain a GE Ice Maker with the right setup, the correct replacement part, and routine cleaning so ice production stays consistent. Start by identifying whether you need a new assembly, a worn component repair, or maintenance to clear flow and buildup problems.
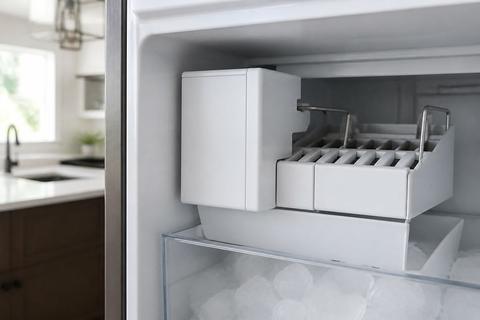
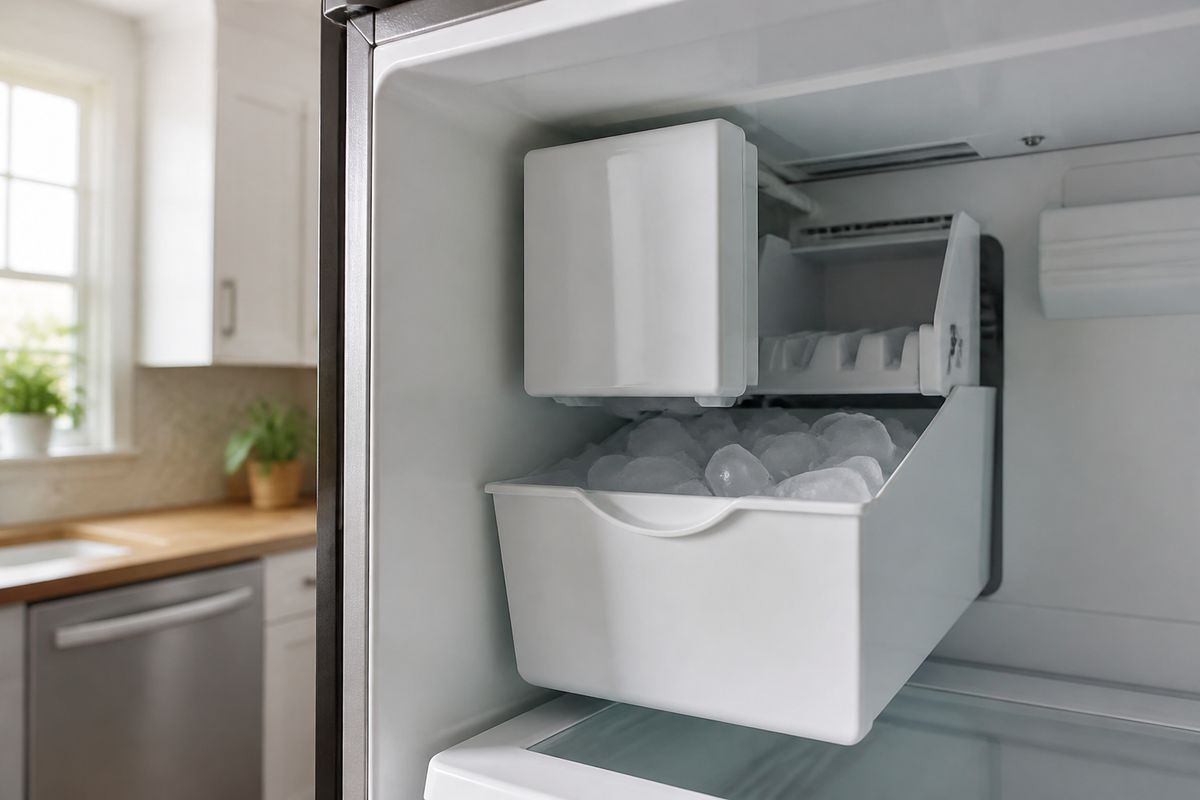
How to Install a GE Ice Maker
Before you install, confirm the ice maker is compatible with your GE refrigerator model and that you have the correct water supply connection parts. The goal is clean water flow, safe electrical supply, and correct placement so the ice bin, chute, and mold cycle work as designed.
- Locate the ice maker mounting area and compare the part number to your refrigerator model number.
- Shut off household water supply, then install or connect the water line to the ice maker inlet using a straight, kink-free run.
- Install a shutoff valve near the refrigerator if one isn’t already in place; connect the line firmly without pinching.
- Plug in the ice maker harness/connection to the refrigerator’s designated connector (use the keyed plug so you don’t misroute power).
- Route the power/wiring so it won’t touch sharp edges or the freezer floor; ensure the ice maker sits level with the correct bracket orientation.
- Set the freezer temperature to 0 to 5°F and restore water; run the ice maker through the first harvest cycle and discard the first batch if your water line needed purging.
Install, Replace, and Maintain a GE Ice Maker Diagram Basics and Hookup
Use the wiring and plumbing basics diagram to confirm water inlet placement, electrical harness orientation, and the correct ice chute/bucket alignment before you begin. Follow the dedicated hookup steps so you don’t misconnect power or kink the water line during installation.
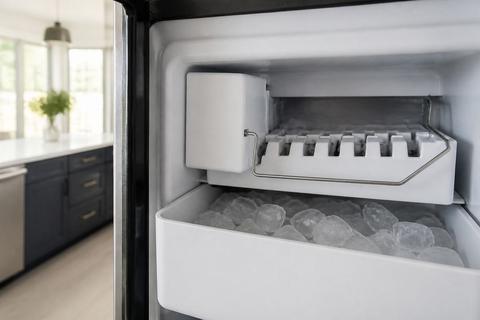
GE Ice Maker Parts: Fixes for Common Breaks
When GE ice makers stop working, the fix usually comes down to one worn or misaligned component. Learn what each part does, the symptoms it causes, and the most direct next step so you can avoid replacing the whole assembly when a single component is enough.
-
Water inlet valve (water not entering the mold)
- Symptoms: no ice, slow fill, wet ice in odd clumps.
- Next step: inspect water flow and ensure the valve is receiving power; replace the valve if it won’t energize or fill after water is restored and the freezer is cold enough.
-
Thermal switch / ice maker control switch (harvest and cycle control)
- Symptoms: ice maker runs briefly then stops, inconsistent harvest, no cycling.
- Next step: test the control path based on your model’s design; replace the faulty switch if the unit will not complete harvest.
-
Auger motor / drive (ice not moving out of the bin)
- Symptoms: ice sits in the bin but doesn’t dispense, jam complaints, loud motor sounds with no movement.
- Next step: address jam sources first (ice bridging, bin issues), then replace/realign the auger if the drive won’t move ice.
-
Ice tray/mold assembly (poor cube formation)
- Symptoms: small/misshapen cubes, incomplete harvest, lots of partials.
- Next step: check for buildup on the mold surfaces and replace the ice tray/mold unit if the mold cannot release properly.
-
Shutoff mechanism / feeler arm (manual stop)
- Symptoms: no new ice despite power; arm stuck up.
- Next step: lower the feeler arm (wire bail) so the ice maker resumes.
-
Switches, sensors, and wiring connectors (no cycle)
- Symptoms: intermittent operation, delayed harvest, power but no action.
- Next step: reseat connectors and replace the failed control component, not the whole unit.
GE Ice Maker Parts: Fixes for Common Breaks
Use the part-specific diagrams and symptom-to-repair mapping to choose the right component before you order. The child article walks through what to check first, then how to swap the failing part safely.
Full Guide: GE Ice Maker Parts: Fixes for Common Breaks
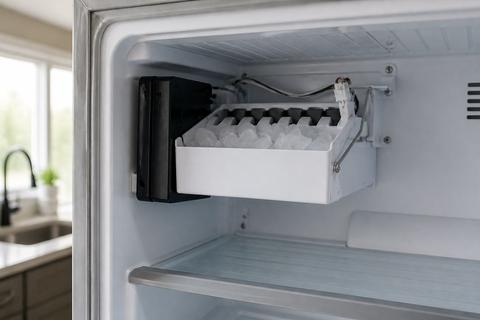
Replace GE Ice Maker WR30X0306, WR30X0327, and WR30X10093
WR30X0306, WR30X0327, and WR30X10093 are common GE ice maker assembly replacements, but the correct choice depends on your refrigerator’s model compatibility. The safe approach is to verify the exact refrigerator model number (and, when provided, the original ice maker part number) before ordering so you match the mounting hardware and harness connection.
- Record your refrigerator model number and the current ice maker assembly label/part number.
- Confirm the replacement assembly matches your refrigerator model; do not rely on “looks similar” compatibility.
- Shut off power to the refrigerator, then shut off the water supply valve.
- Remove the ice maker assembly from its bracket and disconnect the water line and electrical harness.
- Install the new WR30X0306/WR30X0327/WR30X10093 assembly using the original mounting points and screws.
- Reconnect the water line without kinks, then reconnect the electrical harness to the same connector style.
- Restore water and power; run a harvest cycle and discard the first batch if the line was drained or air was purged.
Replace GE Ice Maker WR30X0306, WR30X0327, and WR30X10093
Follow the dedicated replacement process for your exact assembly numbers, including how to match wiring, mounting alignment, and water connection steps. This prevents repeat issues caused by mis-seated harnesses or improper chute/bucket alignment.
Full Guide: Replace GE Ice Maker WR30X0306/WR30X0327 (WR30X10093)
Replace a GE Ice Maker Auger
If your GE ice maker dispenses inconsistent amounts of ice, jams frequently, or ice doesn’t move from the bin into the chute, the auger is a prime suspect. Alignment matters as much as the part itself—an auger that’s installed slightly off-axis can bind and trigger repeated failures.
- Unplug or shut off power to the ice maker/refrigerator before removing the auger assembly.
- Remove the ice bin/ice access cover to expose the auger coupling and drive section.
- Check for jam causes: bridged ice, foreign objects, or a buildup layer that blocks rotation.
- Inspect the auger shaft and coupling for wear marks or damage at the drive contact points.
- Install the replacement auger and ensure the coupling seats fully; keep the auger aligned with the drive so it spins freely by hand.
- Reassemble the ice compartment components and restore power.
- Run the ice maker through a harvest-and-dispense cycle to confirm normal auger motion and chute clearing.
Replace a GE Ice Maker Auger Installation and Alignment
Use the auger installation article for your specific GE design to get the alignment and coupling steps right the first time. Correct alignment prevents binding that can make a new auger fail early.
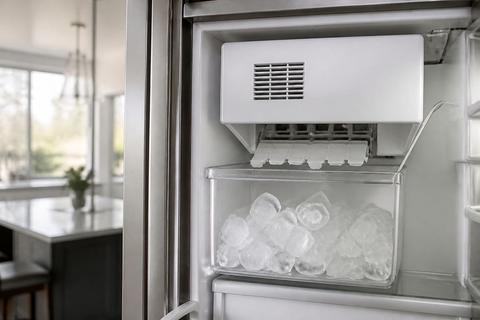
How to Clean a GE Profile Ice Maker
Cleaning protects ice quality, reduces odors, and limits buildup in the mold area and chute path. If you notice cloudy ice, odd smells, or slower production tied to residue rather than a failed component, regular cleaning is the right first maintenance step.
- Pull ice out of the bin so you can access the chute area.
- Follow your model’s cleaning mode or preparation steps as specified for Profile ice makers.
- Clean the inside mold surfaces and the chute pathways where ice travels; remove visible mineral or sticky film.
- Wipe and rinse the internal parts so residue doesn’t break loose later.
- Allow the ice maker to finish its cleaning/reset process so it returns to normal harvest operation.
How to Clean a GE Profile Ice Maker Inside Mold and Chute
Use the dedicated mold-and-chute cleaning process for exact parts and sequencing. That guide covers the scope of cleaning where buildup changes ice quality and flow.
How to Descale a GE Ice Maker and Countertop Ice Machines
Descaling removes mineral buildup that forms when water contains dissolved hardness. Scale reduces water flow into the mold, slows ice production, and can worsen taste and clarity—especially in areas with hard water.
- Decide if descaling is needed: if the machine runs but produces less ice, clogs fill patterns, or forms poor ice, scale is the likely cause.
- For GE ice makers, run a descaling routine using the recommended descaler method for your model.
- For GE countertop ice machines (like nugget-style units), use the manufacturer’s cleaner method and run the full cycle through the internal water path.
- Complete the full rinse step after descaling so cleaner isn’t left inside.
- After descaling, run a few harvest cycles or dispense cycles to clear the system before normal use.
How to Descale a GE Ice Maker and Countertop Ice Machines
Follow the model-specific descaling instructions so the solution contacts the right internal passages and you complete the required rinse. This is the most reliable way to restore normal fill flow after mineral buildup.
Full Guide: How to Install a GE Ice Maker: Diagram Basics and Hookup
GE Monogram: How to Turn Off the Ice Maker and Stop Ice
Turning off your GE Monogram ice maker is useful during troubleshooting, cleaning, or travel so you don’t create unwanted ice or overflow issues. Controls vary by model, so use your Monogram’s specific shutoff method listed on the unit or in the control panel design.
- Identify the ice maker control on your Monogram refrigerator (some models use a dedicated ice On/Off setting; others use a switch or indicator).
- Use the control panel to set ice production to Off (or turn the ice maker to the stopped mode).
- For models with a feeler arm/bail, raise or lift it to stop ice production; lower it to resume making ice.
- If you’re stopping ice for cleaning, allow the unit to finish an existing cycle so it doesn’t leave ice in limbo.
- If you’re preparing for travel and the model is configured to allow it, shut off water and stop ice production for the downtime period.
GE Monogram: How to Turn Off the Ice Maker and Stop Ice
Use the dedicated Monogram shutoff steps to match your control layout, including the correct setting/switch behavior for stopping ice without leaving the unit in an unstable state.
Full Guide: GE Monogram: How to Turn Off the Ice Maker and Stop Ice
Frequently Asked Questions
How do I know whether my GE ice maker needs cleaning or replacement?
If the problem is buildup—odor, residue, cloudy ice, or reduced ice production due to clogged flow—cleaning and descaling are the first actions. If you see electrical faults, repeated harvest/control failures, or physical damage (burned components, cracked tray parts, or persistent jams tied to a worn drive), replacement or part-specific repair is the better next step. A strong indicator for cleaning/descaling is when the unit runs but performance degrades in a way that aligns with mineral buildup or residue in the mold and chute. A strong indicator for repair is when the ice maker won’t cycle or repeatedly jams due to component wear.
Can I install a GE ice maker myself?
Many GE ice maker installations are manageable for a careful DIYer if you have the right tools, the correct model compatibility, and access to a water line connection. The key is getting water, power, and fit right: a kinked water line or incorrect electrical harness connection can prevent ice entirely. Start by confirming your refrigerator model number and matching the ice maker assembly part. Then ensure you shut off the water supply, connect the inlet line without leaks, and route wiring away from sharp edges. Finally, set the freezer to 0 to 5°F so the ice maker can cycle.
Why is my GE ice maker making small or misshapen ice cubes?
Small or misshapen cubes usually point to a water flow problem, residue buildup in the mold area, incorrect ice maker alignment, or a worn ice tray/mold component. Begin with water flow and cleaning: check for mineral buildup and clean the mold surfaces where ice forms. Next, confirm the freezer temperature is in the 0 to 5°F range so the unit can freeze properly. If the water path is clear and the mold is clean but formation remains poor, the ice tray/mold assembly or a related control component needs replacement.
How often should I clean or descale a GE ice maker?
Cleaning and descaling frequency depends on water quality and usage. Hard water increases mineral buildup, which means descaling is needed sooner to maintain normal flow into the mold. Heavy household use increases churn in the ice system and also exposes the unit to more residue and odor sources, so cleaning intervals should be more frequent than for light use. Follow the schedule recommended for your specific GE model and adjust based on performance changes—reduced ice, cloudy ice, or persistent odor are clear signals it’s time.