GE Ice Maker Parts: Fixes for Common Breaks
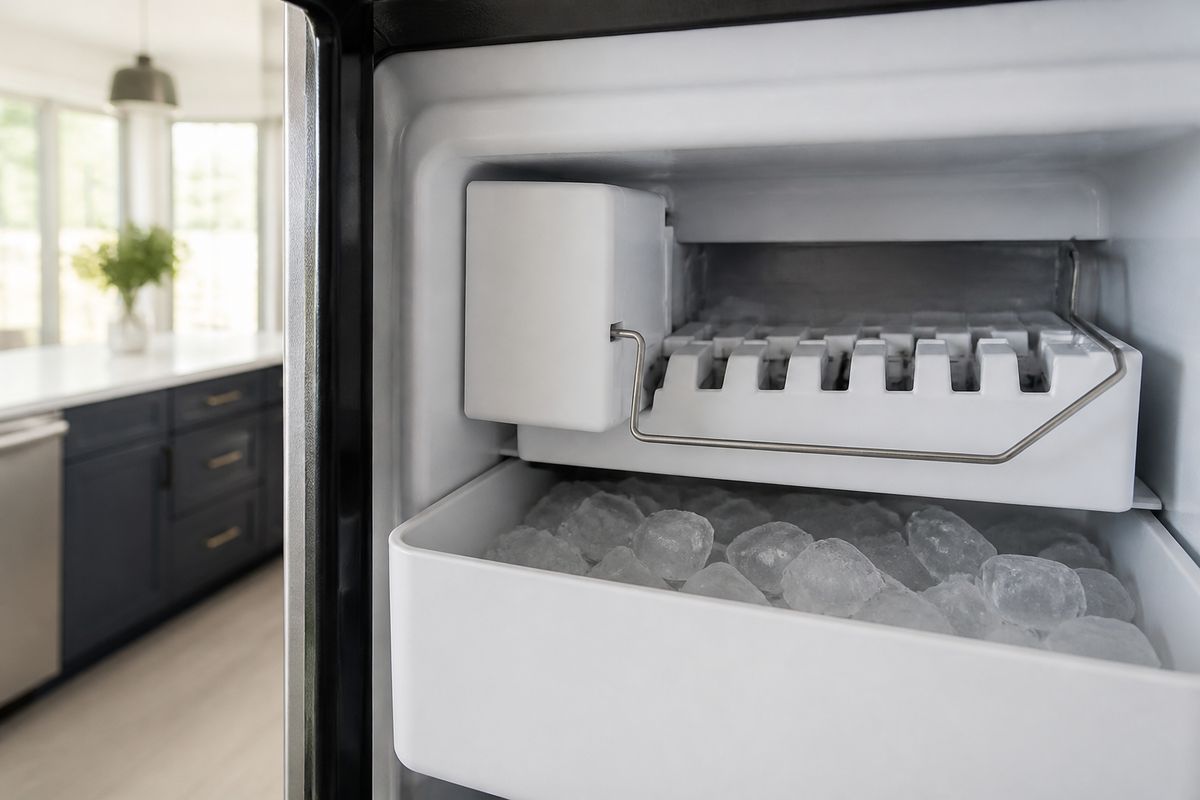
When your GE refrigerator stops making ice—or it produces cubes that are small, hollow, or weirdly inconsistent—you’re usually dealing with a specific failed component, not “the whole fridge.” Finding the right ge ice maker parts (and replacing only what’s broken) saves money and gets your ice back fast. Use your symptoms and the model number to pinpoint the part, then repair with confidence.
For more help, see our Install, Replace, and Maintain a GE Ice Maker guide.
Identify the Right GE Ice Maker Part
Match the model number before ordering
Start with the model number printed on the refrigerator data plate (inside the fresh food compartment on GE models, often on the left wall or near the door frame). Write down the full model (letters/numbers), and—if your ice maker has a separate ice maker label—capture that part number too. GE builds multiple ice maker variations that look similar but use different wiring harnesses, mounts, and module assemblies.
- Find the data plate and record the refrigerator model number.
- Locate the ice maker model/serial tag if present (some modules include a specific ice maker ID).
- Order by exact assembly/component listing, not by “looks like” matching.
Know which parts fail most often
The fastest repairs happen when you target the components that commonly wear out in GE ice systems. The most frequent failures include the water inlet valve (stops or restricts water), the fill tube and water path (clogs or cracks), the ejector motor (ice won’t harvest), and the thermostat/sensor assembly (stops the cycle early or never starts). Mechanical wear is also common in the auger, ejector blades, and ice bin components that see repeated stress.
Common symptom-to-part patterns:
- No ice or slow fill → water inlet valve, clogged water path, restricted inlet line.
- Small/hollow cubes → weak water fill, restricted valve flow, low freezer temp.
- Ice not ejecting → ejector motor, jammed ejector blades/auger, stuck ice bridge.
Separate OEM, compatible, and used options
Before you buy, sort options by how likely they are to fit and work right away. OEM parts are made for your exact GE assembly and carry the best match for connectors, mounting holes, and calibration. Compatible parts can work, but you must match the exact component and service number. Used parts may save money, but they carry hidden wear—especially on motors, sensors, and plastic ice-moving parts that crack under stress.
- Prefer OEM or exact “same part number” compatible listings when repair reliability matters.
- Only consider used parts if the seller provides the exact service/part number and clear condition photos.
- Avoid listings that say “fits many models” unless the part number matches yours.
Diagnose Common Ice Maker Problems
Check for no ice, small cubes, or hollow cubes
Use production quality to narrow down the failure. No ice usually points to water delivery problems, freezer temperature issues, or an ice-harvest cycle failure. Small cubes or slow production often mean restricted water flow or weak filling. Hollow cubes commonly come from incomplete fill timing or low water volume per cycle.
- Confirm the freezer is set to 0 to 5°F and stable.
- Inspect the water inlet area for ice blockage or a restricted line.
- Watch the cycle timing: if the unit fills briefly but makes hollow cubes, focus on valve flow and fill duration.
If you have a feeler arm (wire bail) that stops the unit when raised, ensure it is down and not obstructed by stored items.
Troubleshoot leaks, clogs, and overflow
Leaks and overflow are tied to either water-control issues or an ice path that can’t move properly. A cracked fill tube or loose connection can drip continuously. Clogs cause water to back up, overfill, or create intermittent overflow during harvest. Overflow can also happen when ice isn’t ejecting fully, causing the ice bin to jam and water to keep running.
- Turn off ice maker power and shut off water before inspecting hoses and the fill tube.
- Look for standing water at the fill tube connection, ice chute area, and inside the ice maker housing.
- Clear any ice bridges or clogs in the ice path; remove hardened scale and broken ice pieces.
For persistent clogs, check the household water filter status—clogged filters frequently cause partial flow that leads to poor cube formation and system strain.
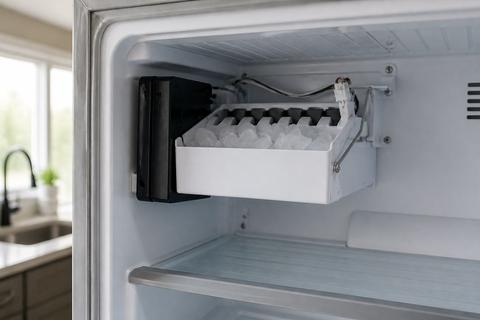
Look for electrical and sensor failures
When the ice maker has power but doesn’t cycle correctly, the failure may be electrical control or sensing. Common culprits include the thermostat/sensor, wiring harness issues, and a stuck control mechanism. Many modular GE ice makers include an internal switch or an LED/status indicator on the front cover. Electrical faults can stop the unit from starting harvest, stopping it early, or triggering error-like behavior (no fill, no eject, or repeated incomplete cycles).
- Inspect wiring connectors for looseness or corrosion (unplug first).
- Locate the ice maker’s power switch/status LED on the module cover (if present) and cycle the control as the manual indicates.
- If available, use the unit’s built-in test/harvest button to confirm it performs a fill and harvest attempt.
If the unit fills but doesn’t eject, you’re looking at the motor/drive path rather than the water side.
Repair or Replace the Broken Component
Test the fill valve, motor, and thermostat
Isolate the problem by testing the components responsible for each stage: water fill, harvest motion, and temperature sensing. A failing fill valve can cause no ice or poor cubes even if the motor works. A worn ejector motor prevents harvest and leads to jams and overflow. A faulty thermostat or sensor can interrupt the cycle at the wrong time, resulting in incomplete ice formation.
- With power off, check the fill valve connections and look for scale buildup around the valve area.
- Restore power and use the ice maker’s test/harvest function (or manual cycle if your model supports it) to observe fill and motor movement.
- If it won’t progress past fill or won’t harvest, focus replacement on the valve or motor assembly first based on observed behavior.
If your GE ice maker has a sensor/thermostat accessible inside the module, replace it with the exact GE-listed part number when you see temperature-related stopping.
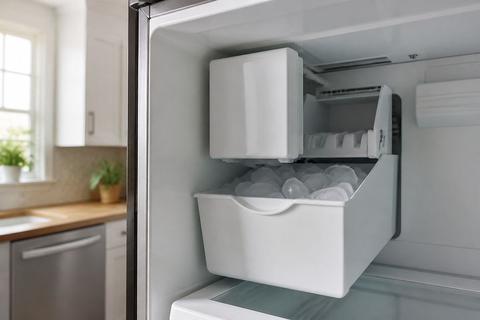
Replace bins, augers, and ejector blades
Mechanical ice-moving parts wear down from repeated impact, and broken plastic or worn blades often cause incomplete harvest, ice jams, and overflow. Replacing bins, augers, and ejector blades is straightforward when you can access the ejector section and align the components correctly.
- Remove ice storage components (bin, auger sections, or ejector cover depending on your model).
- Inspect for cracks, missing teeth, or uneven wear on ejector blades and auger surfaces.
- Install the correct replacement parts by matching the blade orientation and mounting points.
After replacement, verify the ejector path is clear of hardened ice and broken shards that will repeat the jam.
Decide when a full module swap makes more sense
Sometimes the quickest, cleanest fix is replacing the entire ice maker module rather than chasing individual failures. Swap the whole module when multiple components show wear, when the ice maker repeatedly cycles incorrectly, or when the repair requires accessing tightly packaged electrical components. This approach is also cost-effective when labor to disassemble and test multiple parts brings you close to the price of a pre-assembled unit.
- Choose module replacement if the ejector assembly is damaged and the control/sensor area shows evidence of failure.
- Choose part-by-part repair if only one component shows clear physical damage or a specific symptom isolates that stage.
- Price out labor time: if diagnosing requires repeated disassembly, module swap is usually faster.
GE Refrigerator Ice Maker Removal and Installation
Safely shut off water and power first
Before you remove or install any GE ice maker, protect the line, wiring, and the refrigerator control. Water leaks can happen when a fill tube is disconnected, and electrical damage can happen if you work with the module energized.
- Unplug the refrigerator or switch off power at the breaker before handling wiring.
- Shut off the water supply valve feeding the refrigerator.
- Hold a towel and keep a small container ready to catch residual water from the inlet line connection.
If you must access behind the fridge, pull it carefully to avoid stressing the water line.
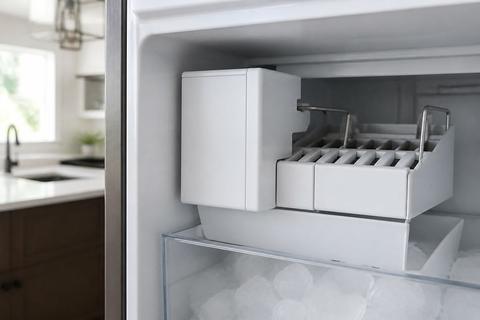
Remove the old ice maker without damaging wiring
GE modular ice makers connect using harness plugs and mounting clips/screws. The goal is to disconnect cleanly and avoid bending harness pins or yanking wires.
- Remove the cover panel(s) that block access to the ice maker harness and mounting points.
- Unplug the ice maker wiring connector by pulling the connector body, not the wires.
- Remove mounting screws/clips, then lift the ice maker straight out to avoid cracking the fill tube.
Inspect the fill tube and grommet where it connects—replace the grommet if it’s damaged or flattened.
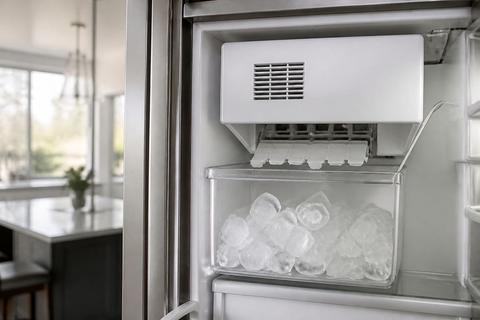
Install the new unit and verify alignment
Proper alignment is critical so the module seats correctly, the fill tube fits without leaks, and the ejector mechanism clears the ice path. After installation, run a harvest cycle to clear air and confirm water flow.
- Seat the new ice maker so mounting points align, then tighten screws/clips evenly.
- Reconnect the wiring harness firmly until it clicks into place.
- Attach the fill tube using the correct connection method for your model (no twists or kinks).
Turn water back on and start the first harvest cycle using the ice maker’s supported manual/test function if available. Watch for a clean, steady fill and normal eject movement.
Model-Specific Notes for Common GE Units
What to check on side-by-side refrigerators
Side-by-side GE refrigerators often have modular ice maker designs that include a fill tube routing path and specific mounting alignment. Before replacing parts, check freezer temperature first because side-by-side models can suffer production issues if the freezer air circulation is restricted. Also examine the ice maker shutoff mechanism—many designs use a feeler arm (wire bail) that stops ice production when raised.
- Ensure the freezer setpoint is 0 to 5°F and airflow vents are not blocked.
- If your model has a wire bail, lower it fully; clear anything that pushes it up.
- When installing the new unit, ensure the ice chute and ejector area align so ice can drop without binding.
If you see ice buildup in the chute, clear it before reinstalling the module.
Tips for compact and XL ice maker variants
Compact and XL variants use different storage and mechanical layouts, so “standard” replacements may not match the mounting or drive geometry. Focus on cube quality and cycle behavior: compact units often reveal water starvation quickly (small cubes) while XL units are prone to harvest and ice-bridge problems due to heavier ice loads.
- Match the ice maker assembly ID exactly, not just the refrigerator brand/model series.
- For small or slow cubes, replace the refrigerator water filter if it’s past 6 months or clogged.
- For XL overflow or jam symptoms, inspect ejector blades and the ice chute area for hardened buildup.
Keep a close eye on cube size consistency during the first few harvest cycles after installation.
Model fit guidance for CAN29, CAN9, and JS2
These commonly referenced GE ice maker families require accurate fit based on assembly design and mounting points. Your best path is to identify the exact ice maker service/part number from the module or data plate, then use that to source the correct replacement. Pay special attention to the harness type and whether the module uses a distinct control board or integrated sensor assembly.
- For CAN29/CAN9-style modules, match the service part number and confirm the harness plug style matches your unit.
- For JS2-style variants, verify mounting footprint and ejector/chute clearance before tightening fully.
- After installation, run one harvest cycle and observe fill-through and eject movement without binding.
If mounting holes don’t line up or the harness won’t reach without tension, stop and verify you ordered the correct assembly.
Special Case: Opal Ice Maker Noise and Wear
Pinpoint normal sound versus a failing part
GE Opal nugget ice makers (countertop models) produce noticeable operational sounds—water flow, motor movement, and nugget shaping. What matters is the pattern: normal operation is steady and rhythmic, while a failing part creates grinding, rattling, loud clicking, or noise that spikes during harvest. Noise can also come from scale buildup that restricts moving components, causing extra strain.
- Note when the noise happens: during fill, during nugget making, or during harvest.
- Check for ice jams in the internal chute or hopper area.
- Clean mineral scale if the noise coincides with reduced ice output or slower cycles.
If cleaning doesn’t improve production and noise, focus on worn drive or pump components.
Inspect the pump, fan, and drive components
When Opal noise points to mechanical wear, you need targeted inspection. The pump supports water circulation and feed; a worn pump creates buzzing or grinding. The fan supports cooling and airflow; a failing fan can cause rattling and abnormal sound. The drive components handle nugget formation movement, and worn gears or misaligned parts can produce persistent clunks.
- Unplug the unit and let it fully cool before inspection.
- Inspect internal components for scale buildup that locks movement or for visible wear on drive surfaces.
- Reassemble and run the unit through a clean cycle to ensure the pump and drive move normally.
If noise returns immediately under load, replace the failing component based on the exact Opal model parts listing.
When noise means the unit needs service
Opal units should not keep getting louder or produce fewer nuggets while continuing to run through repeated cycles. Service is needed when you see persistent loud noise after scale cleaning, repeated stop/start behavior, or signs of mechanical grinding that suggests internal wear. Also treat persistent dripping, error patterns, or failure to complete cycles as indicators that a component has failed rather than merely requiring cleaning.
- If the unit fails to complete a clean cycle properly or noise persists after descaling, stop DIY troubleshooting.
- If the unit continues to run but no longer produces nuggets at the expected rate, service the drive/pump system.
- If you see repeated fault-like behavior, use the Opal’s error indication pattern to guide the repair path.
Buying the Best Replacement Part
Where to compare prices and availability
You’ll get the best value when you compare the exact part number across multiple sellers. Price differences come from shipping speed, return policy, and whether the listing includes the correct assembly or only a subcomponent. Availability matters too: ordering the wrong component is more expensive than paying slightly more for the correct one.
- Search the exact GE part number and compare total cost (part + shipping + taxes).
- Prioritize sellers with clear compatibility statements tied to the exact service number.
- Choose a listing with a straightforward return/exchange policy in case the part doesn’t match your assembly.
How to avoid counterfeit or wrong-fit parts
Wrong-fit parts waste time and can damage the ice maker by forcing connections or misaligning ejector movement. Counterfeit or low-quality components can also fail quickly, especially plastic gear-like components and sensors. Always verify the part number and physical compatibility, and avoid vague “universal” listings that don’t match your module design.
- Only buy when the listing states the exact part/service number that matches your model.
- Avoid listings that use vague “fits GE refrigerators” claims with no part number match.
- Check seller reputation and customer reviews mentioning correct fit for the same ice maker model.
What to confirm before checkout
Before you hit buy, confirm the most common mismatch points: part number, assembly vs. individual component, connector/harness compatibility, and included hardware. For ice makers, a missing grommet, clamp, or incorrect connector style can prevent the unit from sealing or cycling properly.
- Confirm you’re purchasing the correct assembly (module) or the specific component (valve, motor, ejector blade).
- Confirm connector type/harness style matches the existing unit’s connector.
- Confirm the package includes essential installation pieces (grommets, brackets, screws) when your model requires them.
Frequently Asked Questions
How do I find the correct GE ice maker part for my model?
Use the refrigerator or ice maker model number on the data plate, then match it to the exact assembly or component listing before ordering.
What are the most common GE ice maker failures?
The most common issues are a bad water inlet valve, worn ejector motor, failed thermostat or sensor, cracked fill tube, and damaged bins or augers.
Should I repair one part or replace the whole ice maker?
Replace a single part when the failure is isolated and the unit is otherwise healthy. Swap the whole module when multiple components are worn or the repair cost is close to a new assembly.
Can I install a GE refrigerator ice maker myself?
Yes, many replacements are DIY-friendly if you shut off power and water first and follow the model-specific mounting and wiring steps carefully.
Why is my GE Opal ice maker making a loud noise?
Loud noise often points to scale buildup, a worn fan or pump, loose internal parts, or an ice jam. If cleaning does not help, a component may be failing.