GE Ice Maker Installation: Diagram Basics and Hookup
If your refrigerator or freezer isn’t producing ice, the problem is often in the hookup—wrong connections, a blocked water line, or a missed step from the GE ice maker diagram. Getting ge ice maker installation right the first time saves you from repeated no-ice cycles, leaks, and weak ice production. Use the diagram for your exact model so the water path, wiring, and mounting match what GE designed.
For more help, see our Install, Replace, and Maintain a GE Ice Maker guide.
Before You Start: Model, Parts, and Safety
Confirm your GE ice maker model and kit type
Start by matching the ice maker assembly and installation kit to your exact refrigerator/freezer model number. GE ice makers are not interchangeable across styles (bin-style vs. modular, fill-tube layout, and harness type). Find the model number on the refrigerator frame or inside the fresh food/freezer compartment, then compare it to the parts list for the kit you purchased. Also check whether your appliance already has an ice maker mounting plate, harness, and water inlet provisions; some models require a retrofit harness or a specific fill-tube kit to seat and route correctly.
- Locate your appliance model and ice maker type (bin/dispenser/modular).
- Verify your kit includes the correct ice maker, harness, fill tube, and mounting hardware.
- Read the diagram sheet inside the manual for your exact model.
Check water, power, and space requirements
Before installing anything, ensure the water supply and temperatures support ice production. GE ice makers need a connected, unrestricted cold-water line and a freezer temperature around 0 to 5°F to cycle normally. If the freezer is warmer, the ice maker can run but will not harvest or freeze properly. Confirm you have a standard 120V power source and enough clearance for the ice maker to sit flush, the cover to close, and the fill tube to route without rubbing or kinking.
- Set freezer to 0–5°F before expecting ice.
- Confirm power: 120V grounded outlet with no loose plug.
- Plan routing so the water line runs straight with slack for opening/closing doors.
Gather the tools and installation parts
Having everything staged prevents “almost finished” issues like an incorrect clamp, missing elbow fitting, or a harness that won’t reach. You’ll typically need basic hand tools plus the parts your kit specifies (shutoff valve, saddle/adapter, tubing, clamps, and the ice maker mounting screws). Also grab a small towel and a shallow container for initial water checks, because you will have brief drips while seating fittings.
- Tools: adjustable wrench/pliers, screwdriver set, drill only if your kit requires it, flashlight.
- Parts: water line/tubing, shutoff valve/adapter, clamps, fill tube, mounting screws, any included filter housing.
- Supplies: paper towels and a bucket or tray to catch water during the first purge.
Read the Diagram and Identify the Connections
Understand the water line path and shutoff valve
The GE ice maker diagram shows the intended route for the water line from the household supply to the ice maker inlet. Identify where the shutoff valve is installed so you can stop water quickly if you ever need service. Follow the diagram to find the specific connection point for the saddle valve/tee adapter and the path where the tubing runs to avoid sharp bends that can slow flow or trap air. If the line is kinked, frozen, or pinched behind panels, ice production drops immediately—even if the unit powers on.
- Trace the water inlet on the diagram to the ice maker inlet fitting.
- Confirm the shutoff valve is accessible and fully closed/opened as required.
- Ensure the tubing path avoids tight bends and stays clear of moving parts.
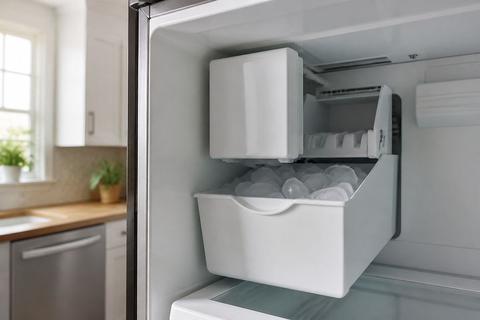
Locate the inlet, fill tube, and mounting points
In the diagram, the inlet connection is where water enters the ice maker, and the fill tube directs water into the ice-making mold. Locate the mounting points so the assembly seats correctly and the fill tube aligns without twisting. Incorrect alignment can cause water to spill, freeze incorrectly, or not feed the mold. Use the diagram to position the ice maker so screws engage the intended holes and the harness/fill tube do not get trapped under the cover or mounting bracket.
- Identify the water inlet fitting and match it to the connector on the ice maker.
- Route the fill tube exactly as shown so it fits without stress or twists.
- Mount the assembly using the diagram’s screw/mount locations so it sits flush.
Match the wiring and control components correctly
Wiring errors are a common reason a unit powers but never harvests or never fills. The diagram indicates the harness path and which connectors plug into the ice maker and control components. Confirm connector shapes and keying—don’t force plugs; instead, reseat them and verify you routed the harness the same way the diagram shows to prevent pinched wires. Some models also have a power switch/LED indicator on the ice maker module cover; the diagram helps you identify it so you know what should be on during normal operation.
- Route the harness exactly as shown and keep it away from sharp edges.
- Plug connectors fully—listen for the seating click and ensure alignment.
- If your unit has a switch/LED, position it according to the diagram before powering.
Install the Ice Maker in a Refrigerator or Freezer
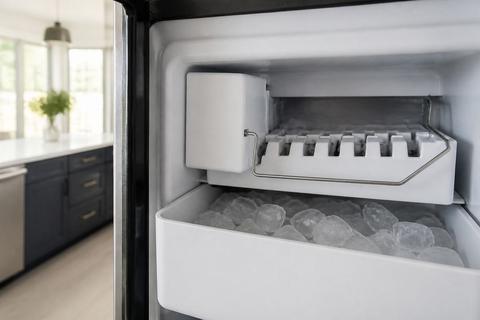
Mount the ice maker assembly securely
Secure mounting ensures the ice maker harvest mechanism moves freely and the fill tube maintains correct alignment. Start by positioning the ice maker assembly in the mounting area per the diagram. Use the included screws and tighten them evenly so the unit sits without rocking. If the ice maker sits even slightly off-level or the mount points aren’t fully engaged, you can get leaks, weak ice, or vibration during operation.
- Place the ice maker assembly into the mounting location as diagrammed.
- Install mounting screws and tighten evenly until the unit sits firmly.
- Route the harness and confirm the cover can close without pinching.
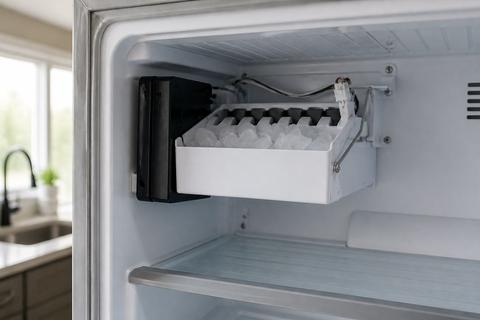
Connect the water supply line without kinks
Connect the water tubing to the shutoff valve adapter and then to the ice maker inlet using the kit’s specified fittings. Cut tubing straight, insert fully, and tighten to the torque/restriction level the fitting design allows (don’t overtighten plastic connections). Before closing panels permanently, ensure the tubing runs without kinks and has gentle bends only. A kinked or kink-prone run can reduce water flow to a trickle, leading to small or no ice cubes.
- Cut tubing straight and remove burrs at the end.
- Insert tubing into fittings fully; tighten per the kit’s instructions.
- Route tubing so there are no sharp turns behind the unit.
Attach the power and test the initial cycle
Power the ice maker according to your model’s instructions and initiate the first cycle the right way. Many GE modular ice makers include a front cover with a switch or status LED; move the switch to ON (or press the recessed test/manual button next to the LED, if equipped) to start a manual harvest cycle. Some models start automatically after installation once the freezer reaches the correct temperature—however, the manual cycle is the fastest way to confirm the water valve and motor actuate.
- Restore power and set any ice maker power switch to ON.
- Start the manual harvest/test cycle using the built-in control.
- Watch for water flow into the mold area during the first fill.
Finish the Hookup and Check for Leaks
Flush the line and install the filter if required
After the mechanical hookup is done, flush air and debris from the water line. If your diagram or manual specifies a filter (or if you’re using a GE-compatible filter housing), install it now before you run multiple ice cycles. Start water flow at the shutoff valve and dispense a few cycles of water/ice so the line clears trapped air that can interrupt filling. A clogged or overdue filter can starve the inlet and cause weak flow, so install the correct filter type if required.
- Open the shutoff valve slowly and let water run to clear air.
- Install the filter housing/cartridge if your kit specifies one.
- Purge air with the first ice-making cycle before evaluating production.
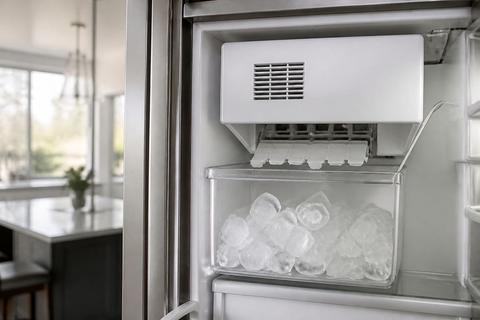
Verify fill level, ice bin fit, and dispenser operation
Use the diagram’s expected fill and mechanical alignment as your benchmark. Confirm the fill tube feeds the mold correctly without spilling water on surrounding parts. If your unit uses an ice bin, ensure the bin seats fully so the sensor/feeler can signal correctly for ice-making. For dispenser models, check that the dispenser gear and bin presence sensor operate as intended after the first ice has formed.
- Confirm water feeds the mold without overflowing around the fill tube.
- Seat the ice bin fully so sensors/feeler arms register correctly.
- For dispensers, run a short dispense to confirm the chute cycles smoothly.
Inspect for drips, loose fittings, and vibration
Finally, look for leaks at the shutoff valve adapter, the water tubing connection at the ice maker inlet, and any junction fittings shown on the diagram. Wipe connections dry and inspect around them during and after the initial fill/harvest stage. Loose fittings can drip under pressure, and vibration can loosen mounting if the assembly wasn’t seated correctly. Pay attention to the fill tube area and panel seams—any persistent wetness means you must correct the connection before continuing daily use.
- Inspect the inlet fitting and shutoff adapter for moisture during operation.
- Tighten only the connection that is leaking—don’t disturb dry fittings unnecessarily.
- Check mounting stability by watching for excessive movement or chatter.
Troubleshooting Common GE Ice Maker Issues
Fix weak water flow or no ice production
Weak water flow often comes from an inlet restriction, air trapped in the line, or the freezer running too warm. Start by confirming the freezer is at 0–5°F and that the water valve is fully open. Then address line issues: ensure there are no kinks and that the water filter is not clogged. For many modular GE units, also check the ice maker’s internal shutoff/feeler arm—on most models, raising the feeler arm stops ice-making, and if it’s stuck up (or pushed up by food), production stops immediately.
- Set freezer to 0–5°F and allow time to recover.
- Make sure the shutoff valve is fully open.
- Check the feeler arm: if raised or stuck, lower it to resume ice production.
- Purge air by running a short cycle after installation if flow was interrupted.
Resolve water filter and fill-tube problems
If ice production is weak or intermittent, the water filter is a top suspect. A clogged GE filter (including common GE XWF, XWFE, or MWF series) can starve the ice maker, especially if it’s past about 6 months of use. Replace the filter with the correct type, then run several dispense cycles or purge cycles to remove air. Also check the fill tube: ensure it is aligned as shown on the diagram and not pinched, twisted, or blocked by ice buildup.
- Replace the filter if it’s clogged or past its service interval.
- After replacing, run a few water/ice purge cycles to clear air.
- Inspect the fill tube routing—reposition if it’s twisted or pinched.
- Remove any visible ice blockage around the fill tube opening.
What to do if the unit still will not cycle
If the ice maker doesn’t harvest or fill after installation steps, verify power to the module and any control switch/LED status. Many modular kits include a small power switch or an LED indicator on the front cover; slide the switch to ON or press the recessed test button next to the LED to trigger a manual harvest cycle. For countertop GE Opal nugget ice makers specifically, reset by unplugging for several minutes, then restart the unit and run the Clean cycle—flashing light patterns on Opal often indicate cleaning needed or a low/empty reservoir.
- Confirm the ice maker switch/LED is set to ON, then press the recessed test button.
- If no response, check that connectors are fully seated and not pinched behind panels.
- For GE Opal nugget models: unplug for several minutes, restart, and run Clean if lights indicate it.
Use, Maintenance, and Support
Follow routine cleaning and maintenance steps
Routine cleaning prevents scale and mineral buildup that slow water flow and reduce ice production. For standard GE ice makers, follow the manual’s cleaning intervals and periodically inspect the water path for residue. Keep the area around the ice maker dry to spot early leaks. If your unit has a serviceable filter housing, replace the filter on schedule—this protects ice quality and keeps flow strong. For Opal nugget ice makers, run the recommended Clean cycle when the unit signals it; persistent alerts usually mean mineral buildup or low water in the reservoir.
- Replace water filters on schedule and as specified by your model.
- Wipe the area around fittings and the ice chute to prevent residue buildup.
- Run the model’s cleaning cycle when prompted by alerts or after heavy scaling.
Know when to consult the manual or service support
Consult the model-specific diagram and troubleshooting section whenever symptoms don’t match installation steps—especially if wiring, harness routing, or inlet fittings differ from other kits. If you find repeated no-ice cycles despite correct temperature, open valve, and clean filter, it’s time to contact GE service support or a qualified technician. Service is also appropriate when water is leaking inside panels, when you suspect a failed inlet valve, or when electrical components require safe diagnostics beyond basic checks.
- Use the exact model manual if parts, connectors, or controls differ.
- Seek service if you have internal leaks or repeated valve/harvest failures.
- Stop DIY troubleshooting if electrical access is required beyond basic switch/connector checks.
Decide whether a replacement kit or model upgrade is better
If your ice maker keeps failing due to repeated clogged lines, aging components, or mismatch issues between kits and your refrigerator/freezer layout, weigh the cost of a replacement kit against a newer, more compatible model. Replacement kits work best when the existing refrigerator system and mounting provisions match the kit and the diagram layout aligns cleanly. Upgrading makes sense when you’re dealing with persistent fitment problems, frequent filter-related starvation, or performance issues that remain after proper installation and cleaning.
- Choose a replacement kit when your current setup matches the kit’s requirements.
- Consider a model upgrade if performance issues persist after correct installation and filter replacement.
- Compare total costs: parts + labor + repeated troubleshooting time.
Frequently Asked Questions
Can I install a GE ice maker myself?
Yes, many GE ice maker installations are DIY-friendly if you have a compatible refrigerator or freezer, a water supply connection, and the correct kit. If you are not comfortable working with water lines or electrical connections, hire a qualified technician.
Do I need a water filter before installing the ice maker?
Not always, but a filter is strongly recommended when water quality is poor or when the manual specifies one. A filter can help reduce scale, odors, and clogs that affect ice production.
How do I know which GE ice maker kit I need?
Match the kit to your appliance model, installation location, and ice maker style. The product manual or model lookup is the safest way to confirm compatibility before you buy.
Why is my GE ice maker not making ice after installation?
Common causes include a closed water valve, air trapped in the line, incorrect wiring, a clogged filter, or an ice maker that has not completed its first cycle. Check the installation steps and troubleshooting section in the manual.
Where can I find the GE ice maker diagram?
The diagram is usually in the product manual, installation instructions, or parts breakdown for your exact model. It shows the water path, wiring, mounting points, and bin or dispenser components.