GE Ice Maker Green Light Flashing: Quick Reset and Fixes
You’re ready for a full bin of ice and then you notice it: ge ice maker green light flashing. When that happens, the ice maker isn’t running its cycle as expected—usually due to a jam, lack of water, or a control reset that didn’t complete. The good news is you can often stop the flashing and restore ice production with a safe power reset and a few targeted checks.
For more help, see our GE Ice Maker Resets, Lights, and Error Codes guide.
What the Green Light Usually Means
Decoding a steady light versus a flashing light
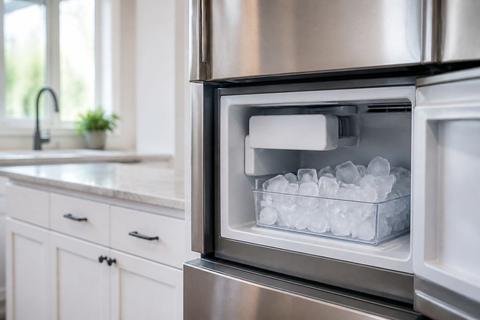
On most GE refrigerator ice makers, a steady green light indicates the ice maker is powered and in a normal state (or ready to make ice). A flashing green light means the ice maker has detected an interruption in its operation and is pausing or trying to restart. Treat flashing as an active problem code rather than “normal cycle” behavior.
To interpret it accurately, check your unit’s location: some models display the status LED through the ice maker cover, while others show it at the freezer door or on the ice maker module itself. The same color can behave differently across GE ice maker designs, so the light pattern is your first clue that the machine is not successfully completing harvest, fill, or communication.
When the light is normal and when it signals a fault
A normal condition is when the ice maker makes ice on schedule and the light stays steady. Flashing indicates a fault condition that prevents the ice maker from completing part of the cycle—commonly harvest (ice won’t eject), fill (water won’t enter), or sensor/door/bin detection (the system thinks something is out of position).
Use these practical signals to decide how aggressive to be: if the bin is empty after several hours, the ice maker has likely stopped making ice due to water flow or a mechanical jam. If you see a burst of ice followed by flashing, the cycle may be breaking at harvest or during ejection.
Check whether the freezer model uses the same indicator differently
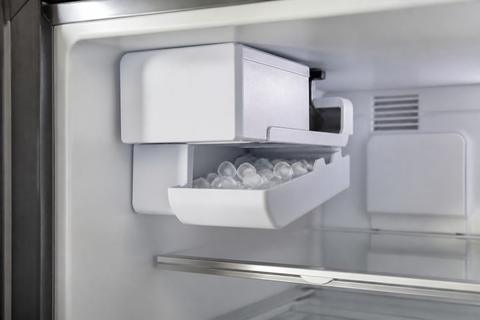
GE has multiple ice maker types (including modular in-freezer ice makers and countertop models). Some modular units use a status LED plus internal sensors, while certain smart-enabled refrigerators include additional lighting related to module status. That’s why the same “green” indicator can mean different specific steps depending on the exact model and ice maker family.
Locate the ice maker label or model number (usually inside the freezer compartment or behind the ice bin). Then match the LED behavior to the manual description for your model—especially whether the LED is meant to indicate “ready,” “harvest in progress,” or “needs service/reset.” If you can’t access the manual, the next section’s reset and mechanical checks still apply safely to most GE ice maker designs.
Quick Reset Steps to Try First
Power-cycle the ice maker safely
Start with a reset that clears a stuck cycle and reboots control logic. Power-cycling is safe and works when the flashing light is caused by a temporary interruption in water fill, motor timing, or sensor interpretation.
- Move any items away from the ice maker area so you don’t interfere with the ejector arm or bin.
- Turn the ice maker OFF using the ice maker switch (if your unit has one), or unplug the refrigerator if you don’t see a dedicated switch.
- Wait 2–5 minutes to let internal electronics fully discharge.
- Restore power (or turn the ice maker back ON).
- Leave the freezer undisturbed for 30–60 minutes so the unit can resume its cycle.
Use the test or reset button if your model has one
Many GE modular ice makers include a test/restart feature—typically a recessed button near the status LED or control area on the ice maker itself. If your model has this button, use it to force a harvest cycle and check whether the motor and water fill can operate again.
- With the ice maker cover accessible, locate the recessed test/reset button next to the LED (if present).
- Press and hold the button according to your manual (commonly a short press initiates a test, but follow the time in your model instructions).
- Watch for normal operation: the unit should attempt harvest and then fill.
- If the flashing green light returns immediately, it points to a persistent water/motor/jam condition rather than a one-time glitch.
Wait long enough for the ice maker to restart properly
After a reset, the ice maker doesn’t instantly produce ice the moment you power it back on. It first completes control initialization, then runs harvest and fill in sequence. If you interrupt this too soon, the flashing light may continue simply because the cycle never completes.
- Restore power or switch the ice maker ON.
- Keep the freezer closed and avoid moving the ice bin during the first cycle attempt.
- Give it 30–60 minutes for modular units to attempt harvest/fill.
- For some systems, ice production takes longer—so base your judgment on whether the flashing stops and the unit resumes cycle behavior, not just on immediate “ice in the bin.”
Common Causes of a Flashing Green Light
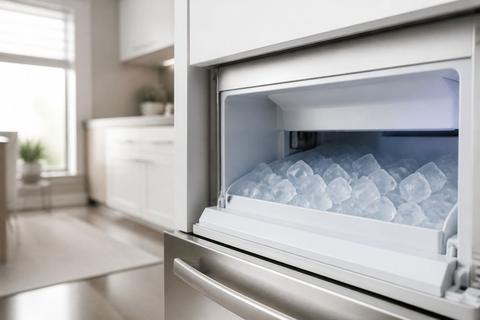
Ice blockage or a jammed ejector arm
The most common mechanical cause is ice that prevents the ejector from completing harvest. When the ejector arm is stuck, the ice maker senses that the cycle didn’t finish and the LED flashes. A jam can be caused by clumped ice, ice buildup around the mold, or a partially frozen slab.
- Remove the ice bin and check for hard clumps near the bottom or the back.
- Look for the ejector arm/feel arm mechanism—if it’s stuck in the “up” or blocked position, free it carefully.
- Clear loose ice from around the mold area and the eject path using a plastic utensil.
- Reinstall the bin firmly so the sensors register it correctly.
- Restart the ice maker and observe whether the flashing stops after the next cycle attempt.
Water supply problems or low water pressure
If the ice maker can’t fill properly, it stops mid-cycle and signals the fault with a flashing light. Low household water pressure, a closed shutoff valve, a kinked line, or a restricted water filter all prevent the mold from receiving water.
- Verify the water shutoff valve behind the refrigerator is fully open.
- Inspect the water line for kinks or bends that pinch flow.
- If you use a GE water filter (common models include GE XWF/XWFE/MWF series), check whether it’s clogged or past its replacement interval (about 6 months).
- Replace the filter if needed, then run a few dispense cycles to purge air and restore full flow.
- If the water line is exposed in a cold area, check for freezing in the fill tube.
Door switch, bin, or sensor issues
GE ice makers rely on sensors to know the bin is in place and the freezer door is closed. If the unit thinks the bin is absent, full, or the door was open during a cycle, it will halt and flash the LED as it attempts to recover.
- Remove and reseat the ice bin so it clicks into place and aligns with the detection mechanism.
- Inspect the bin area for ice debris that can prevent the sensor from reading.
- Check the freezer door closure: confirm it closes fully without resistance and the gasket seals evenly.
- Ensure nothing obstructs the feeler arm/wire bail if your model uses one—food bags can push it upward and stop ice production.
Control board or communication errors
If water and mechanics check out and the light keeps flashing, the issue can be electrical—like a control board fault, wiring/connector issue, or communication between the ice maker and refrigerator control. These problems typically persist after reset and after clearing jams and verifying water flow.
- Power-cycle the refrigerator again (as described earlier) to rule out a temporary logic fault.
- If your modular ice maker has connectors, ensure they are seated firmly (unplug first to avoid shock).
- Look for signs of moisture at the ice maker connections that could cause intermittent detection.
- If the flashing returns quickly with no successful fill/harvest attempt, it points toward a control module/board or sensor needing replacement or diagnosis by service.
Fixes You Can Do Without Tools
Clear ice buildup around the mold and mechanism
Ice buildup can block the mold from releasing ice or can interfere with the ejector path. Clearing it often stops the flashing because the ice maker can complete harvest again.
- Turn the ice maker OFF before you clear the area.
- Remove the ice bin.
- Check the mold area and the surrounding ejector area for ice slabs or packed crystals.
- Remove loose ice carefully with a plastic utensil; avoid metal scraping that can damage components.
- Wipe away residual water/ice with a soft cloth so new ice forms cleanly.
- Reinstall the bin and turn the ice maker back ON.
Make sure the freezer door closes fully
Even small door gaps can disrupt temperature and sensor behavior, which can halt ice-making and trigger error lighting. If the freezer is warm or frequently opened, the ice maker won’t cycle reliably.
- Close the freezer door gently but firmly and ensure it latches.
- Inspect the door gasket for gaps, warping, or food debris.
- If the door is under load from items, rearrange shelves so the door can seal flat.
- After making changes, leave the freezer closed for at least an hour so temperature stabilizes.
Inspect the water line and shutoff valve
A restricted water feed is a direct cause of flashing. You want to confirm both the valve position and the physical integrity of the line.
- Locate the shutoff valve and confirm it is fully open.
- Trace the water line from the wall to the refrigerator and look for kinks, crushed sections, or tight bends.
- If you find a kinked section, straighten it without forcing it into sharp angles.
- If the line or connection appears frosted, you may have partial freezing—address that to restore consistent flow.
- After corrections, run the next ice cycle attempt; a successful fill reduces the likelihood of recurring flashing.
Remove and reseat the ice bin
The bin position sensor stops ice-making when it can’t confirm proper bin placement or when it thinks the bin is full. A bin that is slightly misaligned can trigger a flashing status light.
- Pull the ice bin straight out.
- Check the bin rails and the bin sensor area for ice chunks or spilled cubes.
- Reinsert the bin until it seats fully and level.
- If your bin uses a feeler arm/wire bail, ensure it moves freely when the bin is installed.
- Turn the ice maker back ON and let it attempt harvest and fill.
If Your GE Smart Appliance Is Also Flashing Blue
Separate ice maker alerts from smart module status lights
Some GE refrigerators have smart indicator lights that can flash blue for connectivity or module status, which is unrelated to the ice maker’s specific fault indicator. If you’re seeing green (ice maker) and blue (smart) at the same time, don’t treat them as the same issue.
- Identify where each light physically is located (ice maker cover vs smart module area).
- Treat the flashing green as the ice maker cycle problem source (jam/water/sensor/control).
- Treat the flashing blue as the smart/comms system source unless your manual states otherwise for your exact model.
Reconnect the smart features without confusing them with a fault
If the blue light relates to smart module behavior, reconnecting the smart features can clear the blue status without touching the ice maker fault. Do not repeatedly reset the ice maker if the mechanical and water checks are already done.
- Follow your refrigerator’s smart setup flow (from the GE-branded app or the refrigerator’s menu system) to reconnect the module.
- Power-cycle the refrigerator only once if needed—then focus on the ice maker green status.
- Ensure the freezer door remains closed during reconnection so temperature-driven interruptions don’t add noise to the troubleshooting.
Know when the blue light is harmless and unrelated
A flashing blue light is often about Wi‑Fi or smart feature status, not about ice-making mechanics. If the green light continues to flash and the ice maker doesn’t harvest or fill, the smart system isn’t the cause.
- If ice output is stopped and the green light is flashing, concentrate on water supply, jams, and bin/sensor alignment.
- If the green light returns to steady but the blue remains active, the ice maker is functioning and the blue is likely harmless status behavior for connectivity.
When to Replace Parts or Call for Service
Signs the water valve or inlet valve may be failing
If the ice maker repeatedly fails to fill and the water supply checks out (valve open, line not kinked, filter replaced), the inlet water valve can be failing or restricting flow internally. This produces a flashing light because the mold never receives enough water.
- Look for a pattern: flashing returns after power reset, but the unit doesn’t complete a fill/harvest cycle.
- Confirm water pressure is adequate at the household source.
- Replace the filter and purge air first if it hasn’t been done recently.
- If the problem persists, call for service to test the inlet valve and related wiring. Replacement is typically required when the valve fails to open reliably.
How to tell a control issue from a mechanical jam
A mechanical jam usually clears the issue when you remove buildup and restore the ejector path. A control issue persists even after you clear ice, reseat the bin, and restore water flow.
- If clearing ice and reseating the bin stops the flashing, it was mechanical.
- If the flashing continues immediately after resets and no ice cycle completes, suspect sensors/control logic.
- If the ejector arm is free and moves properly but the unit still won’t complete harvest/fill, request service to inspect the ice maker control board, harness, or sensors.
When repeated resets no longer help
Resets are meant to correct temporary interruptions. If you’ve power-cycled, cleared ice, confirmed door closure, and verified water flow (including a new filter), and the green light still flashes persistently, DIY resets won’t solve it.
- Stop resetting repeatedly after you’ve completed water + jam + bin alignment checks.
- If the ice maker continues flashing and produces little to no ice, service is the next step.
- Report the pattern (how long it flashes after reset, whether it ever fills, and whether clumps appear) so the technician can diagnose faster.
Preventing the Light From Flashing Again
Keep the freezer at the right temperature
Ice makers need stable freezer temperatures to cycle and freeze correctly. If the freezer runs too warm, ice production slows or fails, and the unit can stop mid-cycle and flash.
- Set the freezer to the correct range—around 0 to 5 degrees F for reliable ice making.
- Avoid frequent door openings or overloading the freezer with warm items.
- After changing settings, allow time for stabilization before expecting consistent ice production.
Replace the water filter on schedule
A clogged water filter reduces flow and starves the ice maker. Reduced flow can cause repeated fill failures and flashing.
- Replace your GE refrigerator water filter on schedule (commonly about every 6 months).
- If you notice slower ice production, cloudy tastes, or reduced water flow, replace the filter immediately.
- After installing a new filter, dispense water for a few minutes and run several ice cycles to purge air from the line.
Clean the ice maker regularly and avoid overfilling the bin
Regular cleaning prevents ice buildup that leads to jams and prevents sensor interference from stray cubes. Overfilling can also cause cubes to obstruct the ejector mechanism.
- Periodically check the mold and ejector area for ice buildup and remove any clumps you find.
- Don’t let the bin stay stuffed beyond capacity—empty it regularly.
- Ensure the bin sits flush so sensors read correctly.
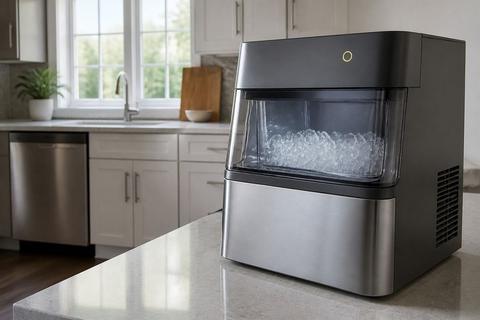
- If your model has a dedicated cleaning cycle (some countertop models do), follow the manufacturer’s cleaning routine to remove scale that slows or stops ice production.
Frequently Asked Questions
Why is the green light on my GE ice maker flashing?
A flashing green light on a GE ice maker indicates the unit isn’t completing its ice-making cycle. The cause is usually one of four things: an ice blockage/jam that prevents harvest, a water supply or flow problem that prevents filling, a bin/door/sensor issue that stops operation, or a control/communication fault. The exact meaning depends on the specific ice maker model and how the LED is used, so check for jammed ice, water flow problems (including the filter), and correct bin placement before assuming an electrical issue.
How do I reset a GE ice maker with a blinking green light?
Start by powering down the ice maker logic so it can clear a stuck cycle. Turn the ice maker OFF (or unplug the refrigerator) and wait 2–5 minutes, then restore power or switch it back ON. If your model includes a recessed test/reset button near the status LED, press it according to your manual after power is restored to force a harvest attempt. After resetting, leave the freezer closed for 30–60 minutes so the unit can restart the cycle properly.
Can a frozen water line cause the light to flash?
Yes. A frozen or restricted water line can prevent the ice maker from filling, and that failure during the fill step triggers an error light. Inspect the water line for kinks and check for frost near the connections and fill area. If you see signs of freezing, allow the line and connection area to warm appropriately until flow returns. Once the line unfreezes and water flow resumes, the ice maker can complete its cycle again and the flashing should stop.
Is a flashing green light the same as a blinking blue light?
Not usually. On many GE refrigerators, the flashing green relates to the ice maker’s operation, while blinking blue often relates to smart module/connectivity status. Treat them as separate systems: troubleshoot the ice maker green light using water, jam, bin, and reset steps, and handle the blue light according to smart feature/connectivity instructions for your exact model.
When should I call a technician?
Call for service if the green light keeps flashing after you complete a power cycle and the basic checks (no jam, ice bin seated correctly, freezer door sealing, shutoff valve open, and a good water filter). Also call if the ice maker never fills, if you hear repeated abnormal noises, if you notice water leaks, or if connector/sensor checks don’t resolve the cycle. Persistent flashing with unresolved fill/harvest failure points to a valve, control board, or sensor that needs professional testing.