GE Profile Ice Maker Blinking Light: Yellow or Blue Fixes
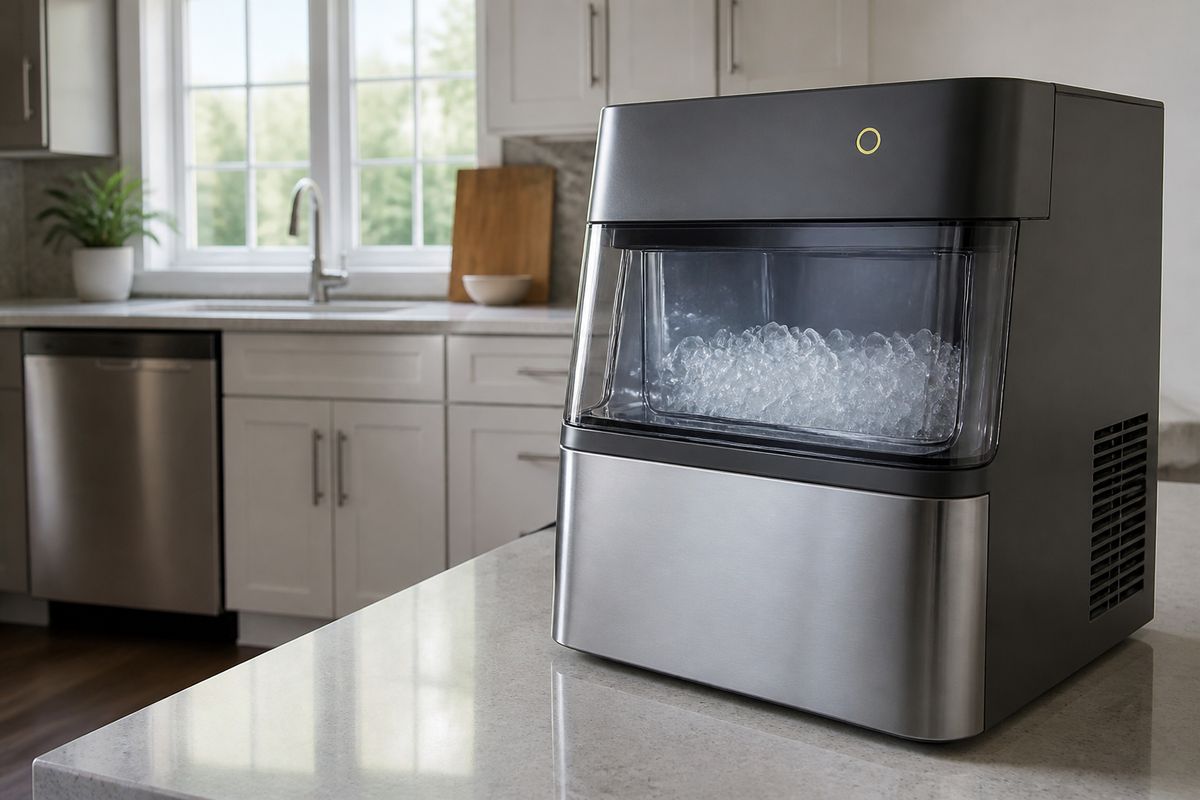
A ge profile ice maker blinking light can stop ice production fast, leaving you with a fridge that looks normal but won’t make ice. If you’re seeing yellow or blue blinking on the ice maker or control panel, the fix is usually tied to water flow, a stuck ice-making cycle, or a simple reset. This guide walks you through what the light means and the safest steps to restore ice making.
For more help, see our GE Ice Maker Resets, Lights, and Error Codes guide.
What the blinking light means
Identify the color and pattern first
Start by matching the color (yellow or blue) and the blink pattern. Yellow blinking on GE Profile ice makers usually signals a warning or status condition—most commonly a water supply problem, an ice-making pause, or a cycle interruption. Blue blinking can indicate the unit is starting up, attempting a harvest cycle, or recovering after power was interrupted.
Write down what you see (solid vs blinking, rapid vs slow). The same color can behave differently across models, so pattern matters more than guessing.
Separate normal status lights from fault signals
Next, determine whether the blinking is a normal operating state or a true fault condition. Normal behavior includes brief blinking during a start-up, clean, or harvest sequence, then returning to a steady status. A fault signal is persistent blinking that continues long after the freezer has cooled and after you’ve allowed time for a cycle to complete.
If you hear the ice maker cycling, the unit may be trying to resume. If you hear nothing and the light keeps blinking, focus on water flow and the ice maker’s control state.
Check whether the ice maker or fridge display is affected
Look closely at which display is blinking: only the ice maker indicator or the fridge lights/display as well. If only the ice maker light blinks, the issue is usually localized to the ice maker control, water valve, sensor, or fill/harvest process. If the fridge lights also blink, the refrigerator may have a wider power or control event affecting multiple circuits.
This distinction determines whether you should troubleshoot ice-maker components only or perform a full refrigerator reset workflow.
Fast reset steps to try first
Power cycle the refrigerator safely
A reset clears temporary control-board glitches and reinitializes sensors and valves. Use a safe power cycle rather than repeated on/off button presses.
- Unplug the refrigerator from the wall outlet (or turn off power at the breaker if unplugging is inconvenient).
- Wait 5 minutes to let capacitors fully discharge.
- Plug it back in and leave the unit to stabilize with the freezer closed.
- Confirm the ice maker light behavior after several minutes, then allow the refrigerator to complete its restart routine.
Reset the ice maker control or test button
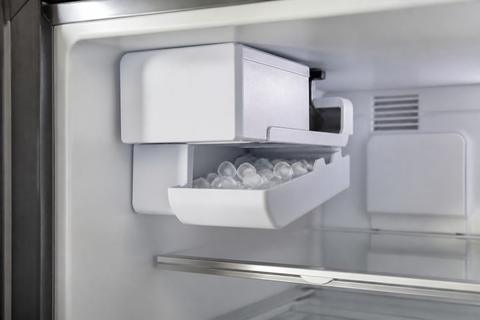
Many GE Profile ice makers can be forced into a manual harvest cycle to verify water fill and motor operation. On modular ice maker designs, there is often a recessed test button on the ice maker assembly (near the LED/status area on the front cover).
- Locate the ice maker’s control/test area inside the freezer compartment.
- Press the recessed test button (use a fingertip or a plastic tool—avoid metal).
- Watch for fill and cycling sounds during the harvest sequence.
- If your model has an ice shutoff feeler arm, lower it fully so ice production is not mechanically disabled.
Let the unit recover after a cleaning or fill cycle
After a reset or interrupted cycle, ice production must restart through fill, freeze, and harvest. If the unit was mid-cycle when power changed, it needs time to stabilize.
- Leave the freezer door closed for at least a few hours after resetting.
- If the ice maker recently ran through cleaning/maintenance, give the completion window before expecting ice.
- Ensure the ice bin is seated correctly so the bin/shelf sensor can detect it is in place.
- If the blinking persists beyond the expected recovery time, move to water supply and ice jam checks rather than repeating resets.
Why a yellow or blue light appears
Low water supply or blocked fill path
The most common cause of yellow blinking is the ice maker not receiving proper water flow to complete a fill cycle. A restricted inlet can come from a closed shutoff valve, a kinked water line, a clogged filter, or ice/sediment blocking the inlet.
- Verify the household water shutoff valve behind the fridge is fully open.
- Check the refrigerator’s water filter status—if it’s clogged or overdue, flow drops sharply.
- Inspect the water line for kinks and the inlet area for signs of freezing.
- Listen for the ice maker fill sound during a test/harvest cycle; no fill sound plus blinking points to supply or valve issues.
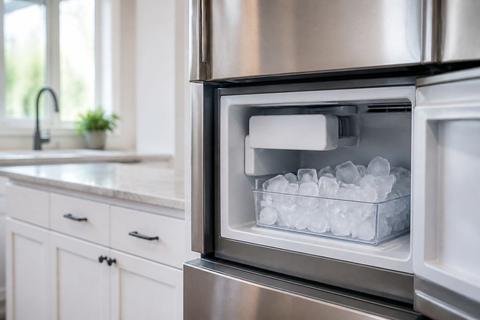
Ice bin, tray, or sensor issues
Even with good water supply, the ice maker may stop if it believes the ice bin is full or if a sensor isn’t reading correctly.
- Remove the ice bin and check for misalignment or a stuck ice mass blocking motion.
- Clean any ice debris that could interfere with the feeler/arm or sensor path.
- Reseat the bin fully—many sensors require correct positioning to allow harvesting.
- If the ice maker has a wire feeler arm, ensure it sits in the correct lowered position (not held up by ice or items in the freezer).
Control board or firmware glitches
A blinking light can also be the ice maker control responding to a transient software/hardware state—especially after power fluctuations, recent cleaning, or a prolonged outage.
- Perform the initial power cycle and wait through the restart routine.
- Reset the ice maker via the test button if available to force a controlled cycle.
- If the same color/pattern returns immediately after resets, the control board, water valve driver, or sensor input may be malfunctioning.
- Repeated cycles that never complete indicate a real component-level issue, not just a temporary interruption.
How to fix common ice maker problems
Inspect the water line, filter, and shutoff valve
Restore water flow first because most ice maker failures start with supply restrictions.
- Replace the water filter if it’s older than 6 months or if flow has slowed.
- Open the shutoff valve fully; confirm it’s not partially closed.
- Check the water line for kinks behind the fridge and ensure the line runs smoothly.
- After replacing the filter, run a few dispense cycles of water to purge air before expecting ice maker success.
Clear ice jams and align the bin properly
Ice jams stop harvesting and can trigger persistent blinking.
- Remove the ice bin and clear any broken or compacted ice around the ice maker outlet.
- If you find a jammed section in the chute area, break apart the ice carefully—avoid forcing parts.
- Clean surfaces so ice cannot bind in the same spot next cycle.
- Reinstall the bin firmly, making sure it’s seated and level so the bin sensor reads correctly.
Clean the ice maker and remove mineral buildup
Mineral scale slows the cycle and can cause the ice maker to stop mid-process. Cleaning resets the internal flow and heat transfer performance.
- Remove the ice bin and any removable ice-maker parts if your model allows.
- Use the correct cleaner recommended for your GE ice maker type (or follow the manufacturer’s cleaning method).
- Run the cleaning cycle, then complete the required rinse cycle to clear residues.
- If you’re using a vinegar-water solution instead of the recommended cleaner, run a thorough rinse cycle to prevent lingering taste or buildup.
Check freezer temperature and door sealing
Ice makers need cold enough conditions to freeze reliably, and warm air entry interrupts freezing.
- Set the freezer temperature to about 0 to 5 degrees F.
- Verify the door seals: close the freezer on a piece of paper and pull—resistance indicates a good seal.
- Make sure the freezer isn’t overpacked against vents and that airflow isn’t blocked.
- If the freezer has been running warm, fix that problem first; no reset will make ice if freezing is inadequate.
When the fridge lights are also blinking
Look for a wider power or control issue
If both the refrigerator display/lights and the ice maker light blink, treat it as more than a single ice maker alert. Power interruptions, control-board resets, or a temperature/power management event can trigger multiple indicators.
- Check whether other appliances on the same circuit are affected.
- Inspect the power cord connection behind the fridge—ensure it’s fully seated.
- Perform a full refrigerator power cycle (unplug 5 minutes, then plug back in).
- After restart, watch whether the fridge display returns to normal while the ice maker remains abnormal; that separation tells you where the fault is.
Differentiate display errors from ice maker alerts
Separate what you’re seeing so you don’t chase the wrong symptom. A blinking fridge display often points to general refrigerator status (temperature or system readiness) while a blinking ice maker indicator points to ice-making-specific sensors.
- Note whether the fridge display has an error code or a specific mode indicator.
- If only the ice maker continues blinking after the fridge display stabilizes, focus on water supply, bin sensor, and ice maker components.
- If both keep blinking in the same pattern, the control system is likely not fully initializing ice-making functions due to a broader issue.
- Record the exact blink colors and locations for accurate diagnosis.
Decide when a full refrigerator reset is needed
A full reset is appropriate when multiple indicators blink, or when the ice maker won’t respond after basic cycling. Don’t stack repeated resets back-to-back—one controlled reset gives the system a clean start.
- Unplug the refrigerator and wait 5 minutes.
- Plug it back in and keep doors closed to let temperatures recover.
- Recheck the ice maker light after the freezer stabilizes and after enough time for a fill/harvest attempt.
- If blinking resumes immediately and consistently, proceed to component-level checks or service rather than continuing resets.
When to call for service
Signs of a failed sensor, valve, or motor
Call for service when blinking persists even after water flow, bin alignment, and cleaning are handled. Persistent blinking combined with missing fill sounds or incomplete harvest points to components failing.
- The ice maker never fills water during a test/harvest attempt.
- The unit produces partial ice, then stops repeatedly.
- The ice maker motor never initiates a harvest cycle even when controls are activated.
- You find abnormal sensor behavior (bin sensor not registering despite proper seating) after cleaning and inspection.
What to note before contacting GE support
Being prepared speeds up troubleshooting and avoids repeat questions. Before contacting GE support or a technician, compile key facts.
- Record the ice maker light color (yellow/blue) and the blink pattern.
- Note whether the fridge display/lights also blink and whether any error codes appear.
- Tell how long the unit has been blinking and whether ice stopped suddenly or gradually.
- List what you already did: filter replacement, water shutoff checked, bin reseated, jam cleared, and any cleaning cycle run.
When repeated blinking means replacement may be needed
If the same blinking behavior returns after resets and the basic causes are ruled out, replacement of a failed assembly may be the next step.
- Persistent blinking continues after confirmed water flow and successful cleaning cycles.
- Test mode shows no water valve operation or no motor movement.
- Sensors appear internally faulty (no bin/feeler response despite correct mechanical alignment).
- The control cannot complete harvest cycles due to repeated component-level failure.
Frequently Asked Questions
What does a yellow light mean on a GE Profile ice maker?
A yellow light usually points to a status or warning condition, such as a water supply issue, a stuck cycle, or the need for a reset. The exact meaning depends on the model and blink pattern.
Why is my GE Profile ice maker blinking blue?
A blue blinking light often indicates the unit is in a normal mode, starting a cycle, or trying to recover after an interruption. If ice production has stopped, treat it as a sign to reset and inspect the water and temperature conditions.
Why are my GE Profile fridge lights blinking too?
If both the fridge lights and the ice maker light are blinking, the problem may be broader than the ice maker itself. Check for a power interruption, loose door switch, or control board issue.
Does flashing mean the ice maker is cleaning?
On some models, a flashing light can appear during a cleaning or maintenance cycle. If the light keeps flashing after the cycle should be finished, perform a reset and confirm the unit is filled and cooled properly.
How long should I wait after resetting the ice maker?
Give it several hours to complete a full freeze-and-harvest cycle. In many refrigerators, normal ice production may take up to 24 hours to fully resume after a reset or power interruption.