Force Defrost a Samsung Ice Maker: When and How to Do It
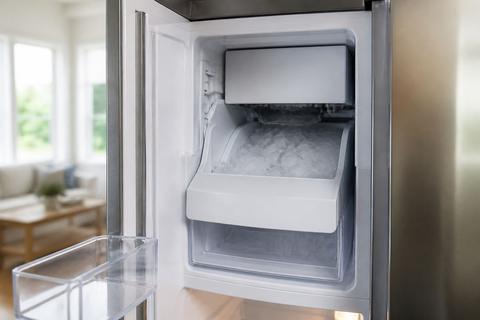
If your Samsung ice maker has stopped dropping ice and the ice room looks frosty or iced over, you’re likely dealing with a freeze-up. A samsung ice maker force defrost run can melt the buildup that prevents the harvest and water fill steps from completing. Use the steps below to start the correct service cycle safely, then move on to the model checks and troubleshooting that stop the problem from coming back.
For more help, see our Samsung Ice Maker Frozen: Defrost, Reset, and Stop Freeze-Ups guide.
When a Samsung Ice Maker Needs a Force Defrost
Common signs the ice maker is frozen
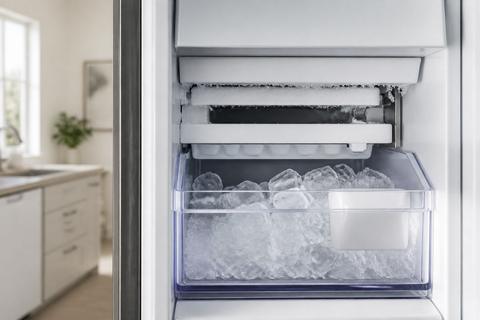
The ice maker doesn’t fail randomly—frost blocks specific moving parts. Watch for these clear signs: (1) the ice bin is nearly empty while the refrigerator runs normally, (2) the ice maker light flashes or changes state, (3) you see an ice bridge across the chute/exit or a thick frost layer inside the ice room, (4) ice clumps stick together and won’t break free, and (5) the ice maker seems to “try” (sounds of operation) but never produces. If you also notice the auger can’t move—often audible as a grinding or quiet failure—force defrost is the direct fix for the frosting that’s preventing harvest.
When defrosting helps and when it won't
Force defrost helps when the failure cause is physical frost/ice buildup around the ice maker, sensor area, or harvest path. If the problem is a clogged sensor, frozen auger, or water chute packed with ice, the service defrost melts the blockage and restores normal cycling. Defrosting won’t resolve issues like a failed ice maker heater, a stuck fan, a defective water valve, bad wiring to the control board, or a control board fault. If the ice maker works again briefly after defrost but stops soon after, treat it as a hardware or supply problem—not just frost.
Why Samsung ice makers freeze up
Samsung ice makers freeze up when cold surfaces trap moisture and water can’t drain or access points freeze before harvest completes. Common root causes include (1) the freezer not holding the target temperature, (2) high humidity or heavy door opening bringing excess moisture into the compartment, (3) restricted airflow in the freezer area, and (4) intermittent or slow water fill that freezes at the inlet. If the unit repeatedly forms ice bridges in the chute, it also points to a harvest/heater/sensor function not clearing the ice each cycle.
How to Start Force Defrost on Samsung Refrigerators
Find the right control panel or display
Start by locating the exact display/control layout because Samsung service-mode access depends on the panel. Look for a digital refrigerator/freezer display with button pairs such as Power Freeze, Fridge, Freezer, Lighting, or similar. If your unit has a panel where you can enter settings (often with a Lock button), use that same area—do not use the ice bucket or internal buttons as substitutes. Before entering service mode, keep the refrigerator door closed to prevent temperature swings that can interfere with the cycle.
Use the service mode button sequence
To begin forced defrost on many Samsung refrigerators with a service-mode display, use this built-in sequence:
- Press and hold the Freezer (or Power Freeze) and Fridge (or Lighting) buttons together for 8–12 seconds until the display changes (often goes blank) and beeps.
- After the panel updates, press a button repeatedly until the display reads “Fd”.
- Press a confirm/start button (often Fridge or Freezer, depending on model) to start the defrost cycle.
If your panel labels differ, the goal is the same: enter service mode, select Fd, then start the cycle.
What the defrost cycle should look like
During forced defrost, you’ll see the system switch out of normal ice-making/harvest timing and run a heater/defrost routine tied to the ice maker area. The display will typically show the service indicator (Fd) while the unit runs the cycle. You may hear fans adjust or relays click; the key is that the ice maker is no longer attempting to harvest ice while frost is melting. Keep doors closed so airflow stays stable and the cycle can clear the frozen path to the chute and harvest components.
Step-by-Step Force Defrost Instructions
Prepare the refrigerator before you begin
Preparation prevents mess and reduces the chance of heat damage or incomplete melting. Do this first:
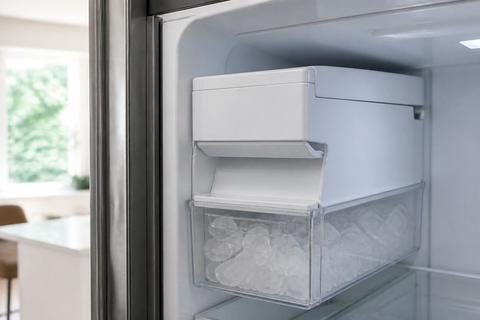
- Set the ice maker to Ice Off on the panel (if available) so it doesn’t attempt production during defrost.
- Remove the ice bucket and set it on a towel in the kitchen sink area.
- If you see a visible ice bridge, carefully remove only loose ice with the ice maker off.
- Have warm water and a cloth ready for the chute/exit area once the frost softens.
Avoid sharp tools in the ice chute. Excessive digging can damage plastic parts or the auger housing.
Run the ice maker defrost cycle safely
Use the force defrost service sequence on the refrigerator control panel:
- Press and hold Freezer (or Power Freeze) + Fridge (or Lighting) together for 8–12 seconds until the display changes and beeps.
- Press the appropriate button repeatedly until the display shows “Fd”.
- Start the cycle by pressing the confirm/start button for your model.
- Leave the refrigerator closed while the service cycle runs.
If your model includes a separate ice maker test button, do not use it to “melt ice”—use the Fd service defrost so the unit clears the sensor/heater path.
Wait the full cycle time before testing
Do not interrupt the cycle. Samsung’s defrost routine is designed to melt frost throughout the ice maker area, including sensor-adjacent surfaces. Allow the entire Fd cycle to complete and the display to exit service mode before you return to normal operation. After the cycle ends, reinsert the ice bucket and set ice back to On. Ice production needs time to refill: after any reset or defrost, give the unit about 24 hours to refill and start producing, then discard the first one or two batches if they taste off or look small.
Model-Specific Notes and Common Variations
Differences on 4-door French door models
4-door French door layouts can place the ice maker controls in a different panel context, and the ice maker may be managed as part of a dedicated ice room system. The service-mode access is still generally through the main display, but button labels and which buttons trigger the Fd selection can vary. If your 4-door model shows Power Freeze and a lighting/fridge button pair, use those exact labels to enter service mode, then select Fd. Also remove the ice bucket and look inside the ice room because these models can form thicker bridges at the chute due to airflow patterns across multiple compartments.
What changes on RF28 and SRF-series units
On many Samsung RF28 and SRF-series units, the panel behavior during service mode is similar, but the exact button pair for entering service mode and the confirm step after Fd can differ. The key approach is consistent: enter the service mode using the Freezer (or Power Freeze) + Fridge (or Lighting) button pair, select Fd, and start the cycle from the same display. If the display does not show Fd, stop and use the exact control labels your model uses rather than guessing. After defrost, these units still need time for water fill and ice harvesting—expect up to 24 hours before normal production.
How to confirm your model's exact controls
Samsung’s button sequences depend on the control panel style installed. Confirm what your model uses by matching the actual button names shown on the refrigerator door panel—look for the Power Freeze, Ice Maker, Lighting, Fridge, Freezer, or Lock labels and follow the exact service-mode pattern that matches those buttons. If your unit has a physical ice maker access area with a small test button on the underside or side of the ice bucket assembly, that’s separate from Fd defrost—use it only for ice-maker testing after service mode defrost. The most reliable confirmation comes from the panel label alignment before you start pressing combinations.
What to Do If the Ice Maker Still Won't Work
Check for error codes and related faults
Start with the refrigerator’s diagnostic readout. Many Samsung models display codes on the panel; look up the code shown on your exact refrigerator model. For example, “6E” often indicates a sensor or system fault that can affect ice maker performance—commonly the ice-maker sensor circuit or a related component. A flashing ice-maker light combined with a code like 5E or SE frequently points to an ice maker sensor fault or a frozen/stalled harvest that a full defrost clears. If the same code appears again immediately after Fd, the issue is not just frost and needs targeted repair.
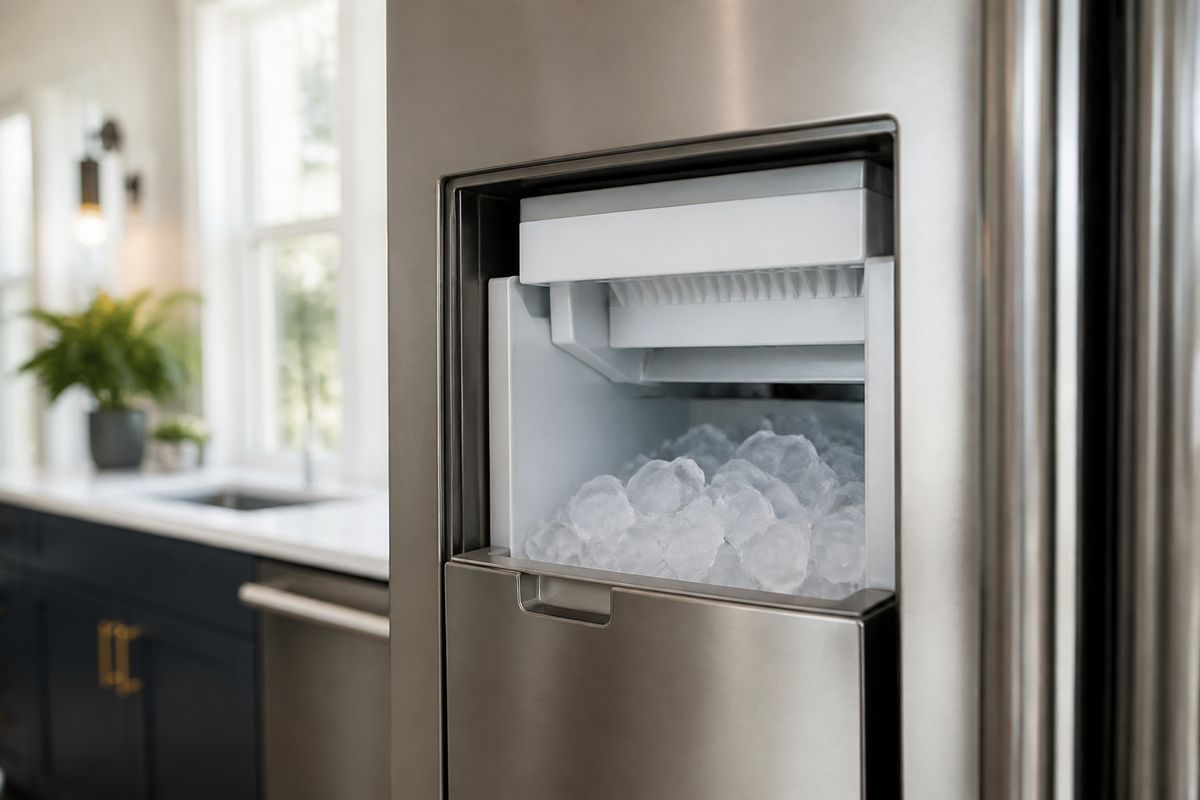
Inspect the ice room, fan, and water fill
After defrost completes, inspect the ice room path and check what actually prevents harvest. Focus on these areas:
- Ice bridge at the chute/exit: clear only melted/loosened ice; don’t pry.
- Fan operation: if an ice room fan is blocked by ice or not running, frost returns quickly.
- Water fill delivery: ensure the water line is connected and water reaches the ice maker area.
- Water valve behavior: if the ice maker never fills, a defective valve can be the root cause.
Also confirm the freezer is at 0°F (-18°C); incorrect temperature causes inconsistent harvest and recurring ice bridges.
When to reset, replace parts, or call service
If the ice maker still won’t produce after a complete Fd cycle and no remaining ice bridges are present, decide based on what you find. If a code points to a sensor (like 5E/SE or 6E), replace the failing part only if you can verify the specific component and connector condition. If you suspect a failed heater/thermistor, fan, wiring, or control board, call service because diagnosis requires model-specific wiring diagrams and component testing. A quick reset alone won’t fix a failed heater or frozen fan—if the issue returns within a short time, move directly to the failing hardware path rather than repeating defrost.
Preventing Future Freeze-Ups
Keep airflow and temperature settings in range
Prevent repeat frost by ensuring the freezer environment supports normal ice cycles. Keep the freezer set to 0°F (-18°C) so water freezes on schedule but harvest clears properly. Maintain airflow by not blocking vents with food and by keeping the back interior areas free of heavy frost buildup. If you notice recurring temperature swings, check that the refrigerator door seals well and that the unit isn’t overloaded, which restricts circulation and increases condensation.
Reduce moisture and door opening issues
Moisture is what turns into ice bridges. Reduce the amount of humid air entering the freezer by limiting long open-door times and avoiding frequent “browsing” that keeps the door open. Don’t store warm, uncovered items in nearby compartments that raise humidity. If the unit is in a high-humidity room, be extra strict about door seal integrity and minimize warm air infiltration that feeds frost growth around the ice chute and sensor area.
Know when a recurring problem points to hardware failure
If you keep needing samsung ice maker force defrost repeatedly, it’s not a seasonal nuisance—it’s a component not doing its job. Recurring freeze-ups in the same location point to a failed or weak ice maker heater, a sensor that can’t detect melt correctly, a fan that can’t keep airflow moving, a wiring/control board issue, or a water valve that’s filling improperly and freezing at the wrong stage. When defrost stops working long-term, switch from repeated service cycles to parts diagnosis so the ice maker completes harvest and clearing consistently.
Frequently Asked Questions
What does force defrost do on a Samsung ice maker?
Force defrost runs a service defrost routine designed to melt frost or ice buildup around the ice maker area—especially near the harvest path and sensor-related surfaces. When ice blocks movement, water access, or heat clearing, the ice maker can’t complete its normal cycle. The force defrost cycle clears that physical blockage so the ice maker can resume normal harvest and fill behavior afterward.
How long should a Samsung ice maker force defrost take?
The exact defrost duration varies by Samsung model and the specific service-mode routine your control panel starts. The practical rule is to let the entire Fd service cycle finish instead of stopping early. Once the display exits the service mode, proceed to restoration steps and remember that ice production won’t be immediate—after defrost, the unit needs time to refill and harvest.
Can I force defrost any Samsung refrigerator with an ice maker?
Most Samsung refrigerators with a display and service-mode access can run some form of force defrost, but the exact button sequence and the on-screen code (like Fd) can differ by model. The method depends on your control panel labels and how the unit exposes service mode. Match the real button names on your refrigerator, and if you don’t see the expected service indicator, don’t guess—service entry behavior can vary.
Why does my Samsung ice maker still not work after defrosting?
If the ice maker doesn’t resume production after force defrost, the cause is typically not just frost. Recurring failure points to a heater problem, sensor fault, fan that isn’t clearing the ice room, wiring issues, water valve malfunction, or a control board fault. Error codes like 5E/SE (ice maker sensor related) or 6E (often sensor/system fault) support this direction because they indicate a specific component-level issue rather than simple buildup.
What is Samsung refrigerator error code 6E?
On many Samsung models, 6E points to a sensor or system fault that can affect ice maker performance. Because Samsung error meanings can vary slightly by series, you should base interpretation on your exact refrigerator model and the symptoms you see. In practice, when 6E appears alongside ice-making failure, it often directs troubleshooting toward ice-maker sensing/controls and the components responsible for harvest and melt-clearing.
Is it safe to manually defrost a Samsung ice maker?
Manual defrosting can be safe if you use a controlled method and avoid damage, but it’s not the preferred approach. The safest option is the built-in force defrost/service cycle because it uses the unit’s intended heating and timing. If you must melt frost in the short term, use safe warming like warm water applied carefully to loosen ice, and avoid sharp tools that can crack plastic or harm the auger and chute.