Samsung Ice Maker Drawer Stuck? Free the Bin and Door
If you’re dealing with a samsung ice maker drawer stuck, you’re probably trying to pull the bin and it won’t budge—no matter how carefully you grip it. Ice can freeze the bucket to the rails, and a misaligned flap in the ice room can lock the door open or closed. The goal is to free it without cracking the bin, bending tracks, or damaging the ice maker assembly.
For more help, see our Samsung Ice Bin and Bucket: Remove, Free, and Unstick guide.
Start with the safest checks
Unplug the refrigerator before forcing anything
Unplugging prevents the auger, flap, and motor from trying to move while the bin is jammed. A stuck samsung ice maker drawer stuck situation can also involve a frozen sensor or jammed harvest path, and powered movement can worsen the bind or break plastic parts.
- Switch the refrigerator off (or use the panel’s Ice Off setting if your model has it).
- Unplug the refrigerator from the wall outlet.
- Wait 5 minutes so internal parts stop moving before you touch the ice bucket, door, or rails.
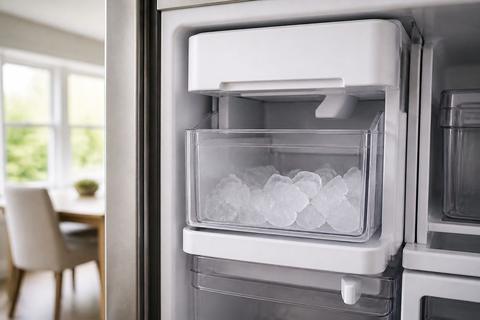
Check for ice buildup around the bin and rails
Ice bridges can freeze the bin to the slide rails, or ice can build up under the bucket so it “locks” in place. Look specifically where the bin seats and where spilled cubes would freeze into a sheet.
- Pull back any nearby shelves/obstructions so you can see the ice area clearly.
- Inspect the rails and the underside of the bucket opening for visible frozen seams.
- Look for ice spilled along the front lip—if you see a “frost wall,” plan to thaw rather than pull.
Confirm the door is fully open and level
The ice room door and dispenser flap depend on correct alignment; a slightly closed or uneven door can prevent the bucket from seating and retracting. Make sure you’re not fighting a partially latched condition.
- Open the refrigerator door fully and ensure it is not catching on something inside the hinge area.
- Place a level on the top surface of the bin compartment area (or visually check the door’s alignment).
- If the door isn’t closing/locking normally, stop and address that issue first—don’t force the ice bucket.
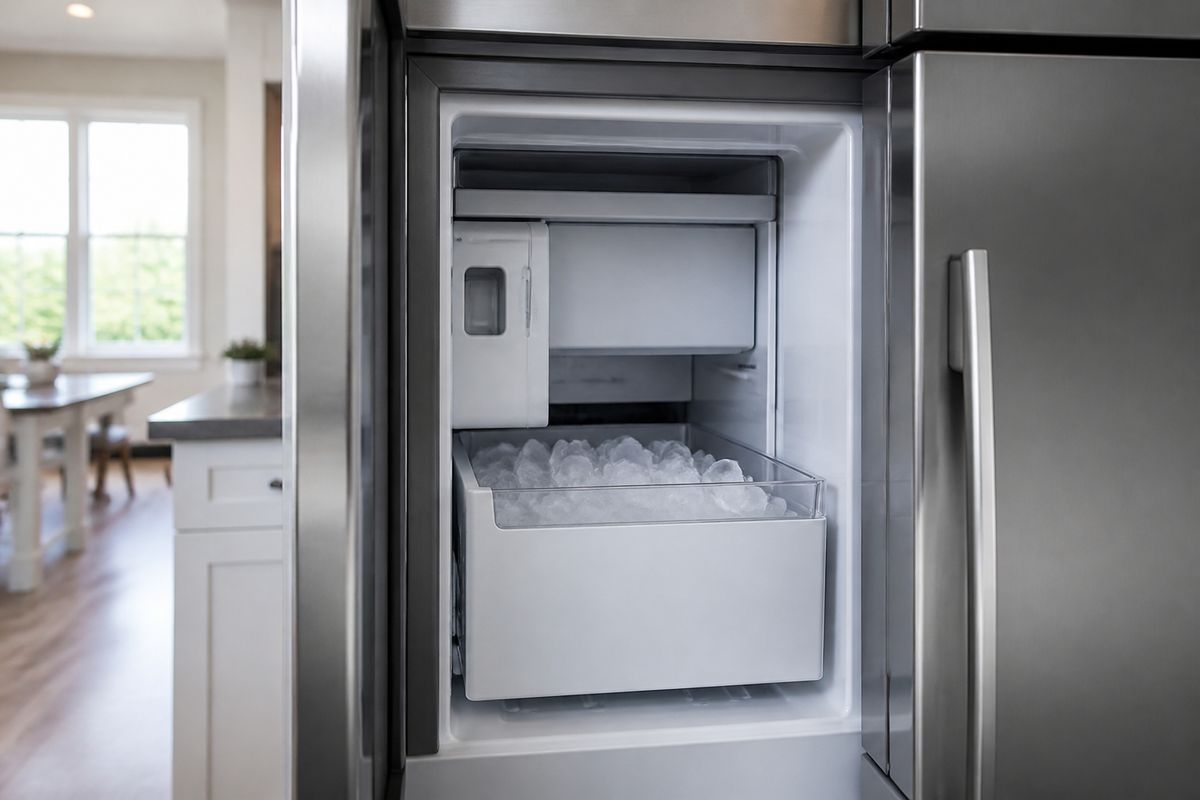
Why the drawer or bin won’t come out
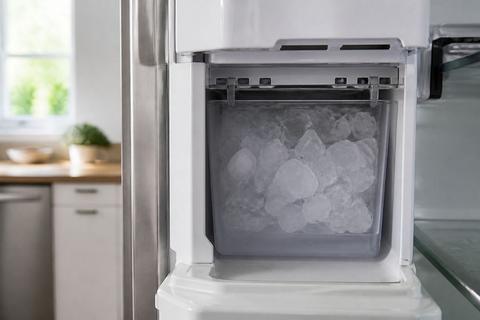
Look for frozen spillover under the ice bucket
Spilled ice can freeze underneath the bin so it acts like a wedge. When you try to remove the drawer, the rails may move—but the bin won’t release because it’s bonded to the ice layer.
- With power off, slide the bin as far as it will go without strain.
- Shine a flashlight under the bucket opening and check for compacted cubes.
- Check for an ice sheet along the bottom of the ice compartment; if it’s there, thaw the edges first.
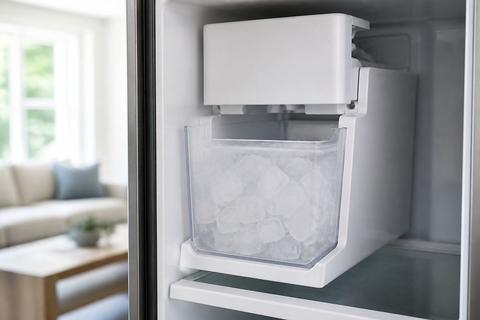
Inspect the ice maker door for a jammed flap
Some Samsung models use an ice room door/flap that must open/close during harvest. If that flap is stuck by frost or ice, the bucket won’t align and will feel “mechanically locked.”
- Look at the ice room opening for frost buildup on the door or flap area.
- Gently try moving the ice maker door by hand only if it moves freely—stop if it resists hard.
- If you see ice bridging the flap, you’ll need careful thawing before reseating the bucket.
Remove obstructions from the bucket track and guides
A small chunk of ice, a dropped label clip, or a bent guide can block the bucket’s travel path. Tracks should be clear so the bin can slide straight without binding.
- Remove the bucket if any portion lifts out; if not, access the track area as much as possible.
- Check the guides on both sides for ice crumbs or hard, frozen fragments.
- Use a plastic utensil (not metal) to remove loose ice—do not scrape aggressively.
How to free a stuck ice bucket or drawer
Use gentle rocking instead of pulling hard
Forcing is how bins crack and tracks bend. A controlled rocking motion can break ice bridges while keeping the bin aligned with the rails.
- With the refrigerator still unplugged, grasp the bin firmly but without twisting.
- Rock the bin slightly forward/back in small increments—never yank.
- Pause after a few rocks to see if the bin shifts a few millimeters; stop if it suddenly resists more.
Warm the frozen edges with a soft cloth and cool air
Thaw just the bond points so the bin can release without overheating plastic. Use gentle warmth only where the ice is holding the bin.
- Dampen a soft cloth with warm (not hot) water and wring it so it’s not dripping.
- Press the cloth on the frozen edges of the rails and bucket contact points for 1–2 minutes.
- Wipe away loosened ice and try the bin again with gentle rocking.
Release the bucket latch and reinstall it correctly
If your model has a latch, it can engage when the bucket tilts even slightly during a jam. Once thawed, re-seating correctly prevents repeat sticking.
- Once the bin loosens, lift it out carefully and check the latch area and the tracks.
- Clear any remaining ice from the latch slot and guides.
- Reinstall the bucket straight in, ensuring it clicks/locks in place and sits level in the compartment.
Fix an ice maker that is stuck on crushed ice
Reset the dispenser setting to cubed ice
A mode selector that’s frozen in “crushed” can keep the mechanism from cycling normally, which can also contribute to drawer sticking. Resetting clears the demand state for the ice maker.
- On the refrigerator dispenser panel, switch from Crushed to Cubed.
- If your model supports it, toggle Ice Type once more after the change.
- Wait for the ice maker to attempt a harvest cycle before trying the drawer again.
Clear packed ice from the auger and chute
Crushed ice packs faster and can clog the chute/auger, preventing proper harvesting and keeping parts from moving freely. Removing the blockage restores normal flow.
- Remove the ice bucket (after thawing as needed) to access the dispenser area.
- Use a plastic scoop to remove visible packed ice from the chute opening.
- If accessible, use a hair dryer on low to melt remaining frost on the auger/chute surfaces, then wipe out loosened ice.
Check for a frozen selector mechanism
The selector can be stuck by frost, especially after defrost cycles or power interruptions. A frozen selector will keep the ice maker from switching and can lead to incomplete harvests.
- With power off, inspect around the selector area for frost or ice residue.
- If you see heavy ice buildup, thaw the affected area with warm cloth contact points, then wipe.
- After cleanup, switch back to cubed and leave the unit powered to complete one harvest cycle.
What to do if the ice maker won’t open
Test the ice room door and sealing flap
If the ice maker door can’t open fully, the bin may not move because the internal pathway is blocked. Check for frost on the sealing flap that prevents travel.
- Unplug the refrigerator again to prevent movement while inspecting.
- Look for ice/frost on the ice room door and the sealing flap edges.
- Gently move the flap/door only if it moves freely; resistance usually means it’s frozen and needs thawing.
Thaw a frozen dispenser door safely
Thawing is the right move when frost has glued the dispenser door closed. Safe thawing prevents cracking and avoids damaging seals.
- Use a soft cloth dampened with warm water and hold it against the frozen dispenser door edges.
- Let it sit 1–2 minutes, then wipe melted ice away.
- Repeat until the door/flap moves smoothly by hand without forcing.
Inspect hinges, springs, and alignment issues
Mechanical misalignment can keep the door from opening, even after thawing. If the door doesn’t close/seat properly, the bucket often won’t align with the rails.
- With the refrigerator unplugged, visually inspect hinges and spring mounts for dislodging or bending.
- Check the door gap—look for uneven spacing that suggests alignment shift.
- If you see broken hinge parts or bent tracks, stop thawing efforts and plan for service, since further DIY bending can worsen damage.
When the tray or ice maker assembly is jammed
Remove and inspect the ice tray for cracks or warping
A cracked or warped tray can force ice to jam in the mold and prevent the ejection cycle from completing. Once the tray is damaged, thawing alone may not fix the root issue.
- Remove the ice tray/assembly components according to your refrigerator’s ice maker layout.
- Inspect the tray walls and mold corners for cracks, warping, or dents.
- If you find damage, replace the tray/assembly instead of repeatedly thawing and reassembling.
Defrost ice clumps inside the mold and ejector area
Ice clumps inside the mold stop the ejector from clearing cubes cleanly, which can lead to a stuck drawer and ongoing harvest failures. A proper defrost clears the internal jam path.
- Power the unit down and allow a full thaw. For a fast approach, run Forced Defrost on many models by pressing and holding the Freezer (or Power Freeze) and Fridge (or Lighting) buttons together for 8–12 seconds until the display changes/belps, then press repeatedly until the display shows “Fd” to start defrost.
- When thawing completes, remove any loosened ice clumps from the mold and ejector area.
- Wipe away water and let the unit dry before restarting ice production.
Know when a failed motor or sensor needs service
If the assembly remains jammed after thawing and cleaning, the problem can be a motor that won’t complete harvest or a sensor stuck reading incorrectly. Fault codes and symptoms help identify this.
- Watch for flashing ice-maker lights or any displayed code such as 5E or SE (ice maker sensor).
- If the unit still won’t cycle after a full thaw/defrost and cleanup, stop repeatedly forcing components.
- Schedule appliance service for motor/sensor replacement—these are precision parts and improper handling can cause more damage.
If Samsung should fix it for free
Check your model warranty and purchase date
Warranty coverage depends on your exact model, purchase date, and whether the issue fits a covered component timeframe. Start by confirming what warranty period applies to the refrigerator’s ice maker assembly.
- Find your model number and serial number label inside the refrigerator compartment.
- Locate your purchase date (receipt or order confirmation).
- Verify whether the ice maker is covered under the manufacturer warranty terms for your region and model.
Look for covered defects and recall information
Some ice maker problems are tied to known defect patterns or service bulletins for specific models. If your symptoms match, the fix may be covered even if standard warranty terms vary.
- Match your symptom (stuck drawer, frozen flap, crushed-ice lock) to the model-specific issue described in Samsung support materials.
- Search for recalls or service bulletins using your model number.
- Save any case notes or support responses—documentation speeds up approvals.
Document the problem before contacting support
Support often asks for the exact symptom, what you tried, and photos. Being organized reduces the back-and-forth and helps determine whether you qualify for repair coverage.
- Take clear photos of the stuck bin position, the ice buildup area, and any frost on the door/flap.
- Note what you tried (thawing steps, forced defrost, resetting ice type) and the results.
- Record any error codes (like 5E/SE) and the times they appeared.
Frequently Asked Questions
Why is my Samsung ice maker drawer stuck in place?
Most often, the bin is frozen to the rails, packed with spilled ice, or blocked by a misaligned ice room door. Frost bridges can bond the bucket underside to the compartment floor, making the drawer feel “locked” even when the rails are free. Another common cause is ice preventing the ice maker’s flap from opening fully, which stops proper alignment during harvest.
Can I force the ice bucket out?
No. Forcing it can crack the bucket, damage the tracks, or break the ice maker assembly. Instead, unplug the refrigerator, thaw the frozen edges, and use gentle rocking to break the ice bond. If the latch is engaged due to tilt or a jammed flap, forcing the bin can bend guides and create a repeat problem.
Why is my Samsung ice maker stuck on crushed ice?
A jammed selector, frozen dispenser parts, or packed ice in the chute can keep it from switching modes. Crushed ice is more prone to compacting, so the auger/chute can trap ice and prevent the mechanism from completing the change to cubed. Frost on the selector area can also freeze the internal linkage in the wrong position.
What if the ice maker won’t open at all?
Check for frost, a stuck flap, or alignment problems. If thawing doesn’t allow the door/flap to move normally, the mechanism may need repair. If you see heavy ice bridging around the dispenser door, thaw the edges safely first, then reassess movement without forcing the door.
Will Samsung fix my ice maker for free?
Sometimes, if the issue is covered by warranty, a service bulletin, or a known defect tied to your model. Verify coverage with Samsung using your model and serial number, and be ready to provide photos, any error codes, and a brief description of the jam. Warranty and coverage can vary by purchase date and region.