How to Change Your Samsung Refrigerator Water Filter

If your ice tastes off, your water looks cloudy, or the dispenser flow has slowed, the fix is usually straightforward: samsung refrigerator water filter replacement. A worn filter can’t remove sediment as effectively, and it can restrict the water line to your ice maker. The good news is you can swap the cartridge and restore clean, steady water in minutes with the right steps.
For more help, see our Samsung Ice Maker Water Problems: Leaks, Overfill, and No Water guide.
What the Water Filter Does and When to Replace It
Why a fresh filter matters for water and ice
A Samsung refrigerator water filter reduces sediment and improves taste and clarity for both the water dispenser and the ice maker. When the filter becomes clogged, water flow slows, which can also slow ice production. Over time, reduced filtration can make ice taste stale or cause cloudy water, especially after long periods between changes. Replacing the filter restores proper flow and helps your refrigerator deliver water and ice with the quality you expect.
Signs it’s time for a samsung refrigerator water filter replacement
Watch for these clear indicators that your filter needs changing:
- Water from the dispenser is slower than usual.
- Ice cubes are smaller, slow to form, or production drops noticeably.
- Water looks cloudy or has an off taste or odor.
- The filter indicator light turns on (if your model has one).
- You recently ran the dispenser after a long shutdown and the first water is unusually dirty.
If you notice multiple signs at once, replace the filter promptly to protect water and ice quality.
How often Samsung recommends changing the filter
Samsung refrigerator filters are typically designed for about 6 months of service under normal usage. If your household uses a lot of water or you notice early symptoms (like reduced flow), replace sooner. If your refrigerator has a filter status light, follow the prompt on the display—it’s based on usage time rather than water quality.
For best results, don’t stretch the replacement interval past the filter light reminder.
Find the Right Filter and Prepare the Fridge
Identify your Samsung model and filter type
Before buying a replacement, confirm your exact refrigerator model and filter type. Locate the model number on the refrigerator interior label (often inside the fridge compartment) or on the side wall near the door frame. Then check your user manual for the filter part number and installation style. Samsung models use different filter cartridge types—some mount inside the refrigerator compartment, while others are housed in the ice maker/ice bin area—so using the wrong type can cause poor fit or reduced flow.
Choose the correct replacement filter
Purchase only a Samsung-approved replacement filter matching your fridge’s specified part number. Use the exact part number from your manual or the label inside the refrigerator, not a “universal” substitute. The correct filter will fit securely into the housing and allow proper water flow to the dispenser and ice maker. If the cartridge doesn’t lock firmly or feels loose, stop and confirm you have the correct filter model before installing.
Turn off the water dispenser if needed and gather a towel
Prepare your space so the swap stays clean and controlled. Gather a towel (and a small bowl if your model drips), then clear a little space around the filter area. If your dispenser has a shutoff or you see a recommended “Ice Off” / “Dispenser Off” step in your model instructions, turn it off to minimize water spillage. Keep the refrigerator doors closed as much as possible during the change to maintain temperature.
Remove the Old Filter Safely
Locate the filter in the refrigerator or ice maker area
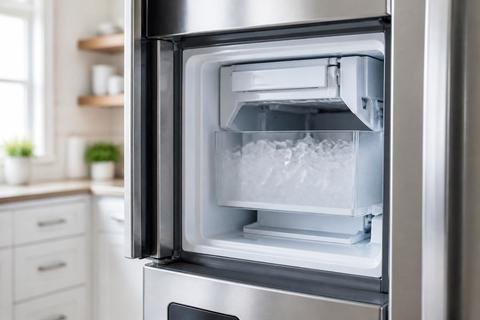
Find your filter housing by checking the area Samsung specifies in your model. Many Samsung French-door models place the filter inside the refrigerator compartment; other configurations locate it in the ice maker/ice bin zone. Open the relevant door and look for the filter cartridge area, often behind a small cover or within a recessed housing. If your model includes an indicator light, note its position so you can later reset it after installation.
Twist, push, or pull the cartridge depending on the design
Remove the cartridge using the exact motion your housing requires:
- If it’s a twist-lock type, turn the filter counterclockwise to unlock, then pull it out.
- If it’s a push-in type, press the cartridge inward slightly to release, then pull it free.
- If it’s a pull/slide type, grip the cartridge handle/edges and pull or slide it out smoothly.
Do not force it. If it won’t move, recheck the housing type and confirm you’re using the right unlocking direction.
Check the housing and surrounding parts for leaks or damage
With the old cartridge removed, inspect the filter seat and surrounding housing area. Look for cracks in the plastic, loose seals, or signs of moisture around the connector points. If you see water leaking from the housing, stop and address the leak before installing the new filter—small leaks can worsen once the water line is pressurized. Wipe the area with a towel so you can clearly see fresh moisture after installation.
Install the New Filter and Flush the System
Insert the new filter in the correct direction
Install the new cartridge with the orientation your housing requires. Align the filter’s tabs or arrows with the marks in the housing, then insert it straight and fully seated. The cartridge should move smoothly into place; resistance usually means it’s misaligned. Insert the filter until it reaches the stop point, ensuring the sealing surface contacts correctly. A misoriented or partially inserted filter can cause leaks and restrict water flow.
Lock the cartridge firmly into place
Lock the filter according to the cartridge style:
- For twist-lock models, rotate clockwise until it stops and feels secured.
- For push-in models, press the cartridge until it clicks or locks firmly.
- For slide-in models, push/slide it fully until the latch engages.
After locking, gently pull the filter housing cartridge once to confirm it doesn’t shift. If it does, unlock and reseat it.
Run water through the dispenser to clear air and sediment
After replacing the filter, flush the system to remove air and initial sediment. Use the water dispenser on the front of the refrigerator:
- Press and hold the water dispenser for about 10–20 seconds, then release.
- Wait a few seconds, then repeat until water runs clear and flow is steady.
- Discard the first batch of water used right after the change.
This flush prevents spitting and ensures the ice maker receives clean, consistent water.
Reset the Filter Light and Verify Ice Maker Performance
Reset the filter indicator after replacement
Many Samsung models require resetting the filter status light after you change the cartridge. On many units, you press and hold the Filter Reset button or a similar Filter indicator button for about 3 seconds until the display changes or you hear a confirmation beep. If your panel uses a combined control, check the exact button labels in your model manual. Perform the reset only after the new filter is installed and locked.
If your refrigerator has an “Ice Maker” control, keep the ice maker off during the install, then turn it back on afterward.
Confirm water flow, ice production, and cube quality
Once the system is flushed, monitor performance in a practical way:
- Dispense water for a short interval and check that flow is steady (not sputtering).
- Watch ice production over the next 24 hours, since many Samsung ice makers take time to refill and start making ice again.
- Check the first cubes for normal size and clarity.
Also verify the freezer temperature is appropriate—set it to 0°F (-18°C) for proper ice formation.
Know what to check if the ice maker still seems slow
If ice production remains slow after a fresh filter, focus on these common causes:
- Ice maker status: Ensure ice maker is turned on (look for an “Ice Off” option and remove it).
- Ice jam: Remove the ice bucket and check for ice bridging or blockage in the chute.
- Filter seating: Reseat the filter if you suspect leaks or restricted flow.
- Frost-related issues: If you see an ice maker sensor fault like 5E or SE or a flashing ice-maker light, run a defrost procedure and let frost clear before production resumes.
If the ice maker was recently emptied, expect 24 hours to restore normal output.
Troubleshooting Common Samsung Water and Ice Issues
Fix leaks, weak flow, or no water after replacement
If you get leaks or weak/no water:
- Turn off the refrigerator’s ice function (use the panel option like Ice Off) to prevent continued demand.
- Reseat the filter: remove it, reinsert it with correct orientation, and lock it firmly into the housing.
- Check the water dispenser flow after reseating and flushing again with several dispenser cycles.
- Inspect the filter seat and connector area for moisture; wipe dry and watch for fresh dripping.
If the water supply is connected but still no water comes through, confirm the shutoff valve is open and the water line isn’t kinked.
Check the ice maker box, housing, and filter seat
For ongoing ice issues, inspect the physical path water and ice take:
- Remove the ice bucket and look for ice buildup around the ice maker chute or inside the housing.
- Clear any visible ice bridge carefully using warm water (don’t damage the plastic).
- Ensure the bucket sits fully in place—improper seating can interfere with the ice sensor and harvest cycle.
- Re-check that the filter is fully locked and that the housing is clean and dry.
A loose filter can reduce water pressure to the ice maker, resulting in small or slow cubes.
When a fan motor or airflow problem may affect cooling and ice
Ice makers depend on correct freezer cooling. If the freezer runs warm or airflow is restricted, ice production drops even with a new filter. Check for airflow issues such as blocked vents or a malfunctioning fan:
- Listen for normal fan operation when the doors are closed.
- Ensure freezer vents aren’t blocked by food containers.
- If you see persistent cooling problems or error codes related to sensors/fans, address cooling first because the ice maker can’t harvest properly without proper temperature.
If the unit went through a defrost disruption or has a sensor-related warning, resolve that before expecting normal ice output.
Helpful Maintenance Tips for Samsung Refrigerator Owners
Keep the filter area clean and easy to access
Make future replacements easier by keeping the filter housing area clean and accessible. Wipe spills right away after filter changes, and keep the surrounding area dry so you can spot leaks early. Avoid storing bulky items directly in front of filter access panels—easy access prevents you from delaying the next replacement. When it’s time to swap again, a clean housing also helps the cartridge seat properly and reduces the chance of trapped debris.
Avoid using the wrong filter or delaying replacement
Using the wrong filter can reduce flow to the dispenser and ice maker, leading to weak water and small cubes. Delaying replacement beyond the recommended interval increases clogging and makes taste and clarity worse. If you notice symptoms like slow dispensing or cloudy water, replace the cartridge immediately rather than waiting for a later date—your ice maker depends on consistent water pressure.
Protect water quality in refrigerators with built-in ice makers
To protect water quality, always flush air after installing the new filter and discard the first water batch. Keep the ice bin clean and clear of old ice buildup that can affect dispensing and cube quality. If you travel, shut down the refrigerator for an extended period, or the water has been idle, flush the system with several dispenser cycles before using water for drinking or making ice. These steps help maintain clean taste and reliable ice production.
Frequently Asked Questions
How do I know which Samsung water filter I need?
Check the model number on your refrigerator label or manual, then match it to Samsung’s approved filter part number. The wrong filter may fit poorly or reduce water flow.
How do I reset the Samsung ice maker or filter light after replacing the filter?
On many Samsung models, you press and hold the Ice Maker or Filter Reset button for a few seconds, but the exact method varies by model. Always confirm the steps in your user manual.
Why is there no water after I replace the Samsung refrigerator water filter?
The new filter may need to be fully seated, the water line may contain air, or the filter may need flushing. If the issue continues, check for a closed supply valve, leaks, or an incorrectly installed filter.
Do I need to shut off the water supply before changing the filter?
Usually you do not need to shut off the supply for a routine filter change, but it can help reduce dripping on some models. Use your model’s instructions if they recommend otherwise.
Can a bad filter affect the ice maker?
Yes. A clogged, incorrect, or loosely installed filter can reduce water flow to the ice maker and cause small, slow, or no ice production.