How to Force a Defrost Cycle on a Whirlpool Ice Maker
If your Whirlpool refrigerator suddenly stops making ice or your ice dispenser turns into a solid block of frost, you may be staring at an iced-over ice maker. A whirlpool ice maker forced defrost can melt the built-up frost so the mold can harvest and refill normally again. This is the fastest way to address a freeze-up when ice is stuck, a fill tube is blocked, or airflow is trapped by ice.
For more help, see our How to Test and Reset a Whirlpool Ice Maker guide.
What Forced Defrost Means on Whirlpool Ice Makers
How the defrost cycle works
A forced defrost warms the evaporator/ice-maker area long enough to melt frost and ice that interfere with water filling and ice harvesting. Whirlpool ice makers use cold metal surfaces to freeze water in the ice mold; when that area accumulates ice faster than it can clear, water can’t flow and the unit can’t complete harvest. During a defrost, the refrigerator’s cooling process is paused for that compartment area and controlled heat (or a timed warm phase, depending on model design) helps melt the buildup. Once the cycle ends, normal freezing and harvest resume—assuming the cause (like blocked airflow or a frozen fill tube) is cleared.
When a forced defrost is actually useful
Use forced defrost when ice production is blocked by physical ice, not when the unit simply has a fault you need to reset. It’s useful when you see a frozen fill tube, ice fused in the bin, frost packed around the ice maker housing, or the dispenser won’t eject cubes because the ejector can’t move. If the ice maker has been off briefly and then restarted, or the refrigerator just recovered after a period of warm/unstable freezer conditions, forced defrost can clear the residual frost that prevents the next harvest. If you have no ice plus visible icing near the ice maker, defrost is a direct first step before replacing parts.
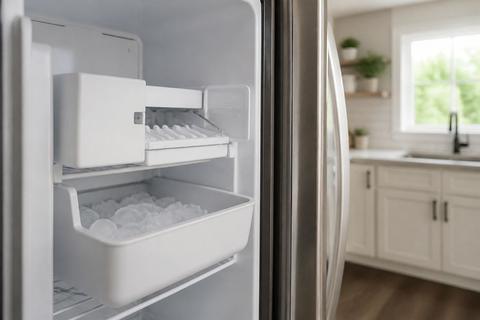
Signs your ice maker or dispenser is iced over
Look for frost and ice where you normally see clean plastic and metal components. Common signs include: the freezer and ice maker area showing heavy frost buildup; a frozen or partially frozen fill tube (the thin tube that feeds water into the ice mold); ice stuck in the ice bin or clumped into one mass; weak dispensing or cubes that crumble because the ejector can’t complete harvest; and a noticeable delay before the ice maker drops ice. If you lift the ice bin (when safe to do so) and the ice looks bonded together with a thick crust, forced defrost is the right response.
Before You Start: Safety, Tools, and Model Checks
Unplugging, water safety, and food protection
Before forcing a defrost, protect food and avoid electrical risk. Start by locating the refrigerator’s power cord and plan to unplug if your model instructions require it or if you’ll access the ice maker area directly. Open only as needed so the freezer stays cold while you work. Catch meltwater with towels and place a shallow pan under the ice maker if ice is likely to melt and drip. If your refrigerator has a water dispenser, note that meltwater can add moisture near the dispenser area—wipe dry any spilled water promptly to prevent slick floors and corrosion.
Finding your exact Whirlpool model and control type
Whirlpool has multiple ice maker designs and different control interfaces, so the correct defrost sequence depends on model type. Find the model number on the inside wall near the crisper drawer or inside the refrigerator compartment on the side wall. Also identify your control type: some models use a keypad with service-style sequences, while others provide a service mode through a dedicated button sequence. Write down the full model number and the ice maker type (inline icemaker in the freezer vs. modular ice maker behind the compartment cover), because button sequences and access points differ.
What you may need: towel, flashlight, and thermometer
Have simple tools ready so you can clear meltwater and inspect the key parts. Use a thick towel to catch water during thawing, and a flashlight to look for ice packed around the ice maker housing and the fill tube. A freezer thermometer helps you confirm the environment after the defrost—Whirlpool performance requires the freezer around 0–5°F so the ice maker can freeze and cycle correctly. Also keep a dry cloth nearby to wipe sensor areas, and avoid sharp tools that can scratch plastic or pierce wiring harnesses.
How to Force a Defrost Cycle
Use the control panel sequence for your model
Forced defrost is executed through the refrigerator’s control panel or service access sequence. Because the exact button order varies by Whirlpool series, use your model’s control interface as the guide and follow the on-panel prompts, if present. In practice, you’re looking for a “service” or “defrost” mode entry that temporarily suspends normal operations and runs the heater/defrost logic.
- Confirm the freezer has power and the refrigerator is in normal operating state.
- Press and hold the combination of buttons your control type uses to enter service/diagnostics (use your model number to match the correct sequence).
- Navigate to the option labeled for defrost/forced defrost (on some displays this appears as a defrost-related mode).
- Start the forced defrost and watch for the cycle indicator to progress.
- When the cycle ends, clear any loosened ice and keep the freezer closed for normal recovery.
Enter service mode if your unit supports it
Many Whirlpool units support a service mode that exposes test functions—sometimes including forced defrost. Service mode is more reliable than improvising because it uses the control board’s approved steps and timing. If your refrigerator has a display panel with diagnostic access, you can often reach service mode by holding specific buttons, then selecting an item that triggers defrost for the evaporator/ice-maker area.
- Locate the refrigerator’s control panel and identify whether it supports diagnostics/service mode.
- With the door closed, enter service mode using the model-specific button hold sequence.
- Use the panel buttons to select the forced defrost or defrost test option (the label may include “defrost,” “D” modes, or similar internal test names).
- Start the test and monitor the display until it indicates the cycle is complete.
- If the unit shows an error code or refuses to start the test, stop and move to troubleshooting steps rather than repeating endlessly.
What the lights, sounds, and display messages mean
During a forced defrost, the unit’s behavior changes in ways that can look alarming but are normal if the cycle begins correctly. You may hear fan changes or reduced compressor activity depending on your model’s design, and you may see display indicators update as the control board moves through stages. Lights might blink or shift from “ice maker” status to “defrost/test” status, and the display may show a defrost-related message or internal test indicator. The key is recognizing that the cycle has progressed: the unit typically transitions from “heating/defrost” behavior back to normal refrigeration once the timer completes.
If the control panel shows a fault message (for example, ice maker fault indicators) or the test does not advance, the defrost function may be blocked by a sensor, a control board lockout, or a physical obstruction that needs manual clearance.
If the Ice Maker Is Frozen Over
Safely clear built-up ice without damaging parts
When ice is physically blocking the ice maker, forced defrost alone isn’t enough—you often need to clear the loosened mass safely. Avoid prying hard with metal tools that can crack plastic housings or bend wires. Use towels and warm, gentle thaw methods around accessible plastic areas, and let meltwater drip off into the towel rather than flooding components. If the unit has visible ice around the ejector mechanism, focus on removing the ice that physically prevents motion rather than blasting heat into wiring or seals.
- Unplug the refrigerator if you need direct access to the ice maker components.
- Remove the ice bin carefully and set it on towels to catch meltwater.
- Loosen thick ice by removing chunks by hand where possible, then wipe residue with a damp cloth.
- For stubborn areas near plastic, use gentle room-temperature thawing; do not aim concentrated heat directly at sensors or wiring.
- Reassemble and ensure the ejector can move freely without binding.
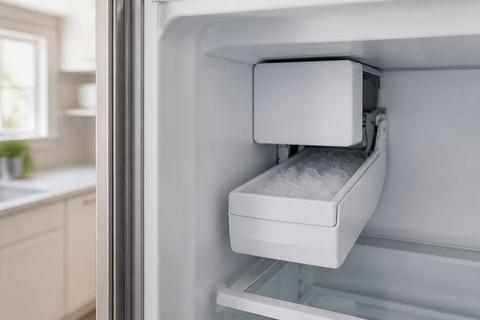
Check the fill tube, ejector arms, and bin for blockages
A frozen fill tube is one of the most common reasons for “no ice” after an attempt to cycle. The fill tube is the thin tube feeding water into the ice mold; if it’s blocked, forced defrost won’t restore water flow until the tube thaws and the inlet valve can deliver water. Next, check the ejector arms (the mechanism that releases cubes) for ice that fused them in place. Finally, inspect the ice bin: if ice is bonded into one mass, cubes can’t drop or dispense properly.
- Inspect the fill tube area for visible ice or a hard crust.
- If the fill tube is frozen, thaw it carefully with warm water or gentle heat until water can flow freely.
- Confirm the ejector arms move without grinding or sticking.
- Break up ice clumps in the bin and remove any ice fused to plastic surfaces.
- Reinstall the bin fully so it can trigger proper bin/harvest detection.
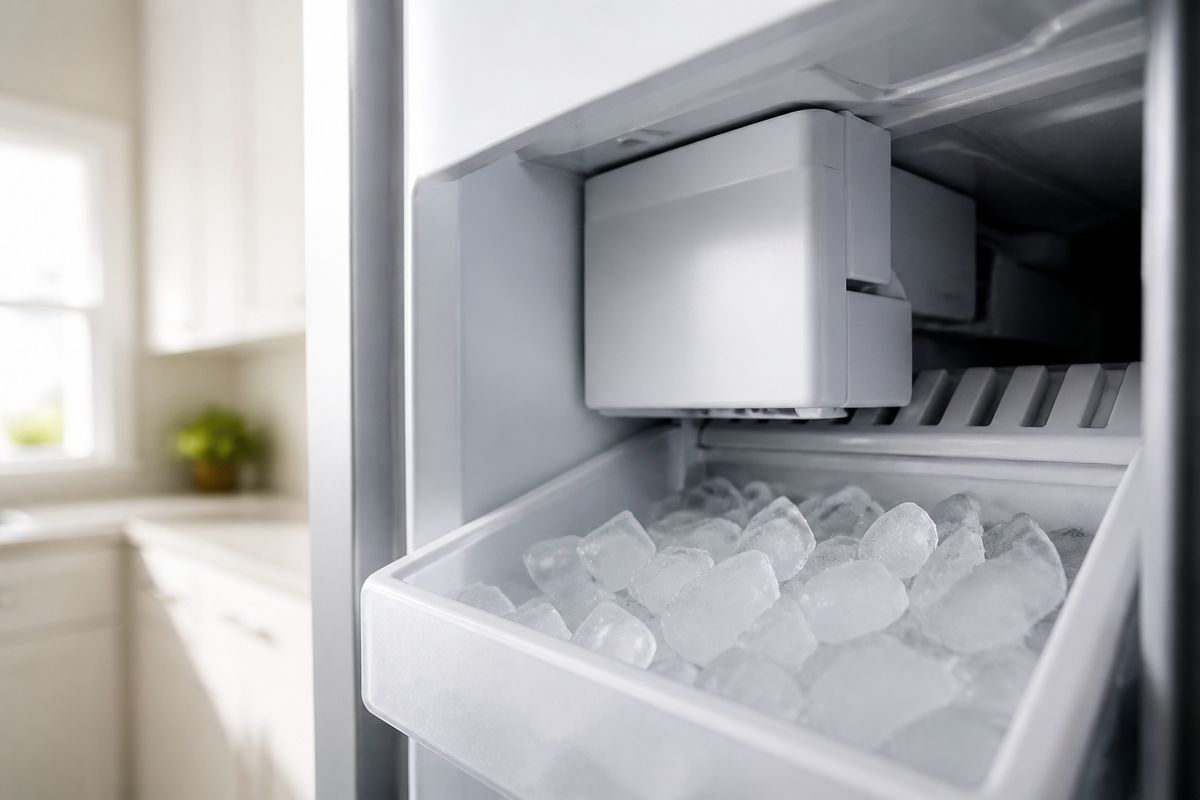
Restore airflow around the freezer and ice maker
Ice builds faster when airflow is restricted, and airflow issues can be more persistent than the frost you see. Clear obstructions so cold air can circulate around the ice maker area and the freezer evaporator zone can remove moisture. Check for blocked vents by food packages, ice that shifted into vent openings, or a freezer wall panel that became misaligned. When airflow is restored, the defrost result is more likely to hold for the next cycles.
- Move food away from vents and confirm no items are blocking the air paths.
- Look for displaced liners or ice that’s covering vent grilles.
- Remove any loose frost you can safely reach with a towel (do not chip hard into surfaces).
- Ensure freezer air channels and the ice maker housing area are not sealed by ice buildup.
- Close the freezer door fully and keep it closed during the initial recovery period.
How Long a Whirlpool Defrost Cycle Should Take
Typical cycle time and why it varies
A forced defrost is designed to be short and controlled, but the exact time depends on how much ice is present and how your model’s control logic sequences heat/defrost stages. In many cases, a forced defrost takes several minutes—enough to melt frost and allow thawed water to drain away. If there’s heavy buildup, the control may extend the cycle to reach its target temperature or completion criteria. If your freezer temperature is far off target or airflow is blocked, the defrost can run long because the ice load is harder to melt.
If you see no change in icing after the cycle ends, the freezer environment or a blocked tube/jam is likely the real cause—not the defrost duration.
What to do if defrost runs too long or ends too soon
If defrost runs unusually long, stop the process after the control indicates it’s still trying to meet a completion condition but ice never clears. Long defrost can point to a failed sensor, thermostat issue, or control problem that prevents accurate temperature detection. If defrost ends too soon and the ice remains, the cycle may be interrupted by a door switch, an airflow blockage, or a jam that prevents meltwater from clearing the affected area.
- If the cycle time is far outside what your model normally reports, cancel/stop and proceed to manual clearance.
- Inspect the key blockers: fill tube ice, jammed ejector arms, and packed ice in the bin.
- Confirm the freezer is within 0–5°F after the refrigerator stabilizes.
- If issues persist after manual clearing, plan for sensor/control testing or a service call (especially if forced defrost repeatedly fails to achieve thaw).
How often defrost issues point to a bad thermostat or control board
Repeated forced-defrost failures or recurring ice buildup right after the cycle often indicates the system isn’t regulating temperature correctly. A bad thermostat or sensor can make the control board think the evaporator is still too cold (causing extended defrost) or too warm (ending defrost before ice fully melts). Likewise, a failing control board can trigger incorrect timing or fail to transition from defrost back to normal refrigeration and harvest. If you clear ice once but it immediately refreezes into a solid mass, you’re likely fighting an underlying temperature control or sensor detection problem rather than a one-time blockage.
When the defrost behavior doesn’t match the actual icing condition, treat it as an electrical/control issue until proven otherwise.
Troubleshooting When Forced Defrost Does Not Work
Power-cycle the refrigerator and try again
If forced defrost won’t start or seems stuck, reset the refrigerator’s control logic by power-cycling. This clears temporary software lockups and can restore proper communication between the display/control board and ice maker subsystem. Power-cycling is simple and safe when you’re not actively thawing with concentrated heat.
- Unplug the refrigerator from power.
- Wait 5 minutes to let capacitors discharge and reset internal logic.
- Plug the refrigerator back in.
- Allow the unit to boot for at least 5 minutes with the freezer door closed.
- Retry forced defrost using the same model-specific sequence.
Test the door switch, sensors, and dispenser controls
If defrost won’t execute, the refrigerator may be preventing it due to an interlock condition. A door switch that doesn’t register properly can stop operations tied to the ice maker/freezer service functions. Sensors that detect temperature, ice maker state, or airflow can also block forced cycles if readings are out of range. Dispenser-related controls can influence ice maker behavior on some Whirlpool configurations; if the dispenser control logic reports a jam or fault, the ice maker may not run normally.
- Inspect the freezer door switch operation (the switch must actuate when the door is closed).
- Check for visible sensor damage or unplugged connectors around the ice maker compartment.
- If your unit displays an ice maker or dispenser fault code, address that fault before retrying defrost.
- Confirm the ice maker feeler/shutoff arm is in the ON position (for many Whirlpool models, lifting it turns the ice maker OFF and lowering it turns it ON).
- If forced defrost still won’t run with interlocks cleared, escalate to service/parts testing.
When a repair part or service call is the better option
If you’ve cleared obvious blockages, confirmed correct feeler position, and power-cycled without success, the next likely causes are sensor, thermostat, or control board faults. At that point, forcing more cycles risks repeated lockouts without resolving the underlying cause. A service call is the better option when the control board repeatedly won’t enter defrost mode, when the freezer temperature can’t stabilize to target, or when defrost behavior contradicts the visible ice load. If your ice maker is repeatedly stuck after multiple thaw cycles, a technician can test the thermostat/sensors and verify heater/defrost components using model-specific diagnostics.
Opt for service when you see error codes tied to ice maker operation or temperature regulation, or when you suspect wiring/connectors are failing.
Preventing Future Ice Maker Freeze-Ups
Keep the freezer at the right temperature
Frozen ice maker parts are the result of temperature, moisture, and airflow interacting—if the freezer runs too cold, you push the ice maker into persistent icing. Keep the freezer set to 0–5°F so the ice maker freezes efficiently without creating runaway frost that blocks water flow. If the freezer is colder than needed, frost can accumulate on the fill area and interfere with the harvest cycle. Stable temperature also makes defrost work properly when frost needs to clear.
- Set the freezer temperature to a target that keeps it in the 0–5°F range.
- Give the refrigerator time to recover after changing temperature settings.
- Keep the freezer door closed as much as possible to prevent warm-air moisture buildup.
- Avoid overloading the freezer so air can circulate around the ice maker area.
Maintain door seals and proper airflow
Air leaks through damaged door seals bring moisture into the freezer, and moisture is what turns into frost and ice near the ice maker components. Check the door gasket for tears, gaps, or areas that don’t seal flat. Also keep vents and air channels clear so cold, dry airflow can remove moisture and prevent excessive frost accumulation. Proper airflow helps defrost work as designed—meltwater drains correctly and the compartment dries instead of refreezing into a solid mass.
- Inspect door gaskets for warping, cracking, or gaps around corners.
- Clean gasket surfaces and confirm the door closes firmly.
- Keep vents unblocked and ensure no items press against the ice maker housing.
- Avoid moving liners or panels so vent paths remain open.
Use the ice maker regularly and clean it as recommended
If the ice maker sits idle for long periods, the unit can develop stale ice and frost buildup that makes the next harvest more likely to jam. Use the ice maker regularly so it cycles through fill/harvest, reducing the chance of ice fusing into a block. Follow Whirlpool’s cleaning guidance and remove buildup as recommended so water can flow freely and ejector mechanisms can move. After long shutoff, after installation, or after replacing the water filter, discard the first 2–3 full batches—this prevents small or off-tasting cubes that can contribute to inconsistent cycling.
Frequently Asked Questions
How do I know if my Whirlpool ice maker needs a forced defrost?
Common signs include no ice production, a frozen fill tube, ice stuck in the bin, weak dispensing, or frost buildup around the ice maker. If the freezer is too cold or airflow is blocked, ice can freeze into a solid mass. Inspect the fill area for a crust on the thin water tube, and check whether the ice bin contains a bonded block instead of separated cubes. If the ejector can’t release ice cleanly, forced defrost is the right first move to melt the physical obstruction.
How long does a Whirlpool ice maker defrost cycle usually take?
Most forced defrost cycles are short and may take several minutes, but the exact time depends on the model and how much ice buildup is present. The control logic runs the defrost phase until it reaches its internal completion criteria, which can vary with the amount of frost and freezer conditions. If it runs unusually long or ends too soon while ice still looks hard and thick, a sensor/control issue or a blockage (like a frozen fill tube) is likely preventing proper thawing.
Can I use a hair dryer to thaw a Whirlpool ice maker?
It is not the safest first choice because concentrated heat can damage plastic parts, wiring, or seals. If you need thawing, prefer gentle, controlled methods like room-temperature thawing or careful warm-water thawing aimed away from electrical components. If you use any heat source, keep it at a distance and stop if you notice overheating or softening plastic. The safer approach is to follow your model’s forced defrost procedure and then clear the softened ice once it’s loosened.
Why would a Whirlpool ice maker keep freezing up after defrosting?
Repeated freeze-ups often point to a bad door seal, blocked airflow, incorrect freezer temperature, a failing inlet valve, or a faulty thermostat or control board. Cleaning and airflow fixes help, but recurring icing may require repair. If the fill tube re-freezes quickly, water may not be flowing correctly or may be trapped in a way that promotes freezing. If ice clumps back into a block soon after thawing, the freezer may be too cold, moisture may be entering, or sensors may be misreading temperatures and ending defrost early.
Is forced defrost the same as resetting the ice maker?
No. A forced defrost warms the evaporator area to melt frost or ice buildup. A reset only restarts controls or clears a fault condition, and it may not solve a physical freeze-up. If your ice maker is iced over—especially with a frozen fill tube or ice fused in the bin—you need defrost to remove the obstruction. A reset can help if the problem is electronic lockout, but it won’t melt the ice mass blocking harvest and refill.